When you build a new addition or finish off an unfinished space in your home, it's quite likely that an electrician or other contractor will be heating the space by installing one or more electric baseboard heaters. In many cases, this is a more efficient and cost-effective method than trying to extend the forced-air central heating system ductwork into the new space. Electric baseboard heaters are also a good method for adding more heat in spaces that might be underserved by the forced-air system, such as a garage, a sunroom, or a basement workshop.
Electric baseboard heaters generally require installation of at least one entirely new dedicated circuit. This includes installation of a circuit breaker in the main service panel, installing cable runs through walls and floors, installing a wall box for the thermostat, and mounting and connecting the wires for the electric baseboard heaters. Because of all this, installing baseboard heaters is quite an advanced project, so it is generally done by a licensed electrician who will follow a typical sequence of work, from planning to the final hookup of the circuit.
Video of the Day
Video of the Day
How a Pro Plans Out an Electric Baseboard Heating Installation
Before beginning actual installation, the electrician or building contractor will consider the heating needs of the room and make decisions on the heaters and thermostats that are needed.
Determining Heating Needs
The electrician or contractor begins by estimating the heating needs of the space, which is computed in watts. The installer calculates the square footage of the room and then multiples this by 10 to get a basic wattage need for the room. A 200-square-foot room, for example, has a basic wattage need of 2,000 watts.
The installer may then make certain adjustments to the wattage need depending on the configuration of the room and other factors:
- 5 percent is added for each window in the room; 10 percent if the windows are old, noninsulated types.
- 10 percent is added for each exterior wall in the room.
- 10 percent is added if there is an exterior door in the room.
- 10 percent is added if the space below the room is not well-insulated (such as over a crawl space).
- 10 percent is added if the ceiling is not well-insulated.
These calculations provide the total heating wattage needed for the space to be heated. It's possible, for example, that a 200-square-foot room could require as much as 3,000 watts of electric heating, which is well above the 2,000-watt basic heating need. By adding together the heating needs for each room, the installer determines if a single heating circuit is sufficient or if multiple dedicated heating circuits are required.
Electrical codes often require that baseboard heaters are served by dedicated circuits that power no other fixtures or appliances in the home. A standard electric baseboard heater circuit is a 20-amp, 240-volt circuit that provides up to 4,800 watts of heating power. If the overall heating needs are greater than this, the installer usually plans to install two or more heating circuits to meet the need. It's not necessary, however, for each room to have its own heating circuit. For example, two small rooms with minimal heating needs could potentially be served by a single circuit providing 4,800 watts.
Choosing Heater Sizes
The installer now turns to selecting the baseboard heaters to meet the heating needs of the room. Electric baseboard heaters are available in 120-volt and 240-volt styles. Professionals prefer to install 240-volt circuits for baseboard heating because they offer twice as much wattage capacity as 120-volt circuits, making it easier to add more heaters without overloading the circuit.
A 240-volt baseboard heater typically produces about 250 watts of heat per foot of length. For example, if a room requires 3,000 watts of total heating, this can be accomplished with 12 total feet of 240-volt baseboard heaters (3,000 divided by 250). This 12 feet of baseboard heating can theoretically be accomplished with a single long heater or more likely with two or more smaller heaters totaling 12 feet in length.
Choosing a Thermostat
The next planning stage is to choose a thermostat. Thermostats for electric baseboard heaters are much different than the low-voltage thermostats typically used for forced-air furnaces. Thermostats for baseboard heaters are line-voltage thermostats, which means they carry the full voltage and amperage load that runs from the circuit breaker to the heaters. They are not "stepped down" by transformers the way that low-voltage forced-air thermostats are designed.
Line-voltage thermostats come in two basic styles: single-pole (two-wire) and double-pole (four-wire). Professionals usually choose four-wire thermostats, which control both sets of hot wires in the circuit. This is generally considered a safer design, reducing the likelihood of shocks if the thermostat ever needs to be serviced.
At one time, line-voltage thermostats for baseboard heaters were simple analog designs; they responded only when you manually moved the dial to a new temperature setting. You can now find many programmable line-voltage thermostats that offer the same flexibility found in the low-voltage smart thermostats for traditional forced-air furnaces.
Usually, professionals install baseboard heaters so they are controlled by a thermostat mounted in the wall. However, there are also heaters that have built-in thermostats. These are more commonly used when the heater is providing auxiliary heat to a room or in small spaces that are only heated occasionally.
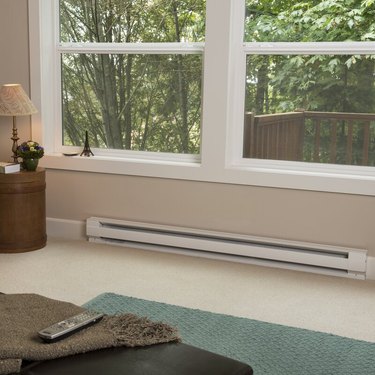
Choosing Positions for the Heaters
The installer will now choose a position for the heaters within the room. It is very common for electric baseboard heaters to be installed beneath windows since this takes advantage of natural air currents that will help distribute heat evenly throughout the room. Beyond this, there are standard practices followed when choosing the position for electric baseboard heaters and thermostats:
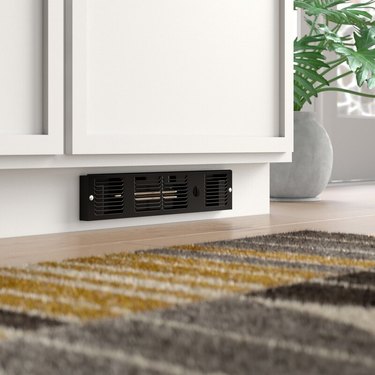
- Don't install baseboard heaters below wall receptacles (outlets), as appliance cords hanging down over the heater are hazardous.
- Don't mount baseboard heaters directly on the floor. There should be a space at least 1 inch wide between the floor and the heater to allow for airflow.
- Locate the wall thermostat on an interior wall and not above a heat source.
Planning Routes for Electrical Cables
The last planning step before the actual installation begins is to carefully determine the routes for electrical cables that will run from the main service panel to the wall thermostat and from the wall thermostat to the baseboard heater as well as for the cables linking the baseboard heaters. The installer may well choose a somewhat indirect route for the electrical cables, opting for an easier, faster route rather than the shortest. Running cables through walls is often the hardest part of the installation, so the installer will give careful thought to the route.
Installing Electric Baseboard Heaters
Cutting Openings and Installing Wall Boxes
With planning complete, the electrician or contractor will begin the actual installation by cutting holes in the walls where the electrical cables will emerge for the baseboard heaters and the wall thermostat. At the thermostat location, the installer will install an approved wall box. (Because baseboard heaters have built-in wire connection boxes, wall boxes aren't required for the heaters themselves.)
Running Cables
Now, the installer runs lengths of NM cable from the service panel to the wall thermostat location, from the thermostat to the cable opening for the first baseboard heater, and to link the baseboard heaters if multiple units are being installed. Electricians have many tricks for routing cables inside finished walls, and they have specialized tools that make the job much easier than it is for DIYers.
Installing the Thermostat
Usually, the next step is to install and connect the thermostat. When installing the thermostat, the installer will strip the circuit wires and connect them to the wire leads on the thermostat using wire connectors. Because the white wire serves as a hot wire in 240-volt applications, it should be marked with black tape to indicate that it serves as a hot wire.
In some four-wire thermostats, the wire leads are coded to indicate whether they should be attached to the wires coming from the service panel (called the line wires) or to the wires running onward to the heater (called the load wires). The wire leads for the line wires are usually coded "L," while the leads for the heater cable are coded "T," but this coding can vary depending on the manufacturer.
The circuit ground wires are also joined together, including pigtail wires that connect the ground system to the metal box and to the thermostat. With the wire connections complete, the thermostat is then secured to the wall box.
Mounting the Heaters
Next, the installer will thread the cables into the wire connection box on each baseboard heater. The heaters can then be secured to the wall using screws driven through the back of the heater and into wall studs.
Wiring the Heaters
Now, the cable wires are stripped and connected to the wire leads on the heater. If the configuration calls for more than one heater, specified wire leads on the heater are also joined to the cable running to the next heater. Wiring configurations can vary somewhat, so the electrician will carefully follow the manufacturer's wiring schematic. With the wiring connections complete, the installer reinstalls the cover panel on the heaters.
Installing and Connecting the Circuit Breaker
The last step in the installation is to connect the circuit to a 240-volt double-pole circuit breaker at the main service panel. Normally, baseboard heater installations are done with 20-amp, 240-volt breakers, which provide plenty of power for most dedicated heating circuits. Installing circuit breakers is a tricky and potentially dangerous activity, which is why electric baseboard heaters are usually installed by pros. Even when DIYers do the rest of the work, they often call in an electrician to do this main service hookup.
The installation is now complete, and the electrician turns on the circuit breaker to power the heating circuit. To test the installation, the thermostat is turned to a high temperature setting, and the installer checks to make sure all heaters are operating correctly.