

Recycle Old Tin Cans Into Adorable, Rustic Countertop Storage With An Easy DIY

We may receive a commission on purchases made from links.
Every time you pop the lid off of a can — whether it's a can of beans, soup, or vegetables — do you feel a slight twinge of guilt before tossing it into the recycling bin? While most "tin" cans are made from steel or aluminum and are highly recyclable, there are other ways to give them new life and solve your counter storage woes simultaneously. On Facebook, She So CraftDee demonstrates a cute and easy way to transform clean, empty cans into something practical — little countertop storage containers with wooden lids. Her DIY is simple enough that you can get your kids involved — or turn out a few on your own. It's another way to reuse old tin cans for sweet countertop storage.
To make the storage containers, you'll need at least one empty can, cleaned, dried, and stripped of its label, spray paint, a wood round that fits on top of the can, a craft acorn, and some glue. The version She So CraftDee makes is rustic and homey, but you can easily give yours a different style with a few tweaks, such as changing the color or swapping out the acorn.
DIY tin can storage cups
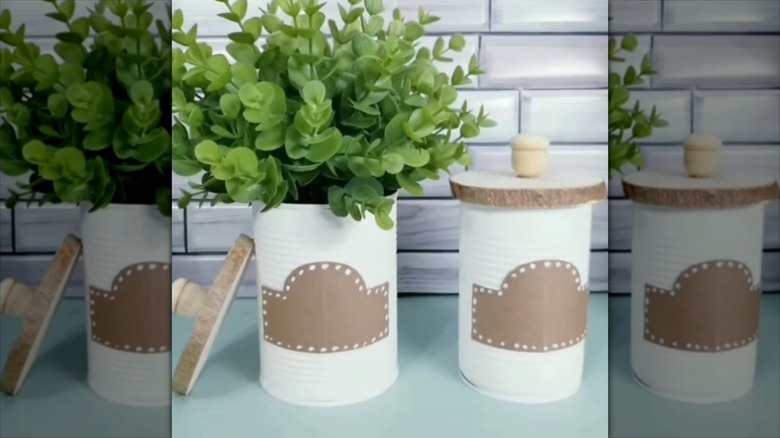
First, decide how many storage containers you'd like to make, then remove the labels, wash, and dry them. If you're having trouble getting the glue off of the metal, a simple way to remove the sticker residue is by using distilled white vinegar. Once your cans are clean and dry, spray paint them the color and finish of your choice. She uses white in the video, but you can choose any color that suits your taste and style. Let the paint dry as directed on the can.
While the cans are drying, make the lids. You'll need one wood round or slice, such as the Senmut Unfinished Wood Slices, for each can. You'll also need a wooden craft acorn for each lid. Use a piece of sandpaper to file away the stem of the acorn, then attach the acorn to the wood slice using wood glue, centering the acorn in the middle of the wood round. Let it dry as directed on the glue bottle. To put the finishing touch on the storage containers, attach a label to the front of the cans. You can cut a label out of kraft paper, as she does in the video, and attach it to the can with glue or purchase label stickers, such as Salemar Kraft Label Stickers Writable Gift Labels.
Personalizing the storage containers

The simple craft is an easy one to personalize — from changing the paint color to swapping out the acorn to choosing a different type of label. Instead of leaving the wood rounds natural, you can spray paint them, too, either a matching or contrasting color. Replace the craft acorn knobs with a large bead or a small figurine.
Another option is to skip the paint and decoupage the metal can or wrap it in contact paper or peel-and-stick wallpaper. Doing so will allow you to add a pattern or design to the finished storage containers. Cut the contact paper to fit, peel off the backing, then roll the can onto it.
As for what you put into the finished containers? That's up to you. Make enough so that each person in your family has one; write their names on the labels and use the cans as catch-alls for odds-and-ends that people seem to collect. Or, leave the lid off of a container and use it as a small vase or to hold a potted plant. If you have wood slices left over when you're finished, put them to good use with another super simple DIY — creating a rustic bowl.