

Turn Dollar Tree Bowls Into Stylish Countertop Storage For A Vanity
We may receive a commission on purchases made from links.
Everyone loves saving money, but that doesn't mean they want their home to look like it's decorated in early 1970s garage sale style. Fortunately, this project turns Dollar Tree bowls into GLAM! Nobody will guess that you turned inexpensive plastic bowls into stylish home decor and storage for a vanity.
This fun Dollar Tree project is detailed in a video from CreaTvDIY on YouTube. Sandy demonstrates how to upcycle budget-friendly Dollar Tree plastic bowls into high-end "glam-style" decorative pedestal storage bowls. The video outlines multiple creative designs that give cheap plastic the look of a luxury boutique.
If you don't have a Dollar Tree nearby, you can shop on their website. You'll find an assortment of inexpensive bowls, such as the clear plastic bowls, ideal for these projects, starting at $1.50 if you look under the Catering Supplies category. The projects are beginner-friendly, but it may take a couple of days to complete because the glues and other products need time to dry overnight. It's especially budget-friendly if you already have some decorative craft supplies on hand. If not, be sure to check Dollar Tree's craft section while you're there to save some money. If you need to purchase supplies such as adhesives, acrylic diamonds, paint, Mod Podge, and paint markers, it could cost around $45 depending on where you shop.
From cheap bowls to stylish countertop storage
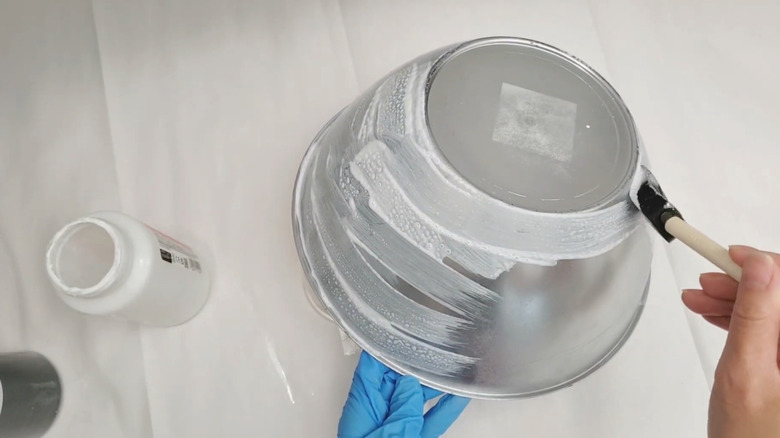
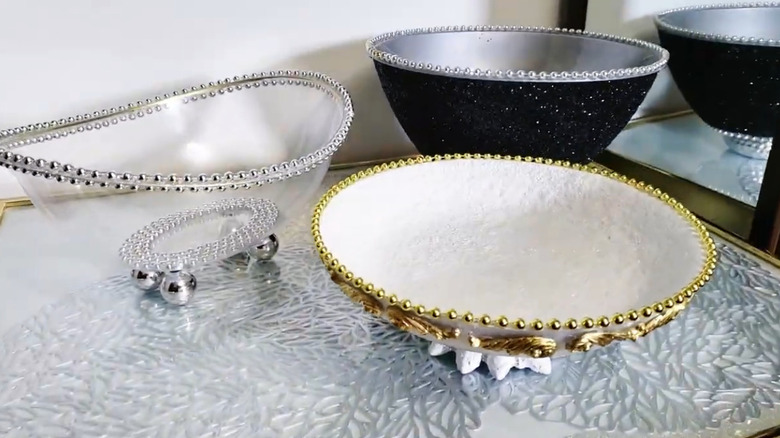
Throughout the video, Sandy showcases multiple variations of this DIY technique to upcycle plastic Dollar Tree containers. For the textured black and silver bowl, coat a plastic bowl with layers of Mod Podge and black glitter to create a dense, textured finish. Then, you'll create a pedestal base with a silver tealight holder, secured to the bottom of the bowl with Fix-All adhesive. Use hot glue to attach a string of silver beads around the bottom to cover the edge of the glitter, and around the top rim of the bowl. Then, glue a mirror to the inside base to cover the impression left from the label.
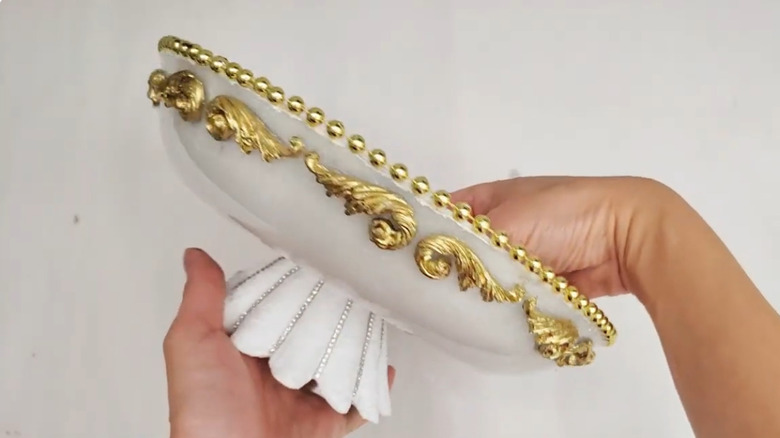
The second project uses a round, flat, plastic garden dish, with layers of Mod Podge coating the inside, followed by white glitter. The inside is finished with glossy Mod Podge to prevent any loose glitter from falling. Create embellishments using hot glue in a silicon mold, and color them with a gold chrome metallic marker. These will be glued around the outside of the bowl. Trim the top edge with gold beads, and fashion the base from a white ceramic tealight holder embellished with white glitter and rhinestones.
For the third bowl, frame the scalloped rim of an oval-shaped bowl with strands of silver beads on both sides. Use a metallic marker to paint the edge between the strands of beads. Sandy fashions four legs with acrylic diamonds and silver plastic ornament balls purchased from Dollar Tree, though you could source similar supplies from your old stash of Christmas ornaments. To hide the glue from the legs, glue silver beads to the inside bottom of the bowl to finish the look.
Tips and tricks to decorate your bowls
For the first bowl, Sandy puts craft paper down to catch excess glitter, which is poured back into the canisters. She also mentions experimenting with other colors, like red or purple, instead of black. This is a great way to customize your bowls to match your decor. She also used hair spray between layers of glitter and Mod Podge so it would dry faster, though you could also use an acrylic sealer or even nail polish if you have a few old bottles lying around.
Initially, Sandy had problems with the black foam of her foam brush sticking to the white glitter of the second bowl. She recommends using a regular paint brush instead, and fixed the problem by painting everything with white paint and adding another layer of white glitter to finally achieve the snow-white look she wanted.
Small, crystal tealight holders could be used for the legs of the third bowl instead of acrylic diamonds. Or if you want a more rustic feel, create a ceramic look by mixing baking soda into matte acrylic paint for a stone-like texture instead of glitter. Then for the base, use a wooden candle holder or a small terracotta pot turned upside down. If these bowls are for your bathroom vanity, keep in mind that humid environments can weaken the bond of hot glue. To keep legs and beading from popping off, scuff the plastic with a light-grit sandpaper and then use E6000 or Fix-All to keep your Dollar Tree bowl projects lasting for years.