

Don't Toss Old Jam Jars: DIYer Upcycles Them Into A Beautiful Votive

We may receive a commission on purchases made from links.
Every avid DIYer knows that old mason jars aren't trash, and there are many ways to upcycle them at home. Even if you think you've tried every DIY out there, there are always niche videos with unique jam jar hacks to be found. In one underrated DIY, Magicofflorals on Instagram shared how they transformed old jam containers into decorative floral votives for tealights.
The DIYer used a combination of floral accents and decoupage to turn the jar into an eye-catching decor piece that adds a touch of nature to a space. It's very budget-friendly, as it requires very few materials. All you need are decoupage, a paintbrush, a pair of tweezers, and the embellishments you wish to decoupage around the outside of the jar. While the original DIYer encircled their design with various floral prints and pressed flowers, this project is totally customizable. You can use any plant prints or themed imagery that match your interior.
The beauty of this idea is that it stands on its own in the middle of a countertop or table, or it can be arranged alongside other decor. It fits well on decorative trays alongside potted plants, books, taller candles, and other miscellaneous cutesy decor. You can even use it to fix your book storage problems, tucking it into a bookshelf to break up the monotony of carefully organized novel collections.
How to DIY gorgeous votives from empty jam jars
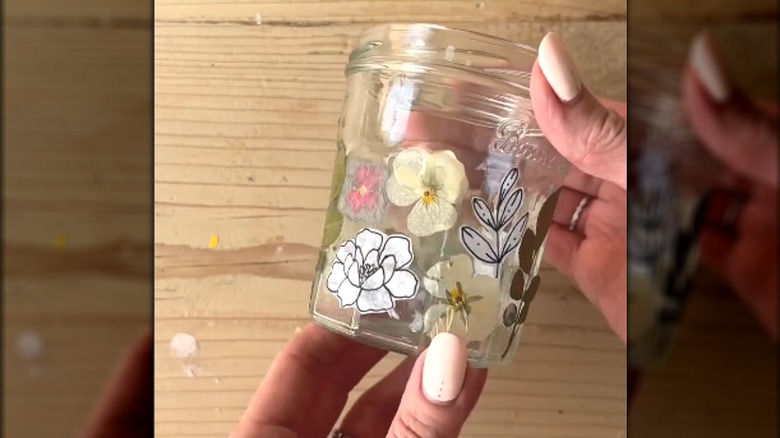
Design a fashionable votive by first thoroughly cleaning out the jam jars. Soak them in hot water and the labels should slide right off. If they're extra stubborn, make a mix of baking soda and cooking oil, and use the resulting formula to rub off the stickers.
Once the jars are clean and dry, brush a thin layer of decoupage or PVA glue, like Plaid Mod Podge, around the exterior. Be careful not to overdo the layer of Mod Podge, as this will make it harder to lay the embellishments down flat without wrinkling or folding them. Use a pair of tweezers to gently press dried flowers and floral prints on top of the sticky layer. Don't worry about streaks of white glue, as it will dry clear in about 30 minutes. Keep the embellishments extra secure by brushing another layer of Mod Podge on top.
Once you're satisfied with the look, drop a small tealight candle inside of the jar. The original DIYer used a real candle, but it's important to keep in mind that glass food storage jars were not designed for this use. Leaving a candle burning for an extended period is even more dangerous when using upcycled jars, as they may not be built for heat resistance. This gives them the potential to crack or break from the high temperatures. Fortunately, it's easy to avoid this risk by opting for electronic, battery-powered tealight candles, like the Homemory Flickering Flameless Candles.