

DIYer Upcycles Old Tin Cans Into A Hanging Planter That's 'Cute And Creative!'
We may receive a commission on purchases made from links.
Even though the majority of food cans are recycled, a large number still end up in landfills after use. Instead of tossing them, ensure your empty tin cans are used to the fullest extent by repurposing them yourself. There are many genius ideas to upcycle old soup cans and other metal canisters around a house. In example, the YouTube account CreateWithHometalk posted a cute method that turns a trio of tin cans into a hanging decorative planter.
Like the hack that turns empty cans into garden decor, this idea is a creative way to add a touch of whimsy to outdoor spaces. Hang the finished product from a porch overhang, gazebo rafters, or other tall structure to take advantage of vertical space and present plants in a unique way. It's a great space-saving solution. This is a great way to break up your landscape if you already have a large collection of planter pots on the ground, as it adds dimension to an outdoor landscape. This can also make plants easier to water by hanging them at eye level, so there's no need to lean over or crouch down.
Transforming tin cans into a unique hanging storage solution requires a few DIY tools. You'll need a drill, spray paint, decoupage, paper napkins, and a decorative chain in addition to several cans of the same size. Be sure to choose a chain that's designed for outdoor use if you're hanging the finished design outside, such as the Rkoyes' Industrial Black Fixture Chain.
How to make a hanging planter from repurposed food cans
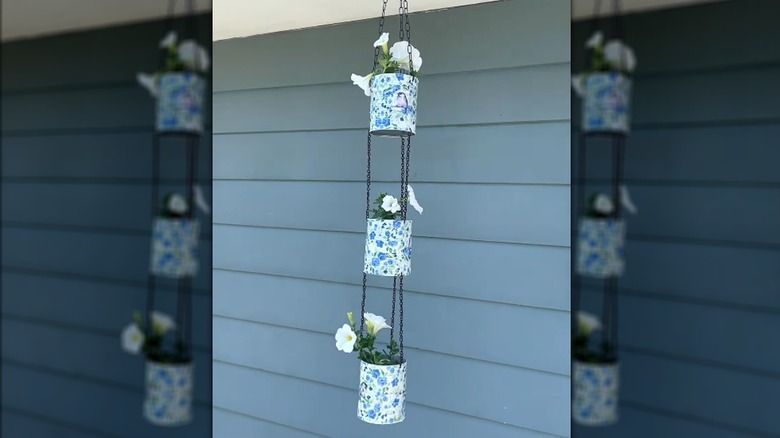
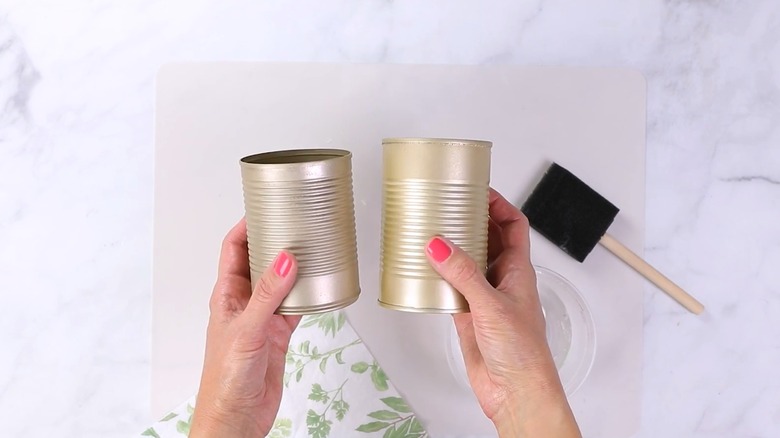
The best way to start any project that upcycles old food cans is to thoroughly clean out three empty cans with dish soap and remove the exterior labels. Once they're dry, use a paint and primer combo, like Rust-Oleum's Painter's Touch 2X Spray Paint, as a base coat. This creates a solid surface to work with and protects the can from rusting. Decoupage the paper napkins around the exterior using an outdoor formula, such as Mod Podge Outdoor Exterior. Instead of gluing entire pieces of napkin over the can, cut the paper into smaller pieces to ensure the design has more variation. This will also make it easier to evenly apply the paper around the tin cans' exterior. Don't worry about decoupaging the inside of the can, as this is where the plants will go, and it won't be visible when hung from a higher spot.
Once the cans are fully decoupaged, it's time to drill the holes for holding the chains. Use a 3/16-inch drill bit to put three evenly spaced holes around the bottom of one can, the top and bottom of a second one, and just the top of the third can. Thread the chain through the holes, using a pair of pliers to remove pieces and close ends as needed. Make sure all three sides of the chain are even, and connect the three lines to a hanging hook at the top.
When hanging this DIY planter outdoors, also drill holes in the bottom of the cans. These holes ensure that excess water can drain from the bottom. Also be mindful of where you hang the chained planter trio. Ideally, it should be shielded from wind and not block any doors or walkways.