

If You Have Beads And String, You Have The Start Of An Adorable Windchime

We may receive a commission on purchases made from links.
Windchimes are a classic decoration that can bring a pop of color and relaxing sounds to your porch or garden. If you want to make your outdoor space a little more whimsical, start digging through your craft supplies. A few beads and some string make it easy to create a vibrant set of windchimes of any size. Whether you have glass or plastic beads, the bright colors and unique shapes are easily transformed into strands that create simple chimes. However, glass beads reflect light in a gorgeous way that's perfect for garden decor.
Each string of beads will need to be tied to a base in order to dangle side by side. Surprisingly, more thread and beads can form a dome-like top for your windchimes. Bellbling posted a fantastic TikTok tutorial, showing how large, round beads can be tied together to create the base of a set of chimes. Otherwise, various everyday objects may be repurposed to hold the windchime strands. You could even reuse a plastic water bottle to DIY an adorable porch windchime.
Though glass beads may make a quiet noise when they clink together, you'll need to add elements to your chimes for them to truly ring. Placing charms and small bells onto your strands of beads will give them a soft sound when the wind blows. Amazon carries a large pack of 1 Inch Silver Craft Bells for about $9. To get a different sound and look, Hobby Lobby sells sets of two Gold Flat Top and Scalloped Bells for under $4.
How to make a colorful windchime with beads and string
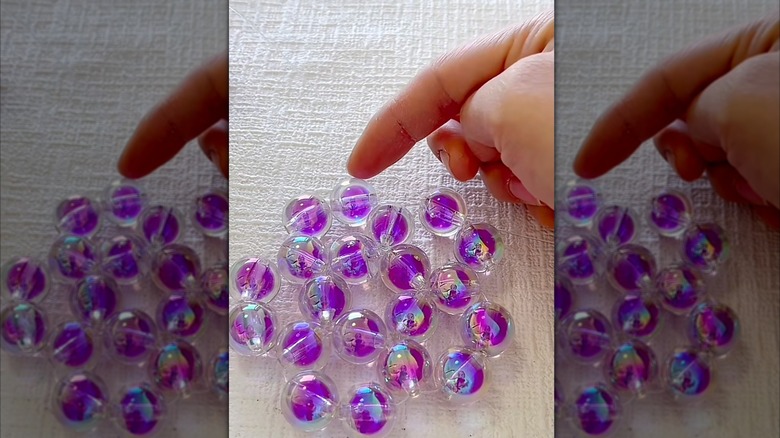
A strong, clear string like fishing line is best for this project, but any string that is thin enough to thread beads will work. If you want to use string and beads to create the top of your outdoor decor, add five beads onto your string and thread it back through the last one, creating a flower-like shape. String another four beads and repeat the technique to form conjoined shapes. Work around your project, adding three sets of three beads, followed by two sets of two beads to make a symmetrical pattern.
When you lift the string, your conjoined beads should make an upside-down bowl shape. Tie a knot tightly against the last bead, and cut the excess. Attach metal jump rings to secure a charm onto the top and inside of the dome to form the hanger. Now, you'll be able to tie your chimes onto the beaded base.
@url_bellbling.shop 🙌🏻Wind chimes DIY Tutorial ➡️@Shop from here_assitant ⬅️LIVE here🔔🔔🔔❤️☺️#bellbling #diycrafts #dıy #fyp #diy #beads #beadsmagic #windchimes #tutorial
If you this method is a too complex, many items can be repurposed as your windchime base — a stick, a clothing hanger, or a metal ring (like a wreath form) will work great to support DIY beaded windchimes. Alternatively, this can be a genius way to turn empty soup cans into eco-friendly garden decor, hanging your beads from the metal container.
Crafting the individual chimes and assembling your decor
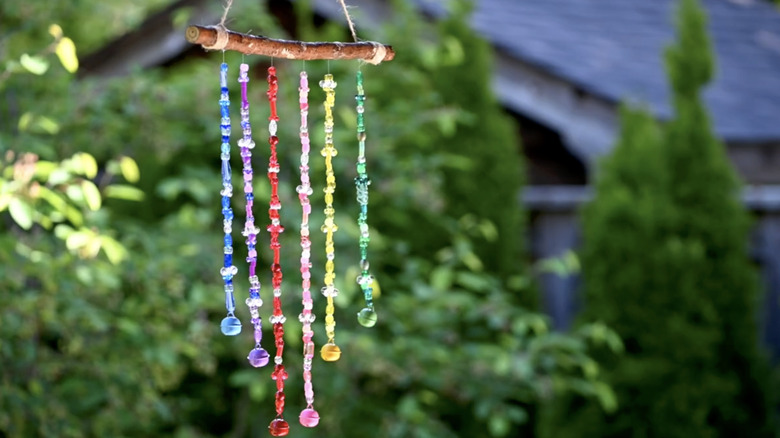
To make the individual chimes for your DIY outdoor decor, cut a long piece of string for each chime. Tie a knot to the end of each, and begin adding your beads. If you plan to use bells to create more sound, attach one to the bottom of each strand. Continue adding beads until you're happy with the length of the string. Make several strands, as each one will add one chime. Alternatively, attach charms to the ends of metal chains and use those for decorative chimes.
Play around with the design of your project. While each chime could be the same length, you can also make varying sizes to achieve different styles. Use beads of all one color on each strand for a rainbow effect, or mix and match colors on one string. Add unique charms for a cute, fun look, or natural accents like seashells. Crafting homemade windchimes is also a great way to reuse caps from glass bottles to DIY charming outdoor decor, or other odds and ends. Use buttons, chains, and pieces of curled wire to accentuate the colorful beads.
Fasten each of your beaded strings onto your base object. Simply tie your strands onto the item to hold them in place. With some objects, like a bottle or can, you may need to poke holes to make spots to attach the chimes. Use more string to create a hanger for the windchimes, securing it to the top of your base.