

Goodbye Clutter: Turn Old Toilet Paper Tubes Into A Scalloped Storage Box
It might sound weird, but collecting your empty toilet paper tubes can be one of the smartest things you do. That's because there are so many ways to use empty toilet paper rolls for extra storage, including this scalloped-edge storage box designed by Zengin Hayaller Dükkanı. The box base is cardboard, making it a truly inexpensive organization solution. And since it has a lid, this container offers hidden storage to keep clutter out of sight.
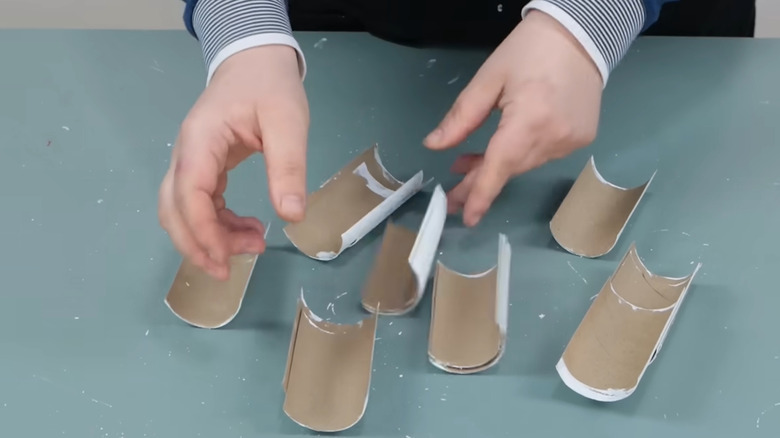
The container uses seven cardboard tubes, cut in half lengthwise to create 14 scallops. However, you can adjust the size of the container — and the corresponding number of tubes you'll need — based on what you plan to store. Cut the tubes and stand them upright to get an idea of how large the container will be. You'll also need cardboard for the bottom and the lid (if you're making one), scissors, and glue.
What makes your scalloped storage box unique is how you decorate it. The original creator used paint to cover the tubes, but you can also use peel-and-stick wallpaper, decorative paper, fabric, or any material that comes to mind. You'll also want fabric to cover the lid, a knob or ribbon loop as a handle, and ribbon or other embellishments to decorate the container.
Connect toilet paper tubes to create a scalloped storage container
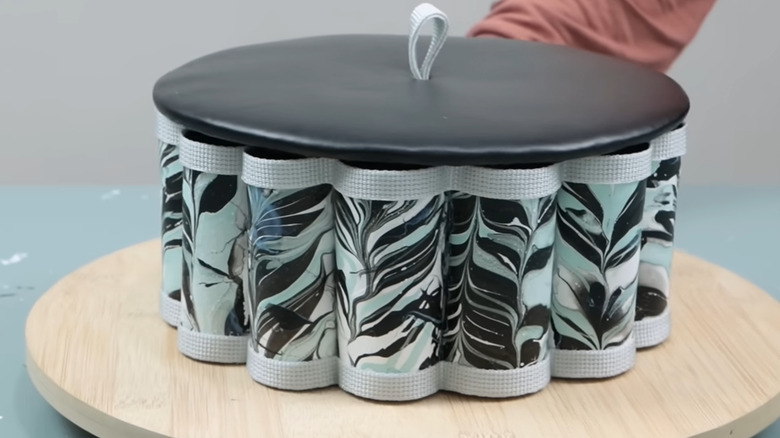
It's best to decorate the cut tubes before gluing them together. The original creator swirled paint, then dipped each tube's outer surface for a marbled effect. You can also paint the tubes directly. To cover them with another material, glue the covering on and smooth it out. You can also paint or cover the insides of the tubes so the container looks pretty when you open it.
Next, assemble the sides of the container by gluing the decorated tubes along the cut edges. After gluing, you'll have one long strip of tubes glued side by side. Next, glue the two ends together to complete the circle. Glue it onto cardboard, trace the box outline, and cut the remaining cardboard outside the container. Paint the cardboard base to help it blend in with your design. Next, decorate the container base as you like with ribbed glue, twine, or decorative cords.
To make the lid, cut a circle of cardboard the same size as the container. The original creator added a layer of batting for depth and a plush feel. Cover the lid with fabric and glue it in place. Then, cut a slightly smaller circle of cardboard, cover it in fabric, and glue it on the bottom of the lid to keep it from sliding off the container. Lastly, glue a wooden bead or decorative knob on the lid to create a handle. The finished container is a perfect storage idea for a small bathroom or the kitchen.