

Ditch The Deck Box: DIY A Chic Coffee Table For Outdoor Storage

Deck boxes are practical storage solutions for outdoor living spaces, but they're not without their drawbacks. For starters, they're not always the most aesthetically pleasing of furnishings. They can be big and bulky, and if they're made of metal or resin, they might not blend very well with a garden or lawn. Additionally, not all deck boxes are multifunctional — sometimes they're just big containers with no purpose beyond hiding miscellaneous tools and sports equipment. If you find that yours lacks practical value or looks overly cumbersome, replace it with a DIY outdoor coffee table featuring a liftable lid and a spacious interior compartment. The end result of this woodworking project, originally derived from pineandpoplardiy on TikTok, can be painted or stained to match your patio furniture and may serve as an elegant centerpiece for your outdoor living space at large.
To make your coffee table, you'll need a collection of basic 1-by-4 boards, plus a series of square 2-by-2 wooden posts for the inside corners and cross beams. You can use this same size wood for the table's legs, but it may be easier and more reliable to order furniture legs with pre-installed hanger bolts instead. You'll also need wood glue, 2-inch nails or wood screws, and a long quarter-inch dowel — the last of which you'll use as a spacer. Before buying your lumber, measure the patio area where the table will sit and decide how much interior storage you need. That will help you determine the table's overall dimensions and avoid building a piece that's too large for the space.
In completing this DIY, you'll get a smart storage solution for a clutter-free deck. It's the sort of furnishing that will pair nicely with patio decor items you should look for at estate sales and thrift stores, too.
How to DIY an outdoor coffee table with a storage compartment
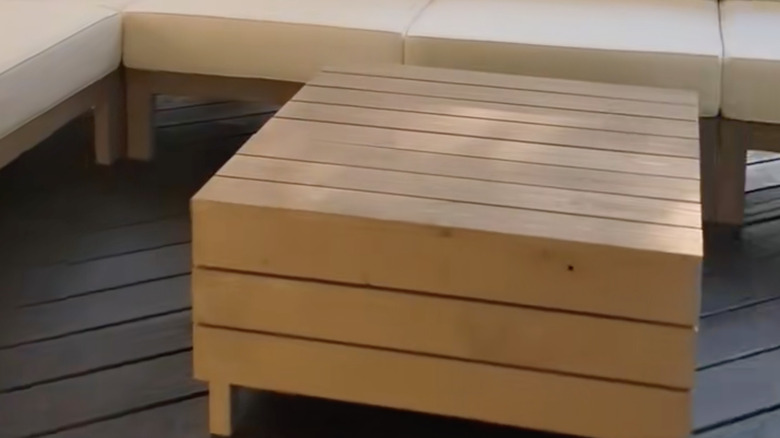
Before you begin this project, make sure you're using a type of wood that's well-suited for outdoor furniture. Cedar and teak are two solid choices since they do a good job of resisting insect damage and moisture-related decay. If you use a less naturally weather-resistant wood, plan to apply an appropriate exterior finish and maintain it regularly.
To start the build, you'll create a square base platform for the table with 1-by-4s. Glue the boards to the tops of some of your square crossbeams to do this. Then attach additional 1-by-4s vertically along the outside edges of this platform using both glue and nails. You'll have the base of the coffee table box assembled — now you have to build up the sides. Attach square post boards to the inside corners of the box base, on top of the crossbeams. Then, affix more 1-by-4s to the sides of these posts, with quarter-inch gaps between them. This is where your dowel spacer will come in handy.
@pineandpoplardiy had my reservations that glue and nails would be enough, but she's still looking pretty. detailed plans available in our shop (shop.pineandpoplar.com) #diytable #CapCut #outdoortable #outdoordiy #woodworkingproject #buildfurniturewithme #diyprojects #diyoutdoorproject #diystoragebox #hiddenstorage
Two steps remain. The first is attaching furniture legs, or more posts, to the bottoms of the box. Elevating the coffee table a few inches allows the wood to breathe and will give you a bit of toe-kick space underneath. The final step is to build the liftable lid. You can do this with more evenly spaced 1-by-4s, with square crossbeams underneath linking them together. In addition to painting or staining your finished table, you may want to apply an oil-based wood sealer to it to ensure that it holds up well against the elements. This chic DIY should work well alongside many genius small patio ideas that'll help you design your dream space.