

Use Old Plastic Containers To DIY Stylish Bathroom Storage Instead Of Tossing Them

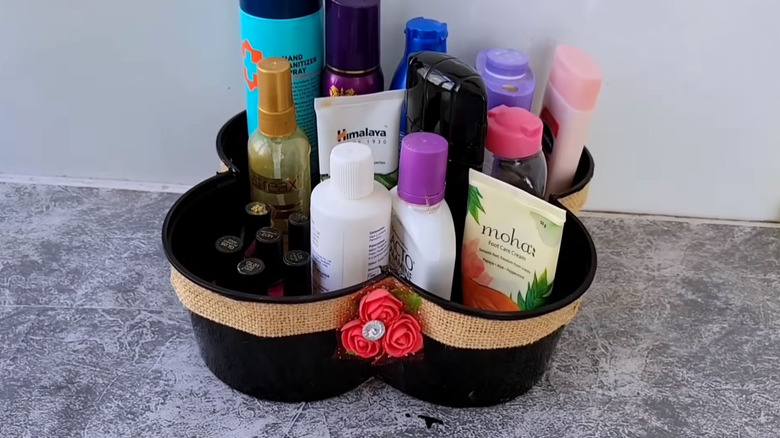
Are your cabinets full of old plastic containers you don't want to throw out? Whether you're on a first-name basis with your DoorDash guy or buying prepared food at the grocery just makes your life a little easier, plastic containers can really start to pile up. Even if their lids are long gone or you're struggling to find a place to recycle them, there's no need to toss your sturdiest plastic containers in the garbage since they can be easily turned into surprisingly stylish bathroom storage. YouTuber @Manacreativecorner used a little masking tape, cardboard, and decorative jute elements to transform two old plastic containers into the perfect spot for displaying her everyday beauty products. To make it, she cut and bent the containers in half, joined them with tape at the seams, added a cardboard base, and used hot glue to decorate her DIY storage solution with inexpensive ribbon and imitation floral accents.
This is one of the most brilliant ways to reuse old plastic containers around the house because the construction method takes a few humdrum circular containers from totally forgettable to surprisingly fancy. A sharp pair of scissors is the most important tool you'll need, but a hot glue gun will also come in handy. Although it can be a little fiddly, thin masking tape adds just the right amount of structural support to this DIY bathroom storage idea without adding a lot of bulk to thin plastic containers, but packing or duct tape would work in a pinch. You can use any identical containers you like, as long as they are flat on the bottom. Two sturdy pieces of cardboard are must-haves, but paint, ribbon, or imitation flowers are optional decorative elements.
Use basic materials you already have to complete this DIY for free
Upcycling plastic food containers to make unique decor is one of the most affordable ways to DIY stylish bathroom storage. If you use a few items you probably already have lying around, this project won't cost you a penny! Starting with clean containers, use scissors to cut down one side and across the entire bottom before folding each one along the opposite side. Ideally it will create a crease, but if your plastic is on the brittle side this step may break the containers in half. There's no need to worry, since you can just use a thin piece of masking tape to reattach both sides together. Repeat that process, adding a strip of masking tape along each seam to combine the two containers into a clover shape. For the most polished look, apply a little paint in the same color as your containers to disguise the masking tape.
Using your taped plastic containers as a guide, the next step is tracing its clover outline on two thick pieces of cardboard before cutting them out. Liberally apply hot glue to the inside of each plastic container bottom before pressing the first cardboard piece on top. Before adding the second piece of cardboard for extra stability, consider covering it with a piece of jute or another durable fabric to create a higher-end finish.
You could stop there and simply start using your new DIY bathroom storage container to organize your bathroom clutter. However, you can completely disguise the plastic containers by customizing them with more paint, trimming the edge with ribbon, or adding small imitation flowers that match your bathroom towels or accessories.