

Easily Upcycle An Old Glass Jar Into A Charming Planter With Hot Glue
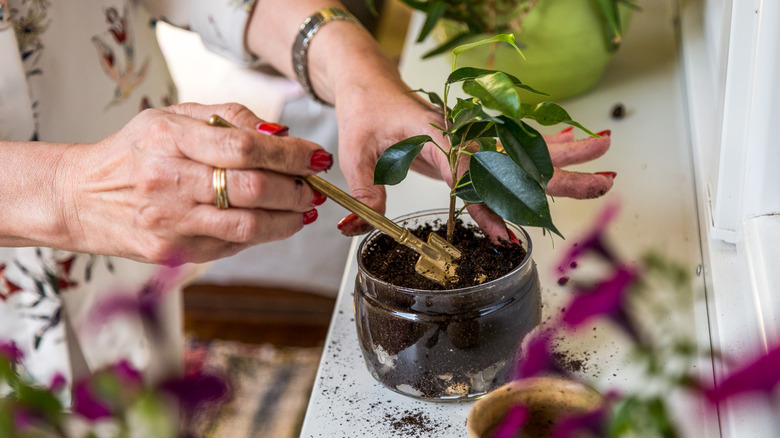
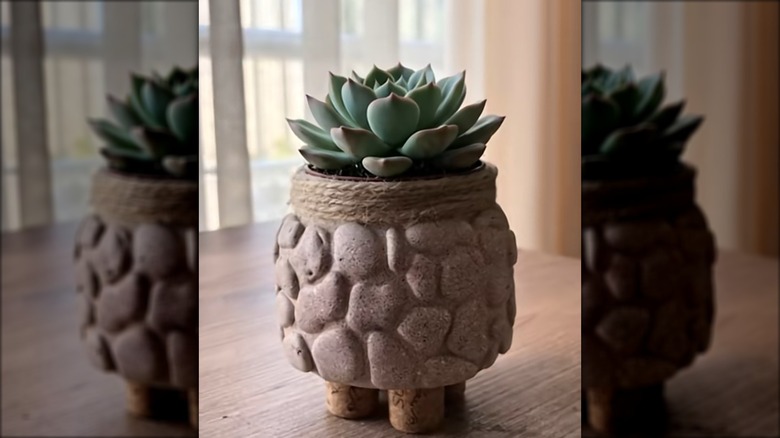
What could possibly be cuter than a tiny plant in a glass jar? A glass jar repurposed to look like a cobblestone pot is adorable. Glass jars are incredibly easy to source — which is good because there are so many ways to reuse them to DIY beautiful home decor — and you probably already have a collection of them lying around. If you don't, just rinse and save the next one you empty. You'll want to use it for this adorable craft.
This DIY by Decor Delights (@decor.delights32 on TikTok) uses simple materials to make a plain jar look like it came straight out of a fairytale. For this project, you can upcycle a glass yogurt jar, pasta sauce jar, or even a baby food container. You will also need wine corks, hot glue, jute twine, and paint. This project is perfect for a gift. Or make one for yourself and use it for your favorite succulent or other small plant.
How to transform a glass jar into a planter
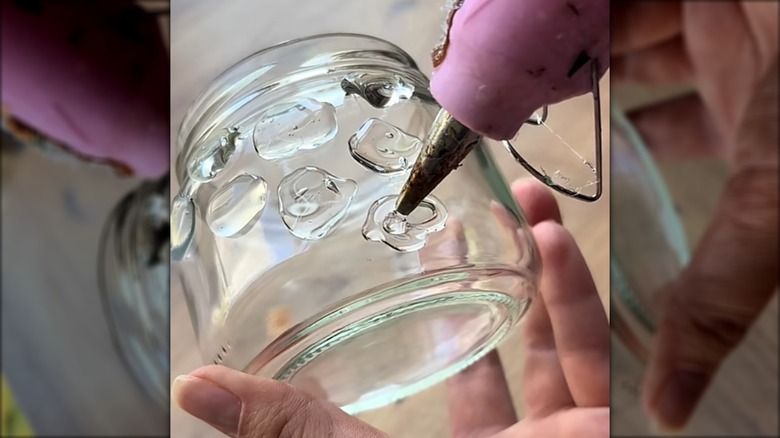
The first step is to remove any labels from your jar, then clean and dry it. You can easily remove those pesky labels using common kitchen ingredients like shortening or a simple combination of hot water, dish soap, and vinegar. Next, you will use hot glue to create the underlying cobblestone-like texture. Do this by creating circles of hot glue on the outside edges of the jar. You don't need to make each circle perfectly round — the goal is to make them look like real stone. Once the hot glue is dry, paint over the whole jar in your chosen color.
The original DIY uses a grayish brown that gives the feeling of stone. If you love the texture but aren't keen on the gray/brown stone look, try using white paint for a "milk glass" vibe, or use cobalt blue to make the jar feel a bit like it's covered in sea glass pebbles. You could also lean into the cobblestone look and hand-paint the jar to look like actual cobblestones. After the paint dries, use a toothbrush dipped in paint to flick a second color (or two) onto the glass to add extra texture, or just leave it as is if you prefer a more uniform, matte look.
Once the jar has been painted, wrap jute twine around the rim and secure with glue. Ribbon also works well for this if you don't like the rustic look of jute. Finally, it is time to add the wine cork "feet" to the bottom of your jar. To do this, cut two wine corks in half. Then use your hot glue to secure the cut ends of each half to the bottom like feet.
What to do about drainage
Glass jar planters might be cute, but they do have one main downside — the lack of drainage holes. Fortunately, there are ways around this problem. The best choice, but also the most complicated one, is to drill holes in the bottom of the jar. To drill holes in glass, you will need a diamond drill bit and plenty of lubrication. Continuously applying water while drilling will help reduce heat from friction, which is important to prevent cracking the jar. If you plan to go this route, drill your holes (three or four will do) before completing the rest of the DIY. That way, if you break the jar, you just need to grab another one instead of having to start the entire project over.
If drilling holes into glass is outside your comfort zone, there are other options. One thing you can do is use a small nursery pot as an insert instead of planting directly in the planter. This means you will be able to remove the plant before watering, and let it drain completely before putting it back in your planter. The original DIY recommends using small pebbles or gravel at the bottom to help with drainage and catch runoff. Unfortunately, using pebbles also increases the risk of waterlogged soil and root rot and will do little to solve the problem. The problem is that water does not easily move through pebbles; it pools there instead. A third option is to choose plants wisely. While no plant truly thrives in a pot without drainage, some plants tolerate it better than others.