

4 Space-Saving DIY Shoe Storage Solutions That Are No-Brainers For Cramped Areas

We may receive a commission on purchases made from links.
There are all sorts of small spaces in which your spare pairs of sneakers and boots can create clutter. They could pile up by your front door and become a tripping hazard. Or, they could make your closet shelves look messy. Even in your garage, a pair of shoes scattered on the floor can be unsightly. Luckily, there are all sorts of smart DIYs out there for getting your footwear collection organized, even in tight spaces. For example, you could build a wooden shoe rack that matches the specific dimensions of your home, or put together a set of hooks that's perfect for storing spare sneakers in your garage. There's even a unique way to DIY a shoe storage solution using PVC pipes.
Many store-bought products that are meant for organizing footwear won't work in cramped areas, or otherwise don't make use of space as efficiently as possible. Plus, they can cost you quite a bit more money. The biggest benefit that comes with building your own storage solution is that you can customize your project to match the exact size of your space, whether it's your entryway, closet, or bedroom. Before you get started with any shoe storage DIY, make sure to declutter and downsize your footwear collection, where possible. Getting rid of that old pair of boots or those cheap flip-flops gives you more room to work with and makes it easier to keep your shoes organized and your floors clean.
Convert leftover shoe boxes into a footwear storage tower
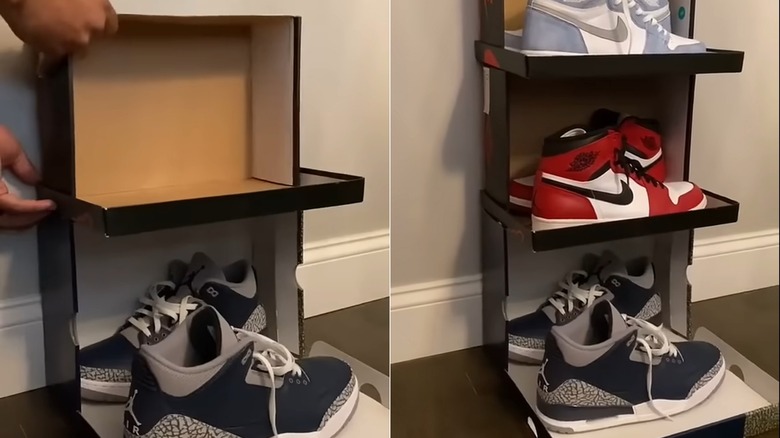
With a handful of empty shoe boxes, you can create a sneaker storage tower that's great for tight corners and doesn't cost a dime. First, sort your boxes from smallest to largest, and separate their lids. Once that's done, take the largest lid and put it down on your closet floor. Take the box that matches it, turn it sideways, and fit it into the edges of the lid. Stack the next largest lid on top of it, and repeat the process. If desired, you can also glue or tape the shoe boxes together to improve the stability of the tower. Do note, however, that the more levels you add to your tower, the more unbalanced the fixture will become. Instead of building a shoe tower that's six boxes tall, for example, you might be better off building two that are three boxes tall each. Also keep in mind that only one pair of shoes can fit on each level.
Though this DIY is certainly on the simpler side, it can nonetheless be effective for tidying up footwear that frequently gets in the way when it's on the floor. The open design allows you to quickly locate the sneakers or heels that will match your outfit, and the tower's use of vertical space makes it a great fit for cramped closets. You could easily paint the shoe boxes to give them all a uniform color. Or, you could improve the aesthetics of the fixture by putting some adhesive contact paper on the insides of the lids.
Make a unique shoe rack with PVC pipes
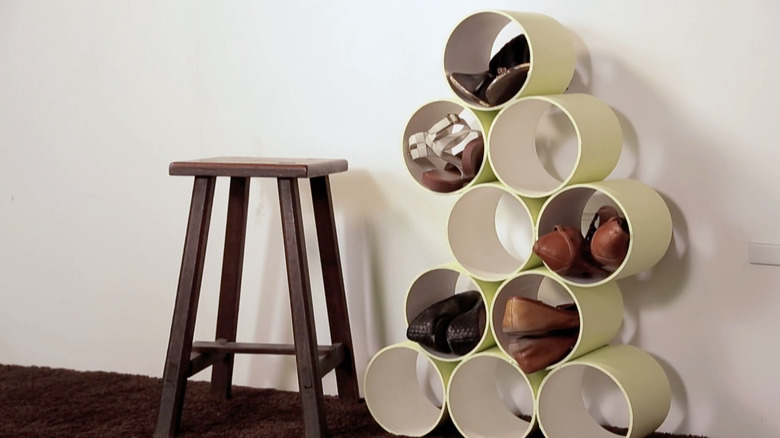
For a truly eye-catching footwear storage solution, try hot-gluing together short segments of large-diameter PVC tubing on their sides in a stacked, artistic-looking formation. The idea for this DIY shoe rack originally comes from Tonic on YouTube. What makes it so great for cramped areas is the fact that it can expand vertically, instead of horizontally. It's also easy to alter and make it as tall or as wide as your space allows. You can also use different sizes of PVC tubing. As long as the interiors of the pieces are large enough to fit a pair of shoes, they'll work for this project.
You can use either a hacksaw or miter saw to cut your PVC into segments. You can also paint the tubing, though you may want to sand it down with fine-grit sandpaper first. In the original video, the creator made the exterior surfaces of the shoe rack green and left the interior areas white. However, you can definitely work with other colors if they better match your decor. Glue the PVC together after painting it, and use binder clips as makeshift clamps to hold the pieces together while they dry. If you decide that you need a stronger adhesive than hot glue for this project, products like E6000 Clear Multipurpose Adhesive can create a stronger bond. This DIY is a stand-out not just because of its funky aesthetic appeal, but also because of how easy it is to assemble in a single afternoon.
Turn coat hooks into a garage wall shoe storage solution
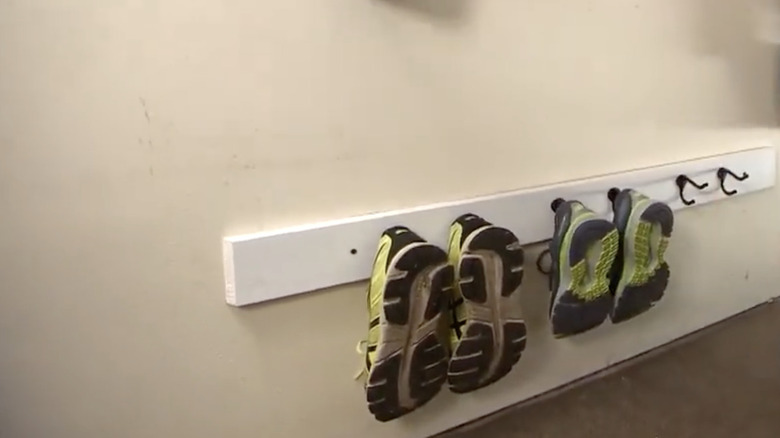
If you have a spare wall-mounted coat rack, you can turn it into a garage shoe storage solution by attaching it to the wall, about a foot or two from the floor. When you hang your footwear vertically on the hooks, it won't jut out as far as it would on a freestanding shoe rack. But what if you don't have an extra coat rack? The answer is simply to build one yourself. All you'll need are a few hooks, a one-by-four board, screws for affixing the hooks to the board, and a couple of drywall anchors if you aren't going to attach the fixture to a stud.
Before you cut down your one-by-four to your preferred length, consider the spacing of your hooks. You may want them slightly farther apart than normal coat hooks, especially if you have wider shoes or clunky boots. Mark hook placements with a pencil, and make sure they're all at identical heights before doing any drilling. When you go to mount the board on the wall, don't forget to bring your level. The completed project gives individual shoes a specific place to go, so they shouldn't be jumbling up in piles anymore. This is a smart way to tackle garage clutter, and keep the path around your car clear.
Utilize vertical space with a tension rod DIY
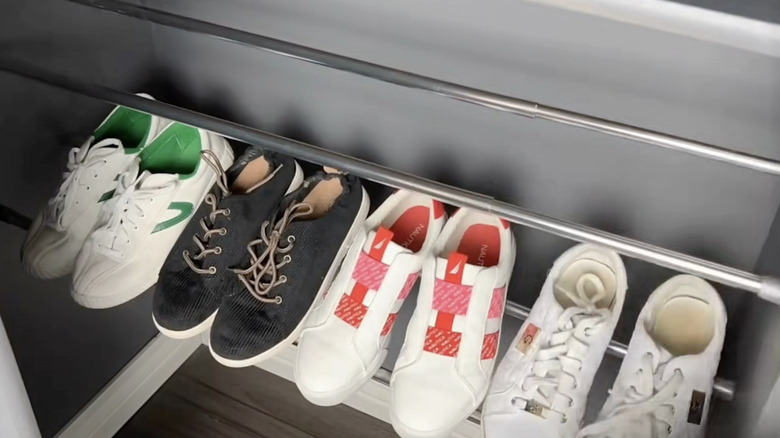
The floor of your closet might seem like a convenient place to keep your spare pairs of shoes. But they often end up in a big pile that's neither accessible nor attractive. The solution is to store them just a few inches up with the help of some spare tension rods, which you might already have in your garage or basement. These fixtures are customizable in length, which means they'll suit just about any closet or other narrow space. You'll use them in pairs to create makeshift shelves. Put the back rods in first. Then, add the front rods, half an inch lower down. That way, your shoes will lean forward slightly and look like they're on a retail rack.
Layering your tension rod sets on top of one another is a great way to make use of the vertical space that you're not using at the back of your closet, and will create a display for your shoes. For consistency's sake, use a tape measure to check that your rods are all equal distances apart. As an added step, you could wrap your tension rods in adhesive contact paper if you're not satisfied with their original color. This is one of many fantastic tension rod hacks that will help you organize like a pro.