

Woman Turns Old Wall Decor Into Countertop Storage With A Clever DIY Solution

You've heard of repurposing items into wall art — like turning doilies and a clipboard into the most unique wall decor. But what about turning wall decor into a countertop organizer? It's definitely a creative switch, and one that turns out to be quite functional. The project, shared by Hometalk, uses wrapped canvas style artwork to create a shelf for your countertop, with another piece of wall art to create a removable tray underneath.
Think of it as an alternative to tiered tray storage — like this idea for transforming old wooden bowls into countertop storage. You get two levels of storage to maximize the space on your countertop. To make this idea durable, choose artwork that's printed on wood but has the wrapped canvas look — the image is printed across the entire front without a visible frame, and the back side is open. This creates the tray effect with a rim. A canvas will flex and won't hold heavy items. If that's all you have available, glue a thin piece of scrap wood to the image side of the canvas to lend stability to it.
You'll need one large wall decor piece for the top and two smaller pieces (with the same dimensions as each other) for the side supports. If you want to create a tray for underneath, grab one more wall decor item that's slightly smaller than the top piece, so it'll fit between the supports. You'll also need hot glue or E6000 to attach the pieces, along with paint, decorative paper, handles, and any other embellishments you want to create your custom design.
Assemble an elegant storage tray with wall decor
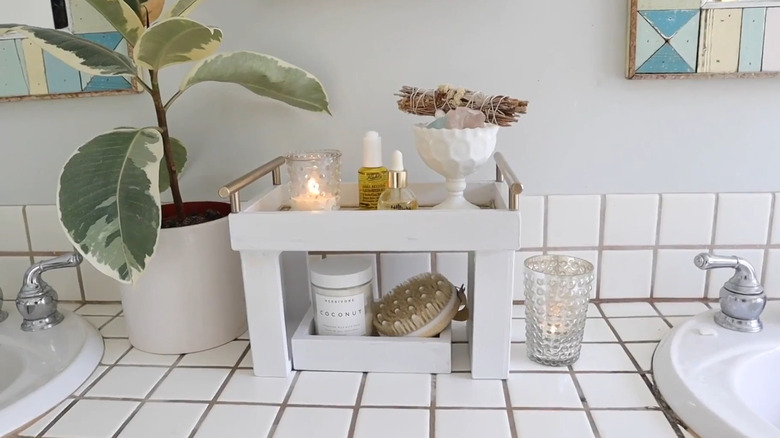
To start, paint the four wall art pieces the same color. The inspiration project uses white to keep the design clean and neutral, but you can choose a hue that either blends in with your countertops or creates bold contrast. It may take several coats to cover up the previous images.
Now you can embellish the pieces to fit your room's theme. That includes covering the bottom of each tray to dress it up. In the original, the bottom tray gets a cane webbing covering, while the top is covered with a vintage-looking map print. Fabric comes in a variety of colors or patterns to achieve the look you want, or use a sheet of imitation leather for an elegant finish. Decoupaging decorative paper inside the tray also works. Cut the cover to size and glue it to the inside of the top and bottom trays. If the edges aren't even or you want a defining element, glue twine, small beads, or other materials around the edges.
To assemble the tray, glue the two side decor pieces to the bottom of the top tray. Slide the smaller tray underneath. Or, find another piece of artwork that matches the top dimensions, and put it on the bottom with the side supports inside the tray. Finally, add handles to the top tray. Drawer pulls are an easy option, but you can switch it up to fit the theme. If you have a coastal bathroom with a beachside vibe, try slim pieces of driftwood as the handles, for example.