

Grab Old Pickle Jars To Create Stunning Glass Etched Tea Lights

We may receive a commission on purchases made from links.
If you just tossed an old pickle jar in the recycling bin, you might want to go back and grab it. With varying sizes and shapes, pickle jars are so versatile, and you can reuse an old glass jar to DIY home decor you'll love. For folks who love the soft glow of tea lights, pickle jars make wonderful holders, and there's an adorable way to dress up the glass. On YouTube, 1905 Farmhouse shared the brilliant idea of etching images onto pickle jars to create the cutest tea lights. With this fun project, your pickle jars will be upgraded into beautiful, intricate tea lights in no time.
By etching your design, you'll be able to give glass jars a stunning makeover without paint. Instead, you'll need a bottle of glass etching cream and a stencil to stick to the jar. A kit like Armor Etch Glass Etching Cream is about $25 and comes with brushes to apply the solution. Etching cream is made up of acids that will permanently alter the appearance of the glass, creating a frosted finish. Because this cream is so strong, it's crucial to wear gloves and use caution when working with it. The stencil for your pickle jar tea light will determine the style. Adding words, flowers, or other images to your jar allows you to create a fully customized piece.
How to etch pickle jars to make gorgeous tea lights
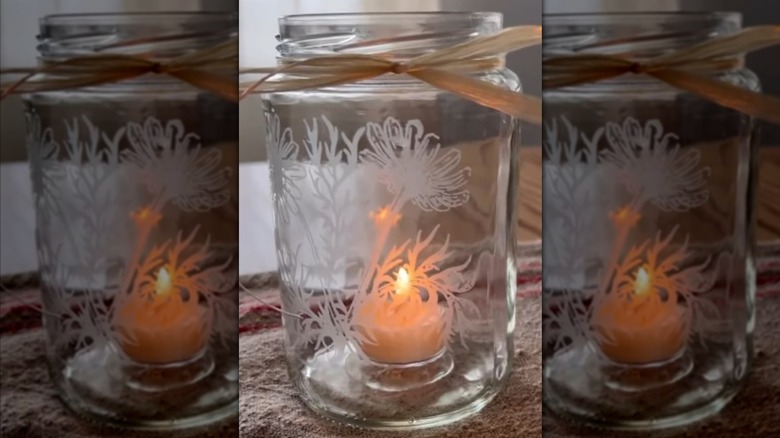
While plain pickle jars would make cute tea light holders, etching the glass upcycles them into stunning decor. Store-bought adhesive stencils are an easy way to achieve this look, though you could make your own vinyl stencils with a Cricut machine. Alternatively, vinyl stickers or contact paper work well for customizing your designs. Some glass etching cream kits will include stencils, making this project even easier.
Before you start applying your stencil and etching, it's important to thoroughly clean the glass. Wipe down your pickle jar with a little rubbing alcohol, removing any smudges or dust that could interfere with your stencil. Now, stick your stencil or stickers onto the pickle jar. Applying a border of tape around the stencil will stop the etching cream from dripping down the jar. With a paintbrush, rub a thick layer over your stencil. Wait for about five minutes and add another coat.
After about five to 20 minutes, rinse the cream away with water. Check the instructions on your specific product to know how long it should set. Peel off the stencil as well, revealing the design on your jar. Finally, tie a ribbon around the neck of the jar or add other embellishments to customize it to your style. Real candles or battery-operated ones, like Amagic's LED tealights, will both work to illuminate the jar. Then, set your finished project on the table to create a whimsical light-up centerpiece.