

Skip Paint: There's A Smarter DIY To Update Red Oak Cabinets
We may receive a commission on purchases made from links.
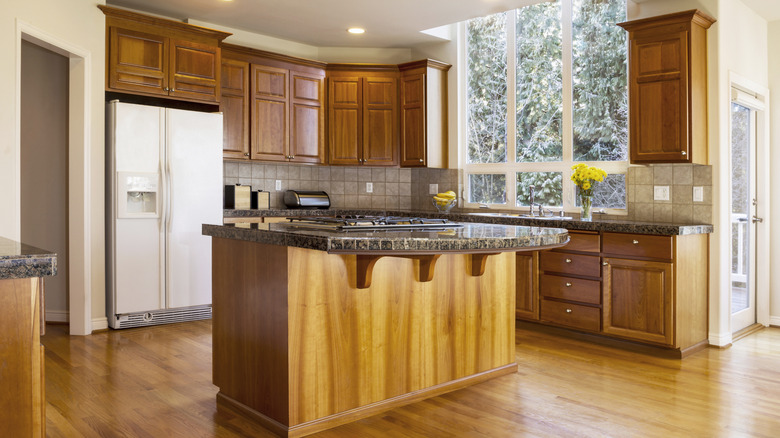
Traces of '80s and '90s aesthetics are seeping their way into today's decor features, but not everyone is on board — especially when it comes to the highly debatable red wooden cabinets. While some homeowners are welcoming the kitchen trend of yesteryear into their space, others are figuring out ways to update their oak cabinets with a modern touch. If you're all for a present-day approach, there is a clever way to rejuvenate your cooking space while still preserving the beauty of the red oak wood: using a green stain.
While your first inclination might be to find a paint color, using a stain is a smarter and easier option because it enhances the wood's natural tones and textures and ultimately makes for a quicker project. Staining might not last as long as a paint job, but it's not prone to quite as much chipping as its counterpart. And it allows moisture to escape more easily than paint, which is ideal for a kitchen setting. Working with green stain will allow you to ease the intensity of the red and pink shades while leaving you with a warm finish that feels homey and cozy — the top priority of a lived-in kitchen in 2026.
How to use a green stain to update your red oak cabinets
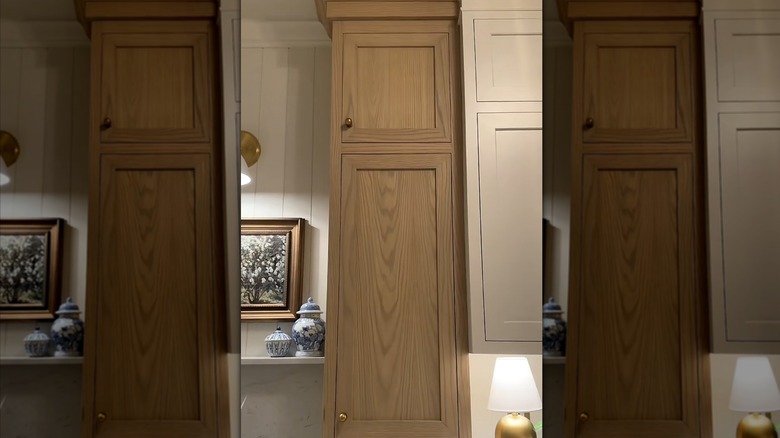
Once you've decided to go the staining route when touching up wooden cabinets, there are a few things to note. First things first, whether you're working with a new piece or a slab of wood from old cabinetry, you'll want the surface to be as smooth as possible. To get that effect, use 180-grit sandpaper on the surface, and 220-grit sandpaper on the piece's edges, if you don't have a sander power tool on hand. Take a dry and damp cloth to get rid of any excess wood clippings from your sanding endeavor before you reach for the brush.
When it comes time to start staining those dated kitchen features known as red oak cabinets, you'll work in the direction of the wood grain to cover the entire surface. Once you've completed a single coat, immediately wipe off any excess with a dry cloth. Follow the stain's directions regarding the number of coats you'll need for your desired effect and for the drying process. When it's completely dry, you'll want to use a topcoat that coincides with the stain (using a water-based topcoat like Varathane Water-Based Crystal-Clear Ultimate Polyurethane if you used a water-based stain).
Once you screw your revamped red oak cabinets back into place, use this opportunity to play up the kitchen's charm. Accentuate the stained cabinets with natural accessories like woven baskets, linens in earthy hues, brass hardware, and a bit of greenery to boot.