Turn An Old Plastic Container Lid Into Cute Countertop Decor With A Storage Twist
We may receive a commission on purchases made from links.
Even if your countertops aren't super cluttered, it only takes the smallest mess to draw your eye away from your bathroom or kitchen decor and make your space look chaotic. Thankfully, minor disarray often requires only simple and cheap solutions, many of which you can whip up right at home. In fact, with one particularly genius way to reuse a lid from a plastic container, you'll create an adorable counter decoration that doubles as clutter-busting storage. Whether you have a round or square lid, take a tip from YouTube channel Camelia DIY and make it the base for a miniature basket that will quickly organize and beautify your counters.
When trying this project to make a chic DIY countertop storage box, you'll need supplies to secure sides around the lid, matching the shape of the container it covered. Lids from small food containers are the perfect size for a cute little catch-all bin that can live on the counter. However, any plastic container lid could be used to make storage baskets of different sizes and shapes.
Meanwhile, cardboard and fabric are wonderful for disguising the lid and giving a little extra strength to the base of your DIY decor bin. The sides of this nifty storage decor can be constructed with a small piece of wire mesh, such as Everbilt Hardware Cloth, for a charming aesthetic. Alternatively, crafting the walls with rope or cardboard will make it more enclosed, concealing the contents better. Once built, use your decor to elevate your countertop while providing a place for toothpaste and toiletries in the bathroom, coffee pods or utensils in the kitchen, or a landing place for odds and ends in any room.
Crafting a cute countertop storage basket with a plastic lid
An essential starting step in turning an old plastic container lid into neat storage is to ensure the plastic lid doesn't bend or droop when items are in the basket. To reinforce the base, cut a piece of cardboard to fit on the lid's top (the label side) within the perimeter of the raised lip, and glue it in place. Then, glue a piece of fabric, such as burlap, directly over the cardboard, making sure it's large enough to fold over and hide the lip of the lid.
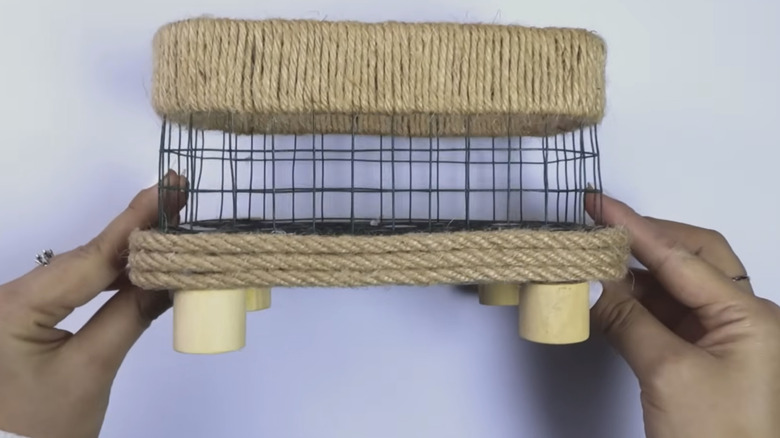
For an open basket design, use wire mesh to make the sides. Cut a piece that's long enough to wrap all the way around the perimeter of the lid. Stick the wire into the groove of the lid's lip that snaps onto the container, running the mesh along the entire groove to fully enclose the basket on all four sides, and hot glue it into place. For a fabric or woven bin, there are a few ways you can create stunning walls. One easy option is to cut a section of cardboard to fit around the lid and cover it with fabric. Hot glue this piece around the outside of the lid. For a woven look, glue a layer of rope around the lid. As you glue the rope down, stack it on top of the previous layer tightly until your bin is as tall as you'd like.
With the walls in place, cut a piece of cardboard to fit inside the basket at the bottom. Glue a piece of decorative fabric over it before setting it in place. To make this mini storage bin even cuter, place twine around the top of the wire version, and glue wooden beads onto the bottom as feet.