Turn Ordinary Wood And Peanut Butter Into A DIY Bird Feeder Birds Can't Resist
We may receive a commission on purchases made from links.
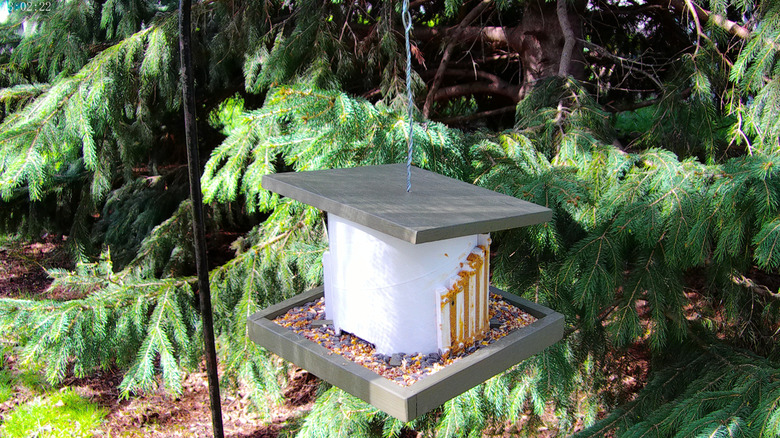
Many of us find joy when songbirds and other feathery friends grace our yards and balconies. They soar through their carefree lives, offering us a glimpse of unfettered freedom that I, for one, admire. One surefire way to make friends, feathery or otherwise, is to feed them. As a professional woodworker with decades of experience, I put my skills to work to attract birds to my backyard without buying a feeder. Instead, this fun little birdfeeder is easy to make and looks great. Plus, building it is within the scope of nearly any DIYer. One downside to adding a birdfeeder in your yard, is that they can be messy. However, this feeder serves up birdseed in a tray with a ridge to keep seeds from falling and has slots for peanut butter.
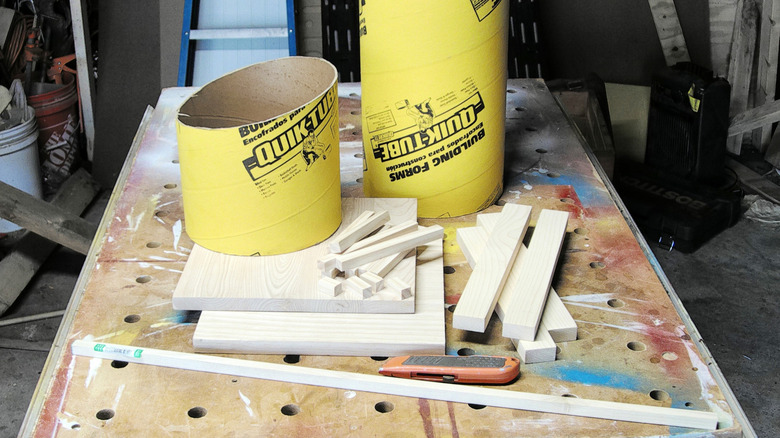
The center cylinder of this feeder is a section of an 8-inch diameter Concrete Forming Tube. You can get them at your local hardware store or on Amazon. The top and bottom are made from 1-by-12-inch select pine, and each one is 11-1/4 inches square. The bottom edges are made from 1-by-2-inch pine and are 12 inches long. I purchased 1/2-inch square wooden strips at my local hardware store to make the 10 peanut butter sticks. (They'll be mounted to create grooves to hold the peanut butter.) From the same 1/2-inch square stock, cut four 1-inch lengths to make blocks that secure the cylinder's position on the bottom.
Getting started
Cutting the angle onto the concrete tube is a little trickier than it might seem. Here's how I did it. Using a marker, I measured down and drew a small line 8 inches from the edge. This will now be the front of the cylinder. Then, directly opposite (180 degrees) of that location on the cylinder, I marked a line 6 inches down from the edge. This spot is the back of the cylinder. Then I took a piece of twine and taped it on the 8-inch mark, winding it around the cylinder. I then taped it in place on the 6-inch mark. From there, I continued the twine back to the 8-inch mark, taping it in place, circling the concrete tube. Then I used the twine to guide my marker as I marked off the top edge of the feeder cylinder. Now you have your angled line. Use a utility knife to cut through the concrete tube, and sand the cut line smooth. Cut a 2-inch wide-by-1-1/2 tall opening at the front and back of the cylinder, to allow birdseed to flow out.
Next, cut the peanut butter sticks to length. To add a bit of visual interest, I made the sticks of varying sizes. I made two of each length: 6 inches, 5-1/2 inches, 5 inches, 4-1/2 inches, and 4 inches. This is a subjective choice. You could make them all the same length, should you wish to do so. Drill 1/8-inch diameter holes on either end of each stick, 1/2-inch from the ends. These will be used to mount them to the cylinder.
The top and bottom
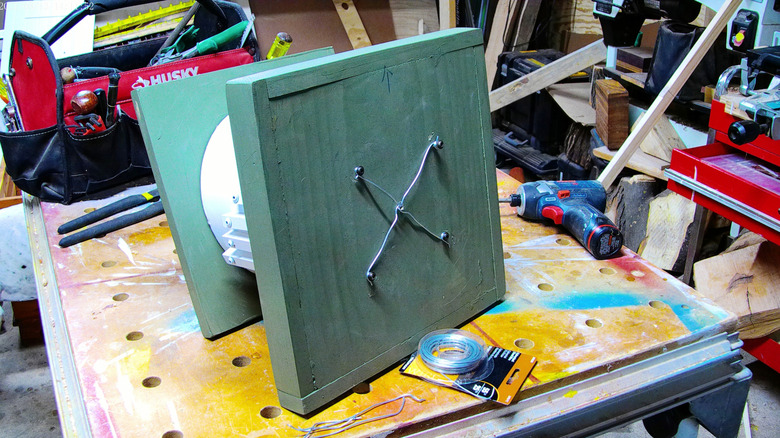
Cut the top and bottom pieces to their 11-1/4 inch square dimensions. I used a chop saw for this task, but a handheld circular saw, jig saw, or even a hand saw would work well, too. I recommend using a combo square or something similar to mark the cutting lines. It will help you keep the pieces truly square (90-degree corners). When they are cut to size, use a straightedge to determine the exact center of the top and bottom. Place it at opposite corners and trace it across the center of the piece. Then, move to the opposite corners and do it again. You will have created an X dead center on each piece. Now, drill a 3/8-inch diameter hole through the center point of the bottom; leave the top for now. The hanger wire will thread through those holes later. Take a few minutes to sand the top and bottom smooth. I started at 80-grit and advanced through 120-grit, which makes a great surface to receive paint.
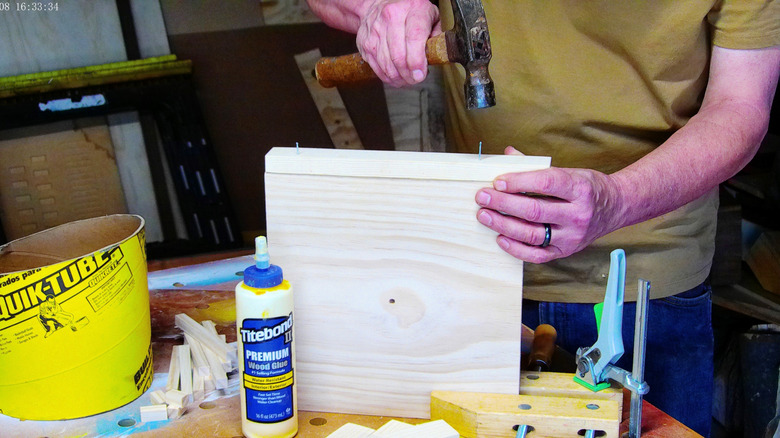
I cut the bottom ridges to 12 inches long. Attach them to the sides using glue and a couple of finishing nails. The adhesive needs to be water-resistant or waterproof, like Titebond III Ultimate Wood Glue. Mount the edges all around the bottom, overlapping them at the corners to create a continuous border.
The next details

After the glue cures, sand the bottom edges smooth, cleaning up the overlapping joints at the corners. Then place the cylinder on the bottom and measure to make sure it's centered. Grab the 1-inch blocks you made earlier. Put a thick coat of glue on the blocks and carefully place them just touching the cylinder, as you can see in the photo above. Allow that glue to cure for at least an hour.
While you are waiting for the glue to cure, carefully remove the cylinder, then grab the peanut butter sticks and separate them into two groups. Where you mount them on the cylinder is up to you, but I chose to mount them on the sides of the cylinder, rather than the front and back, where the seed openings are located. I secured the center stick of the group of five first, then spaced them approximately 1/2-inch apart. I mounted them using #8 panhead screws, 3/4-inches long.
Finishing up the birdfeeder
You are very close to completing your birdfeeder. Next, set the top carefully on top of the cylinder and drill a 3/8-inch diameter hole in its center. You want the top to slide smoothly up and down the wire (see the very top image). It's time to paint the birdfeeder parts. I painted the cylinder white, using an exterior spray paint. It required three coats. The top and bottom I painted with a green, flat exterior latex paint. I put two coats on the top and bottom and let the paint cure overnight.
To hang the birdfeeder, I twisted together two 40-inch pieces of 16-gauge galvanized steel wire. I drove a screw partway into my work surface and bent the wire pieces around the screw, with equal lengths on either side. Then I started twisting the wire tightly together to form a thicker hanging wire. I continued twisting until there was only about five inches of untwisted wire at the end. On the underside of the bottom, drive four panhead screws partway into the bottom. Feed the twisted hanger wire down through the top and cylinder, then through the bottom. Wind the loose wire ends of the hanger wire around the panhead screws and drive them the rest of the way in. Slide the top up the wire to fill the cylinder with seeds, hang it up, and enjoy the benefits of putting a bird feeder in your garden or landscaping beds.