Not Pots, Not Mugs: These Vintage Thrift Store Finds Make Adorable Planters

Have you ever been wandering around your local thrift store and spotted an animal figurine you just had to have? Maybe you're obsessed with those oversized ducks and geese, the vintage '80s decor items everyone is snatching up. Perhaps there's no shame in your ceramic cat lady game. And since getting weird with it at a secondhand shop is all part of the fun, there might even be a life-sized, safari-inspired find that catches your eye. When it comes to those random must-have decor purchases, deciding to buy it is one thing but figuring out what to do with it can be quite another.
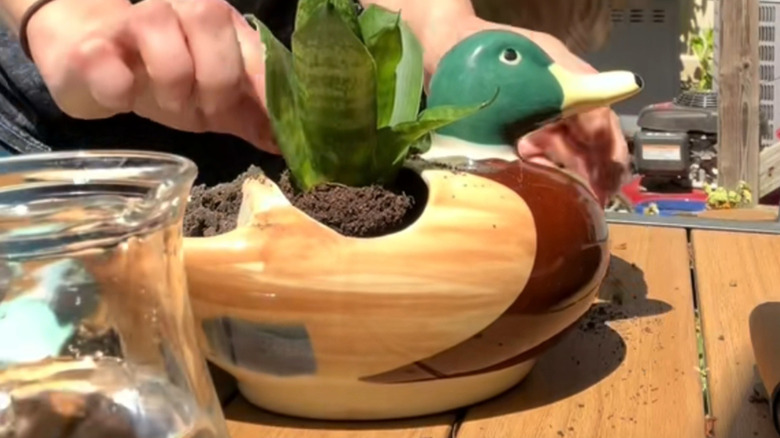
Several crafters are sharing on social media how they've completely transformed vintage thrift store figurines from dust collectors to the most adorable planters. This is a unique alternative to repurposing pots and mugs as planters. It probably goes without saying that you won't want to do this project without quickly checking if your figurine is just a trinket or if it's among the valuable vintage pottery pieces to look for at an estate sale or thrift store. But once you're sure the value is in the charm and not the check book, the process of turning a ceramic animal figurine into the planter of your dreams couldn't be easier as long as you use the right tools and techniques to create an opening for plants to slot in.
Along with your planter of choice, you'll also need a cordless drill with a diamond- or carbide-tipped bit. This can help you avoid chipping or cracking your ceramic figurine. It's a good idea to wear safety glasses while you're drilling. And, of course, you'll also need some potting soil and plants.
Drill slowly to avoid cracking your vintage ceramic planter
The trickiest part of this simple DIY planter is creating a large enough opening in the top of your ceramic figurine to insert your potted plant. You'll want to start by figuring out exactly where you want to locate the hole and how large it needs to be. For the best results, avoid drilling into any decorative elements or spots around the neck or tail, which are likely to be slightly thinner and therefore more prone to cracking. Once you've selected your spot, add a small piece of masking tape to mark it. This will do double-duty, since the tape will also hold the tip of your drill bit in place so it's less likely to slip.
The most important thing to remember when drilling holes in ceramic is to take your time. Slowly begin drilling into your figurine using very light pressure. Your drill bit will heat up as you work, so dip it into cool water occasionally to make sure it doesn't overheat. Continue to use your drill to open the hole to your desired size, before using sandpaper to smooth any rough edges. Repeat the process if you want to add additional drainage holes to the bottom of your planter.
Next, you'll fill your adorable new planter with the growing medium of your choice. Ceramic planters may hold up for a while outside. However, we recommend using your new animal figurine to hold low-maintenance indoor plants you don't need a green thumb to grow.