Turn Old Bottle Caps Into Adorable Wall Art You'll Love
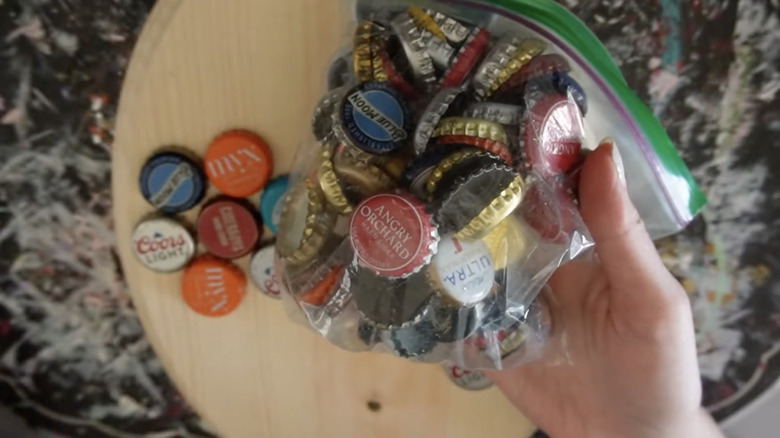
When you enjoy drinks from glass bottles like specialty sodas and beer, the bottle caps can quickly accumulate. Rather than simply throwing them away, these metal caps can be upcycled to make stunning wall art on a budget. The shape of the round metal caps is perfect for creating adorable flowers that will add a pop of unique floral decor to your home. With a wooden board, some string, a bit of glue, and a whole bunch of bottle caps, you'll be able to create a gorgeous three-dimensional flower sign to hang on your wall. Paint or stain could also be helpful for this project if you want to change the color of your board or your bottle caps.
Depending on the type of flower you want your decor to emulate or the style you're going for, you might leave the bottle caps as they are, bend them, or flatten them. Changing the shape of the bottle caps allows you to customize this project and create the perfect look for your flowers to match your space. The size and shape of your board, as well as the number of bottle caps you're working with, will determine if your wall art has more or fewer flowers. This project is extremely simple, and if you repurpose wood and craft supplies you already have, you can complete it for free. If you don't have space for any more wall art, this project could also work as a fun spring door decor idea.
How to make cute flowers out of old bottle caps
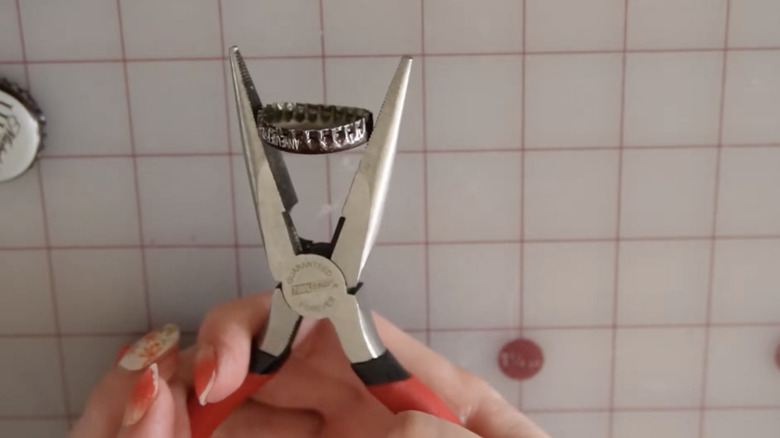
First, you'll need to decide how you want your bottle cap flowers to look. For a design that's similar to a sunflower or daisy with pointed petals, fold most of your bottle caps in half. Place the bottle cap between a pair of pliers and press to fold the rim together. Using a regular, round bottle cap for the center of each flower helps to give your design more dimension and make it super cute. These bent caps can also be used as leaves.
If you're looking for more of a layered petal look, you'll want to create a different shape with the metal caps. Smash your bottle caps, so that the rims are folded in toward the center. You'll want these caps to have a slight oval shape with the top wider than the bottom. These pieces can then be laid out in a circle, with another set forming a second circle in the middle. This gives your petals a layered look similar to zinnias, and a regular, unbent bottle cap will still work for the center.
Alternatively, to get a simpler floral design, leave your bottle caps as they are for cute, cartoon-like flowers. With this option, you won't need as many bottle caps, but your flowers won't look nearly as intricate either. While leaving the bottle caps as the color they are can make for unique designs, painting them will make the flowers look more uniform.
Assembling your bottle cap wall decor
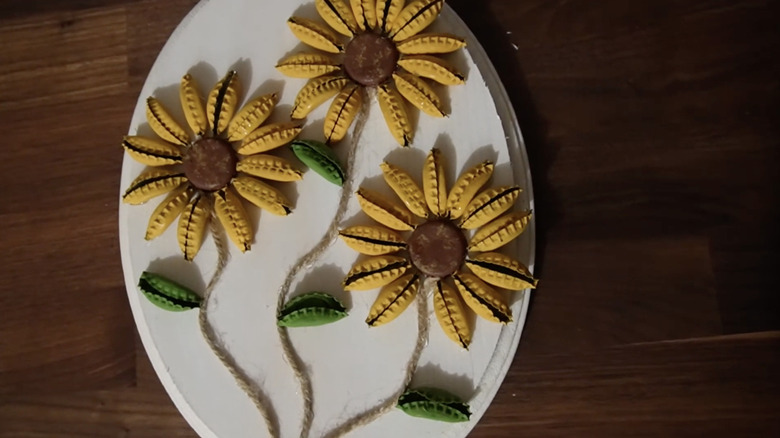
Prepare your board by sanding if necessary and painting or staining the wood if you'd like. Lay out your bottle caps to adjust how your flowers will look and fit onto your wall art. Play around with the shapes for your flowers, perhaps showing some from a side angle. If you want to use up even more round bottle caps, create a pot for your flower stems to spring out of at the bottom of the board. When you're happy with the look, hot-glue the caps onto the wood or use another strong adhesive to design textured wall art. About two or three flowers should fit onto your board, whether it's a long, rectangular plank, a square, or an oval.
Now, you'll use your string or twine to make the stems of your flowers. If you'd like, you can paint them green. However, leaving the neutral color of the twine or jute will give this wall art a cute, farmhouse vibe. Lay a piece of string under each flower, adding slight bends and curves to give the stem character and dimension. To hang your floral wall art, hot-glue another piece of twine to the back of your project and hang it from a hook.