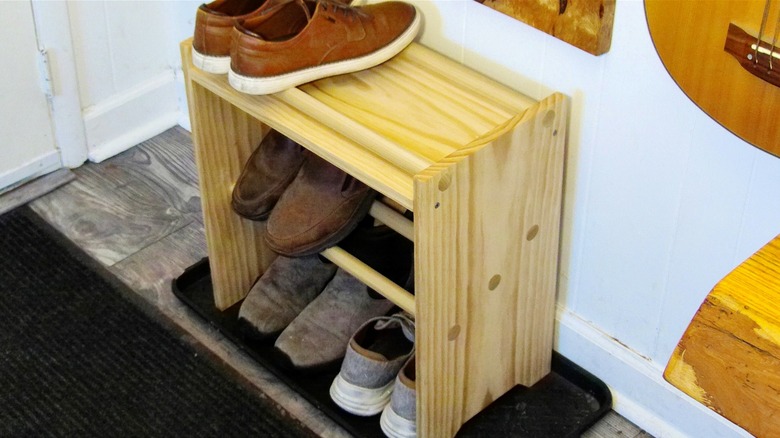
Tidy Up Shoe Clutter Fast: A Simple Wooden Storage Rack Anyone Can DIY
We may receive a commission on purchases made from links.
With my chauvinistic Y chromosome shining through, I used to think that women were the guilty party when it came to an overabundance of shoes. But sadly, as I look to the entryway of my man cave, I must come clean to the fact that I have a big pile of footwear to manage myself. Often a literal pile. As a professional woodworker, I decided to design a simple shoe storage rack to tidy up my shoe clutter. The shoe rack I came up with is made from wood that you can easily find at your local big box home improvement store. On top of that, you only need a couple of essential carpentry tools to get the job done. So, if you are also tired of the clutter and ready to test your DIY skills, this rack might be for you.
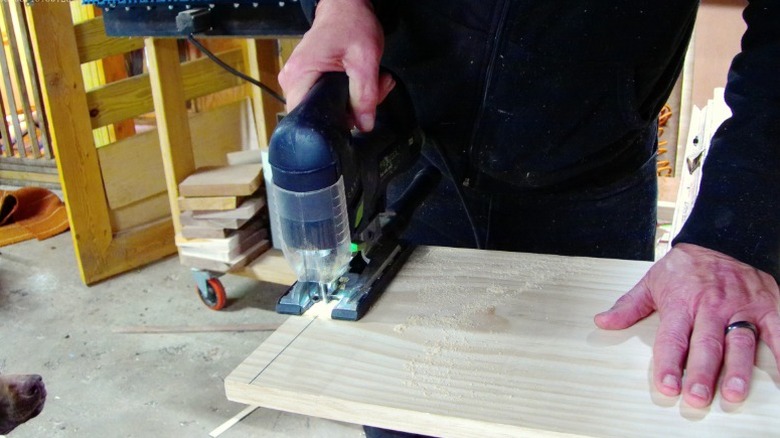
You will need an 8-foot 1-inch-by-12-inch board of select pine to make the sides and the shelves. "Select" is the top grade of lumber you'll find at home improvement centers and is worth the cost. Check the board to make sure it is flat and straight. Next, you'll need 1-inch diameter dowels. I bought two, both measuring 72 inches long. Also, if you don't have one already, pick up a drill bit that will bore a 1-inch diameter hole. A paddle bit will do the job and is probably your least expensive option. You will also need a saw of some sort that cuts wood well. In truth, you could easily use a hand saw for this project, but a jigsaw or a small circular saw will make the job go faster.
Square cuts are important to start your shoe rack project
I made my shoe rack 21 inches tall and 20 inches wide. It fit nicely into a spot by my entry door, near my coat and hat rack. You could easily make yours wider — you'd just need to cut the shelf and dowels longer. That is one of the great things about building your own custom DIY furniture. For my design, the shoe rack's material list included two 1-by-12 side supports, five 1-inch-thick dowels cut to 20 inches in length, and one shelf at 18 ½ inches long, which I'll discuss later.
Get started by cutting the two sides (each 21 inches long) from the 1-by-12 lumber. It is important that your cuts are square — 90 degrees to the edges of the board. A great way to ensure that is to mark your cut lines with a square.
The ends of dimensional lumber like 1-by-12s are often cracked, dented, or otherwise distressed. You can't assume that the end of the board is exactly square either. So, your first cut should be to trim off about an inch or so from the end of the board. With a fresh square cut in place, proceed to cutting your sides to length.
Lay out the construction details
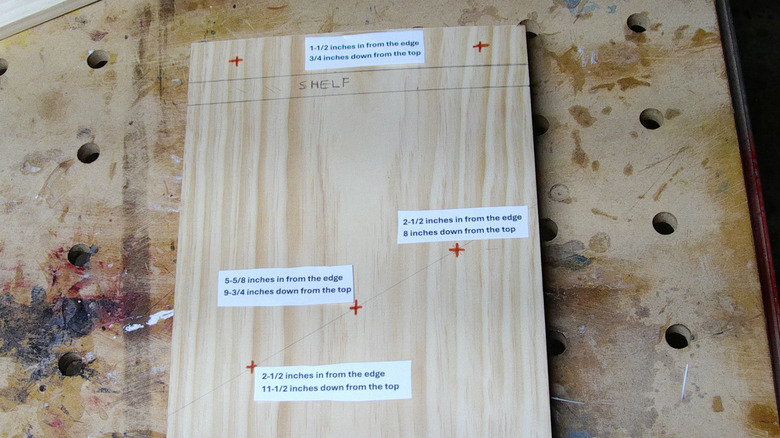
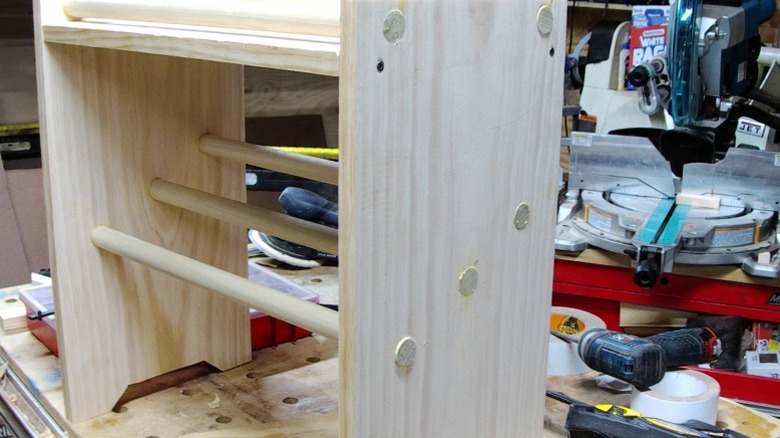
There are five 1-inch diameter holes that will need to be drilled on each side piece to make this shoe rack. Marking them accurately on the sides is crucial. The photo above provides an idea of where to bore the holes.
Following the diagrammed hole placement above, the very top holes are located 1 ½ inches in from the side edges and ¾ inch down from the top edge. The lowest mark (on the left of the board) is 11 ½ inches down from the top and 2 ½ inches from the side. Then, mark 5 ⅝ inches over from the side (essentially in the middle of the board) and 9 ¾ inches down from the top edge. The last location is 2 ½ inches in from the right edge of the board and 8 inches down from the top. Finally, mark the top of the shelf 1 ½ inches down from the top of the side. Now, your layout task is done.
I only marked out one side and then stuck the two sides together using double-faced tape (also known as carpet tape) and lined up the edges all around. I was then able to drill the 1-inch diameter holes down through both of the sides at once. This two-for-one approach ensures that all the holes will line up perfectly.
Drill the sides, and cut the dowels
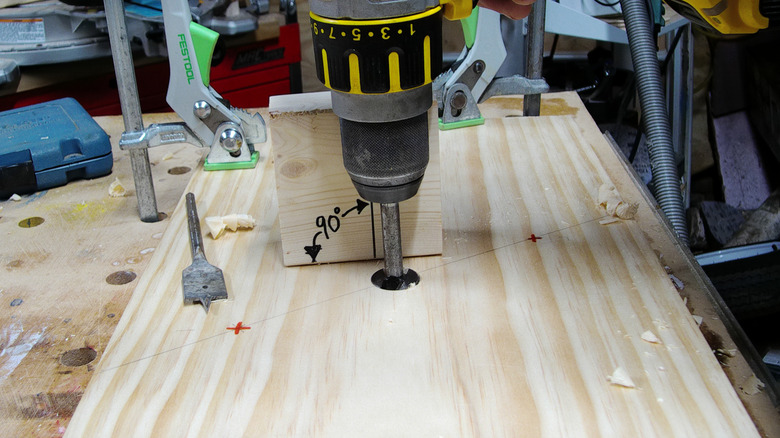
To bore the holes through both panels at the same time accurately, I used an easy drilling hack to help me know that I was drilling the hole at 90 degrees to the surface. It's a squared-up block of wood with a registration line on it that allows me to align my drill bit accurately in one orientation. The block itself also provides a visual guide for a second orientation. These two data points allowed me to drill squarely into the sides. Those 1-inch diameter holes secure the dowels, which hold the rack together and give the shoes a place to sit.
You will need to cut all five dowels to 20-inch lengths. When you do that, mark the cut location all around the dowel's circumference. If you are cutting the dowels with a handheld jigsaw or with a hand saw, that mark will guide your blade accurately through the whole cut.
I made "feet" on the side panels by cutting a small section out of the bottom edge of each side. I measured them to be 2 inches wide and angled at 45 degrees, exactly ¾ inches up the side. Then, I cut out the section. The feet are optional, but I think they add a satisfying detail and an intentional look to the design.
Cut the shelf, and assemble the shoe rack in stages
The last piece to cut is the shelf. Accounting for the dowels being 20 inches and subtracting 1 ½ inches (the thickness of the two sides together), you should cut your shelf to 18 ½ inches. But double-check the true thickness of your sides. I actually needed to cut my shelf 18 ⅜ inches long, as the sides were just over ¾ inch thick. Bear in mind that it's better to cut the shelf a bit short, since you can always sand down dowels that protrude from their holes. It's more difficult to fix dowels that don't reach all the way.
Sand all the pieces smooth. I sanded the sides and shelves up to 180 grit and sanded the dowels with 100-grit paper. Test the fit of the dowels in their holes. If it's too tight, sand the ends of the dowels until they fit smoothly.
To start assembling the shoe rack, attach the shelf to one of the sides. Position it 1 ½ inches down from the side's top edge. I used two counter-sunk screws to secure it. Lay the side on a work surface with the shelf sticking up. Put a bit of glue into each 1-inch-wide hole, and insert the dowels. Ensure they are completely through the holes and touching the work surface. Let the glue cure. Then, place the second side on top of the sub-assembly, just barely starting each dowel into their respective holes. Put a small amount of glue into each hole, and tap the side to push the dowels further into their holes. Drive screws to secure the shelf. Tap the side until the dowels are slightly proud of the surface. Stand the shoe rack upright, adjust it for square, and let the glue cure.
Finish up your shoe storage rack
When the glue has cured, sand the sides of the storage rack smooth. There will likely be mess and even drips around the dowel holes. That glue needs to be sanded completely away. Start with 80-grit paper, and work up to at least 180 grit. Take your time sanding. I recommend a random orbit sander to sand your wood pieces properly. Move it about 1 inch per second as you sand to ensure quality results.
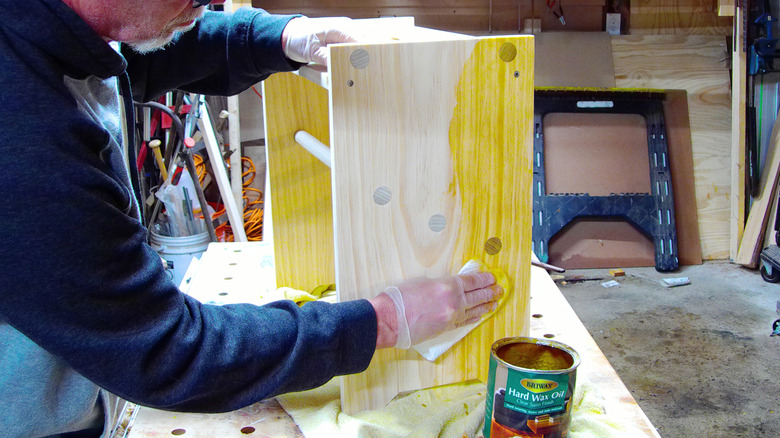
Applying a finish is a must with this project. Shoes, especially in the winter, bring with them moisture, grit, and grime. I chose General Finishes hard wax oil, as I prefer to see the natural grain of the wood and think the exposed dowel ends look great. But painting is also a good, tough, and protective finish for a shoe rack. If it ever becomes distressed, you can simply apply another coat. I put my shoe rack on a plastic tray to collect any water that might drip down. But if you were to use it to organize your shoes in a closet, there is no need for the tray — just set it up, and say farewell to shoe clutter.