Repurpose This Common Thrift Store Find Into Hidden Storage Gold
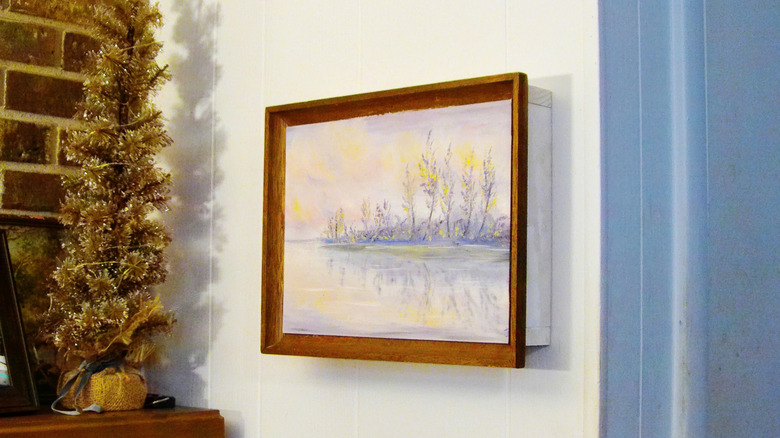
It's not often that I see a TikTok idea and get blown away, but this fun little project struck me as genius. As an expert woodworker, I guess I may have been a bit biased, but it just looked so fun! Then, inspiration struck me. My mother was a lifelong amateur painter, and when she passed a few years ago (at 93 years old), I acquired a few pieces of her artwork. With her paintings in hand and the TikTok idea in my head, I picked up a thrift store frame and repurposed it into hidden storage. The idea is to build a shallow shelf and mount the picture frame to it with hinges. The shelf visually disappears into the wall as the painting catches your eye and draws your attention ... but the hidden storage cabinet remains.
I'll walk you through the basic steps for this nifty little project, although it will become apparent that the specific dimensions for all the pieces will vary with the picture frame you are using. My mom's picture is a landscape, and it is presented in a landscape orientation (a horizontal rectangle). If your picture and picture frame are a vertical rectangle, you can see how that would change the shelf construction and where the hinges would be mounted.
Getting started on the shelf constuction
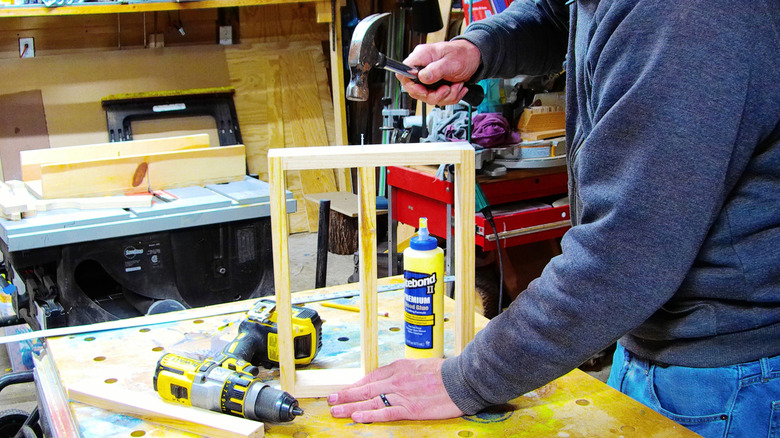
I recommend using dimensioned lumber; here I am using 1 x 3 select pine. If you want a deeper shelf, simply choose wider boards. The main frame of the shelf should be just a bit smaller than the back of the picture frame that you will mount onto it. Cut the vertical and horizontal pieces to length. Use basic butt joints nailed together with glue to form strong corners. I knew I wanted to paint my shelf white, so I used small white nails with small heads. One helpful tip to keep things easier when nailing small boards like these together is to predrill the nail holes. If you do that, you can put the nails into the predrilled holes before you begin and not need to hold them as you tap them in. It's so much easier!
My frame is relatively small (about 13 inches by 10 inches) and that limited me to a single shelf. If you have a larger picture frame, especially one that is a vertical rectangle, you could easily place more shelves in the opening. The shelf(s) need to fit snugly in place and then be nailed to secure them. Note the nailing strip at the top back of the shelf assembly. It is a narrow strip of wood fitting inside the frame (like the shelf), but attached to the top of the frame. It's used to mount the shelf onto the wall. You'll see it in use later.
The hinges and the magnetic catch
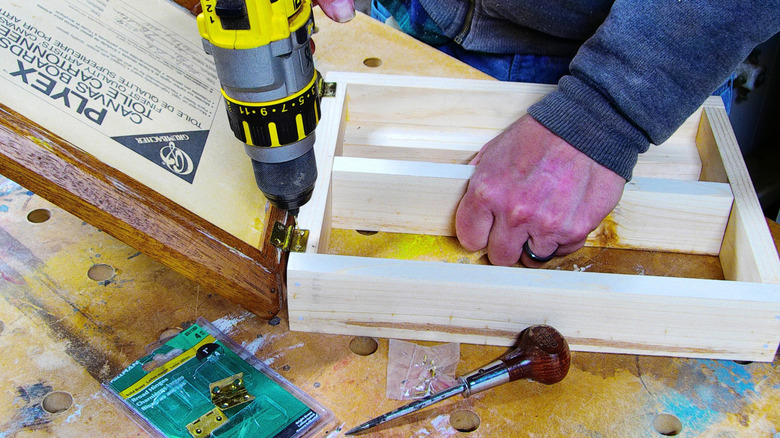
With the shelf frame completed, it's time to mount the picture frame to the shelf with hinges. I had some basic butt hinges lying around, so I used them rather than another type. Don't let anyone tell you otherwise; mounting hinges is a fussy process. Even after having mounted probably thousands of hinges of various types, I still find it a task that I don't look forward to doing. A couple of tips that will help. Mount the hinges to the shelf assembly first. But only use one screw per hinge at this point. Next, locate where the hinges will mount onto the picture frame. I often put some masking tape where they will sit, which lets me draw alignment marks without harming the finish on the picture frame. Again, only drill one hole and use one screw per hinge on the picture frame. If it turns out that you are misaligned, you can more easily adjust how the frame fits by drilling newly located screw holes. If you'd already drilled all the holes, they could get in the way of relocating the hinge. If everything lines up properly, drill the remaining screw holes and drive them in.
Mounting the magnetic catch is easily done if there is sufficient picture frame wood within the perimeter of the shelf assembly. In my case there was not, so I ended up mounting the catch under the shelf and hot gluing the steel strike plate to the back of the painting. The mother of invention, as they say.
The final steps
Now that the picture frame is properly fitted to the shelf assembly, it's time to remove the picture frame from the shelf assembly to apply a finish. Take the magnetic catch off as well. With that done, you can apply a finish of your choice. As I mentioned, I planned to paint the shelf component white. You can choose to stain the shelf assembly or finish it however you prefer. I sanded the shelf up through the grits, starting at 100-grit up to 180-grit. I had no nail holes to fill, but if you used headless finishing nails, now is the time to do that. I generally don't paint wood (in fact, I have a bit of an attitude about it), but in this case, it made sense. The shelf was going to be mounted onto the white wall in my "man cave" basement. Once your finish is dry, reassemble the frame and picture.
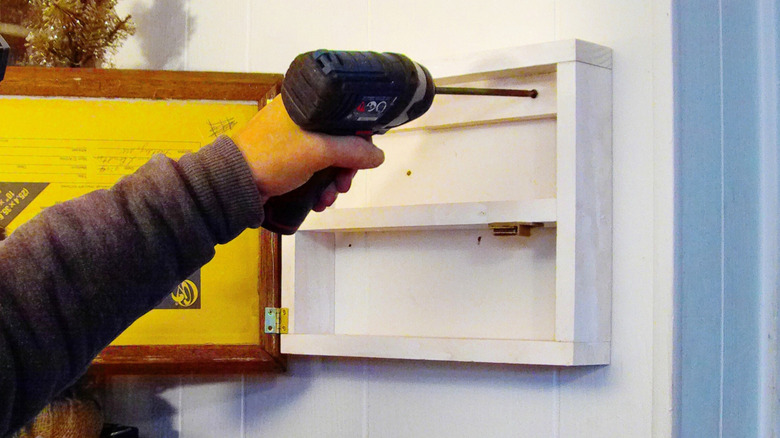
Note that I screwed the shelf to the wall through the nailing strip I mentioned earlier. You can place screws or nails anywhere along the width of the nailing strip (use at least two). Find a stud in the wall to firmly secure the shelf in place. This was a fun little project. I can say with certainty that it is the first I have made after being inspired by TikTok. For this old dog, it was a new DIY trick I was eager to learn. The shelf now holds and hides an extra set of keys, sunglasses, my dog whistle, and other ephemera.