Repurpose Empty Yogurt Containers Into A Unique Kitchen Storage Solution

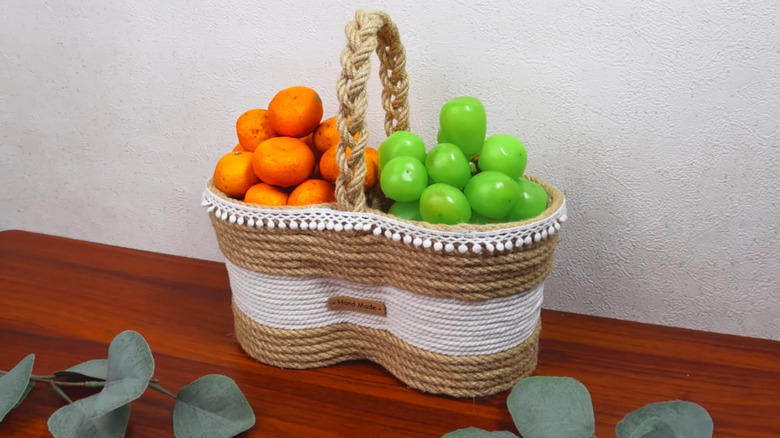
There are loads of ways to reuse glass yogurt jars in your home, from making simple candles to organizing your collection of cooking spices. As it turns out, big plastic yogurt containers can be just as useful. If you need extra kitchen storage, transform a pair of them into a basket with two compartments for napkins, cookie cutters, soup ladles, wooden spoons, or even pieces of fresh fruit. In addition to being versatile, this basket can also be customized to match your kitchen decor or reflect the type of cooking you enjoy most.
To turn two cylindrical yogurt tubs into this style of basket, gather a few different varieties of decorative string, some small pieces of cardboard, and durable fabric scraps that are at least 6 inches long and as wide as one tub's circumference. Then, grab a utility knife to make cutting a snap and a hot-glue gun to assemble everything. You could also find a cute embellishment for your basket, perhaps a gingham bow if your kitchen has a farmhouse vibe or a handful of acorn caps for textural appeal and a refreshing hint of nature.
Begin by tracing the bottom of a yogurt container on two pieces of cardboard. Cut out the circles and glue fabric to each one. Then, push the circles into the bottoms of the tubs. Also, make two fabric-covered cardboard rectangles that are about an inch wide and slightly shorter than the height of a yogurt tub. Finally, cut out two pieces of fabric that are as wide as the tub's circumference and an inch or two longer than the tub's height.
Crafting and customizing your double-barrel basket
To start assembling your basket, remove the rim from a yogurt tub. Take one of the larger fabric pieces and hot-glue it around the top of the tub, placing one of its edges about an inch from the edge of the opening to create a border. Cut a few flaps in the fabric and fold them into the tub's interior, gluing them in place as you go. Repeat this process with the other container, and then attach the tubs by gluing together small sections of their borders. Next, use the fabric-covered rectangles to hide the seams between the containers. Stick the rectangles' top edges to the border, near the spot where you glued the containers together, and their bottom edges near the bottoms of the containers.
The next step is winding the string around the basket's exterior. Glue it down in sections, making tight rows so each yogurt container is completely covered. For maximum visual impact, color-block the basket with contrasting hues of string. For extra textural appeal, use braided string on the basket's exterior. Or, choose yarn instead of string for a softer basket. Once you've finished decorating the outer surfaces, braid together some of the remaining string to create a handle and attach it to your creation.
You can also make use of any leftover materials from the project. Try fashioning a flower or bow from fabric scraps and attach it to your basket. If you still have the yogurt container lids, there are tons of craft-tastic ways to repurpose lids from plastic containers, such as making magnetic photo frames for your fridge.