The Stunning IKEA KALLAX Hack That'll Instantly Transform Your Cramped Entryway
Efficient entryway storage is a total game-changer, especially in small spaces where every square foot matters. No one wants to have guests walk in and be greeted by a cluttered pile of shoes, dog leashes, backpacks, reusable shopping bags, and whatever other chaos your family generates as they come and go from the house. The key to an organized and tidy entryway is having all of that mess tucked away out of sight. However, nice-looking, large-capacity storage consoles can cost a pretty penny, especially ones with a high-end aesthetic. However, Antoinette Chris-Oguta (@thequeentonie) shared on Instagram how she transformed a basic $79.99 IKEA KALLAX 2x4 cube storage shelf into a beautiful entryway console that makes a stunning first impression with guests.
By creating cabinet door frames with a recessed panel of rattan caning, as well as custom feet and hardware, Chris-Oguta created an affordable dupe for far less than woven door cabinets. These can go for hundreds at places like Target or Wayfair and even thousands at higher-end retailers like Pottery Barn, West Elm, or One Kings Lane. Her clever IKEA hack also hides eight cubbies worth of storage behind closed (yet ventilated) doors, which makes all the difference for keeping the entry neat.
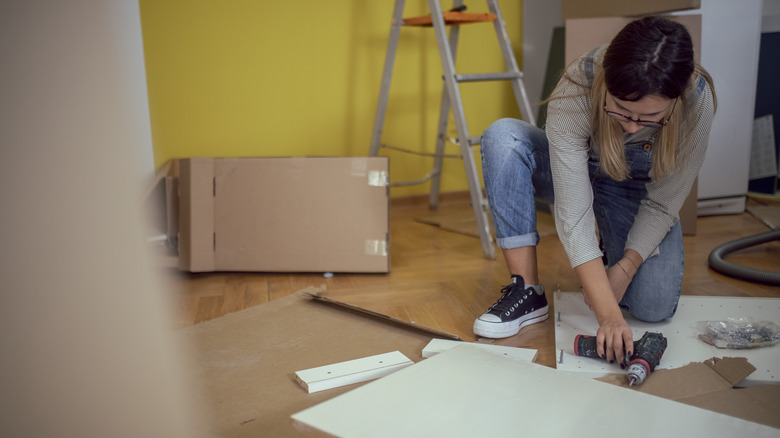
Before you begin this DIY, take a piece of the unassembled KALLAX to the paint store for a color match. Though the internet claims Benjamin Moore White Heron, Benjamin Moore Simply White, and Glidden Parchment White are all good matches to various "IKEA white" products, a custom match is best for getting the exact shade and sheen. Alternatively, the KALLAX is available in three other finishes, so you could always do contrast doors or paint-match one of those. Finally, assemble the KALLAX unit per the instructions, and you're ready to start your IKEA entryway DIY.
Create door frames for the IKEA KALLAX with 1x2 or 1x3 boards
The first step for personalizing your IKEA KALLAX entry console is to create door frames to fit each vertical pair of cubbies, or four in total, by cutting a 1x2 wood board to the right size. Let's jump ahead a bit and chat about hinge placement, as it may affect what size board you want to use to build the frame. It appears that the DIYer mounted the middle hidden hinges to the inner sides of the center divider but to the front of the frame on the outer sides so that those outer hinges are visible.
This is likely because the 1x2 door frame was not wide enough to accommodate the placement of the hinges on the inside of the wider KALLAX exterior frame (which is just under 1.5 inches thick), but if you use a larger 1x3 size board for the door frame, you'll have more room to mount an internal hidden hinge if desired. However, it's worth mentioning that the door frame will have a chunkier look and be thicker than the KALLAX outer frame when the door is opened if you go with the larger 1x3 boards to build it. It really comes down to your aesthetic preference of airier door frame versus hidden outer hinges.
Once you've decided on frame material and cut everything to size, pre-paint the pieces with your color-matched paint and let them dry. The Instagramer attached the four frame pieces together with a staple gun on the back to keep things in place, and brass L-shaped flat corner braces for stability on every rear corner of the rectangular frame. Caulk the seams on the front side and touch up paint for a seamless look.
Add decorative rattan caning, feet, and hardware to transform your IKEA KALLAX
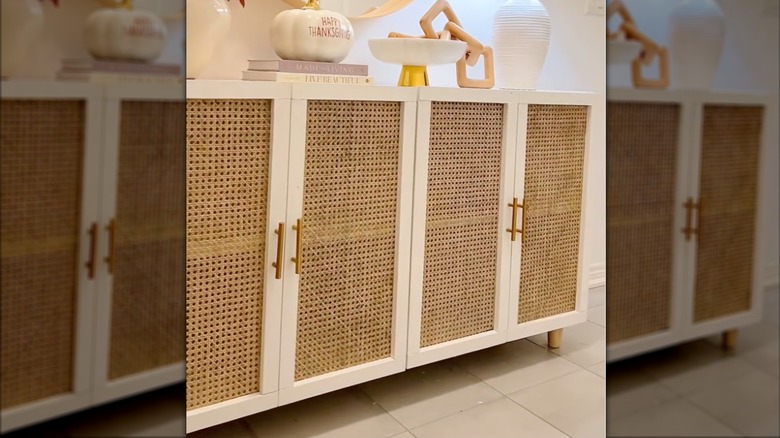
Now that the door frames are built, it's time to add natural rattan cane webbing to the inner frame area. There are several roll sizes and weaving patterns available, so select one that best fits your style and door dimensions. Cut four pieces from the roll to fit the back side of each door. Soak the pieces for about 30 minutes before attaching them to the frames in order to soften it, make it more pliable, and work out any kinks. Dry caning will be too stiff, brittle, and unforgiving to work with, so you risk cracking and imperfections. Use a staple gun every inch or two to attach the caning along the rear sides of the door frame so it's neatly visible on the front of the door.
Next, you are ready for final touches and to hang the new rattan doors. Add 3-5 inch tall feet to the bottom panel to raise the KALLAX off the ground and give it an elevated (pun intended!) aesthetic. If you choose a foot with a threaded top, you'll first need to install a leg mounting plate, like these brass Biaungdo Furniture Leg Mounting Plates ones, so the foot can screw in securely.
Once the feet are mounted, flip the unit right-side-up. Finally, attach the doors to the KALLAX frame with small brass door hinges in the placement as discussed above based on your frame material size. Once the doors are on, drill one or two hole(s), depending on if you select a knob or a pull, on each door and screw in decorative hardware. And voilà: with a little elbow grease and DIY magic, you've created a high-end looking entry console table with organic appeal on an IKEA KALLAX budget.