5 Things You Should Know Before Installing Floating Shelves
We may receive a commission on purchases made from links.
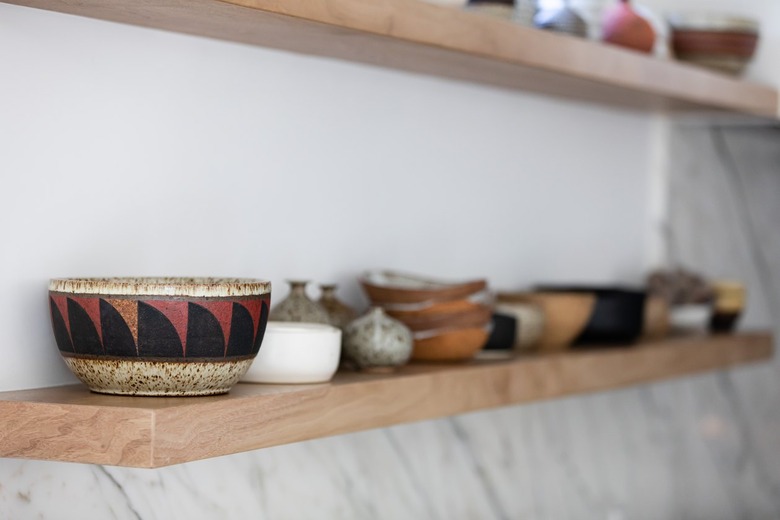
Floating shelves are a great way to add storage while filling any blank walls in your home. We especially love them because — unlike shelving that displays all its brackets, bells, and whistles — floating shelves offer a sleek, minimalist design. However, before you try to install a floating shelf on your own, there are some things you should know.
To help prepare you for your future floating shelves, we spoke with Kevin Anderson, the founder and "chief shelf nerd" of Shelfology, which recently collaborated on a collection with Semihandmade. "Nobody wants to start a project and run into problem after problem," Anderson tells Hunker. "Having some basic knowledge and tools at the ready will save you pantloads of time."
Before you get started, you should get the general idea behind the mounting hardware that makes floating shelves possible: "Aksel bracket hardware consists of horizontal support rods welded to a 1/4-inch steel flat bar with countersunk attachment holes for mounting to the wall," explains Anderson. "The shelf is milled to slide over and hide the bracket that is engineered and rated to carry calculated loads."
With this information in your tool belt, the Shelfology founder believes that there are five things you should know before you install your floating shelves.
1. Know what's inside your wall.
1. Know what's inside your wall.
"Studs and drywall might be the go-to for your average home build, but if you're in a high-rise, a historical location, or a modern loft, you could encounter anything from concrete block to lath and plaster or steel studs," Anderson explains. "Each material has different weight limitations and installation dos and don'ts, and each one needs a different type of anchor to make sure your shelving stays up."
In other words, don't start drilling into your wall without knowing what's going on underneath the surface. Otherwise, your simple floating shelf installation could become a much larger project.
2. Double-check that you have the right hardware.
2. Double-check that you have the right hardware.
Shelfology shelves ship with three different types of standard anchors that Anderson personally recommends:
- The GRK screw: "We recommend a contractor-grade screw that drills smoothly into wood studs and blocking for maximum leverage."
- The Toggler drywall anchor: "Holding 65 pounds an anchor, these plastic fasteners work in tandem with the GRK to fill in spaces between studs for better holding power. Their ability to grip the back of the wall from within gives your shelf the extra holding power needed to make sure no drooping occurs across its length."
- The Alligator masonry anchor: "These substitute for a standard drywall anchor when brick, stone, or concrete block walls are behind your surface. Paired with a GRK screw, they open to grip the inside of the stone surface and provide a tight hold."
For walls that have lath and plaster, metal studs, or hollow concrete blocks inside, you may need toggle bolts, molly bolts, or Tapcon masonry anchors. For these projects, Anderson advises, "Visit with your friendly neighborhood hardware man (or shelf geek!) before you get started."
You should also note that Anderson recommended both GRK screws and Toggler anchors (which come with their own screws) because he prefers the GRK's quality.
3. Gather and line up all the tools you'll need.
3. Gather and line up all the tools you'll need.
Though this might seem obvious, it could save you several surprise trips to the hardware store. "While your average IKEA shelf might need only a screwdriver or Allen wrench, heavy-duty shelving often requires a more thoughtful multi-step installation process," Anderson states. "Don't interrupt your installation with multiple trips to the hardware store; gather the right tools beforehand to avoid frustration."
Anderson specifically recommends having the following tools at arm's length:
- Stud finder
- Pencil to mark studs
- Level
- Measuring tape
- Power drill with multiple drill bits
- Phillips screwdriver
- Fastener set
4. Know your shelf's wood type, and have help at the ready.
4. Know your shelf's wood type, and have help at the ready.
"Chances are, if you have custom shelves made, you'll be selecting from hardwood options, and depending on the species you choose, you'll find that they will get ridiculously heavy, quickly, depending on their size," the Shelfology founder says. "Grab a buddy to hold the other end of the shelf as needed, so that your job will go smoothly and no one will lose a toe. Even the lightest shelves turn heavy when you're the only one holding them up!"
5. Pick the right type of shelf for the job.
5. Pick the right type of shelf for the job.
"This is the one [tip] we've built 10 years of creating radical shelving on," Anderson explains. "Before you start, ask yourself: 'How much weight do I need to float?'"
Anderson adds that the adage "form follows function" is key. "Your bowling ball collection will need stronger shelves than your Furby collection," he says. "Floating shelves can comfortably support anywhere between 25 pounds to 350 pounds if you select the right hardware and dimensions. Read the fine print on anything in a retail package, and don't go beyond the weight capacity listed."
If you've opted for custom shelving, choose the depth and thickness based on the items you want the shelf to support. "The shelf geeks recommend, at minimum, an eight-inch depth for shelves with lightweight displays, a 10-inch depth for bookshelves, and a 12-inch depth for kitchen shelving that can hold heavier plates and serveware."
