A Beginner's Guide To Painting A Room — From Taping To Cleaning Up

We may receive a commission on purchases made from links.
Unless you're the type of person who can't open a paint can without getting paint spatters everywhere, there's no reason not to approach painting a room as a DIY home improvement project. The actual painting can be a lot of fun, but before you get to that, there's prep work to do, and it's important. As the saying goes, 90 percent of a paint job is in the preparation, and proper prep will probably consume the bulk of the time it takes to do the paint job.
Wanting to change up the color of a room? Here's our definitive beginner's guide to painting a room.
The Basics of Painting a Room
The Basics of Painting a Room
Once you've decided on the colors, it all comes down to figuring out how much prep work there is to complete.
Basically, the job comes down to these five steps:
- Preparing the room
- Preparing the walls and ceiling
- Priming and painting the ceiling
- Painting the trim
- Priming and painting the walls.
Though some rooms may just need two coats of paint and nothing else, there are scenarios that require a bit of extra time. For example, if you live in an older home that has glossy oil-based paint on the walls, you'll have to spend some time de-glossing that, and a primer will be an absolute necessity before you paint. In fact, a primer is almost always necessary unless you're applying paint with the same sheen and a similar color to the original, but you may be able to forgo the primer if you use an all-in-one paint plus primer.
Tip
Even though volatile organic compounds aren't as much of a problem with latex paint as they are with oil-based paint (which isn't allowed in interiors anymore in many states), you'll still want to provide adequate ventilation and wear a respirator while painting. You should also wear old clothes because spatters are inevitable even if you are being careful. And a hood and goggles are recommended, especially if your DIY painting project includes the ceiling.
Using Painter's Tape
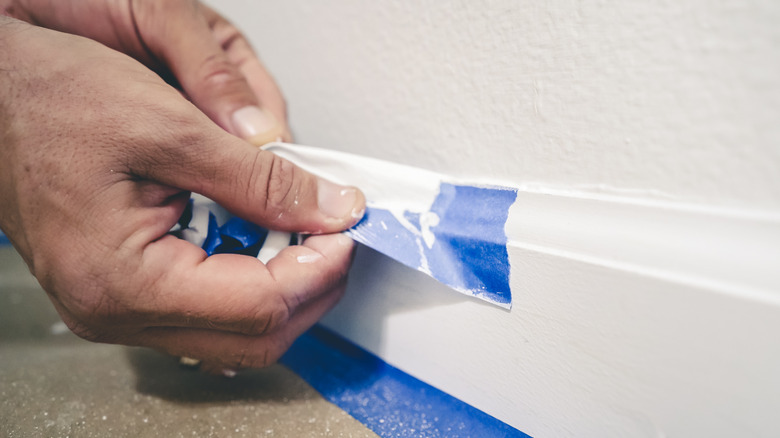
Using Painter's Tape
Experienced painters can get by with a minimum of masking tape because their steady hands and good eyes allow them to make faultless straight lines between surfaces of different colors. If you're a beginner who hasn't developed these skills, one of the most important painting tips to remember is that tape is your friend as long as you use low-adhesion painter's tape that won't pull paint off the surfaces when you remove it. Painter's tape is generally blue, but the best type, which is called Frog Tape, is green. It's worth the extra money it costs because it helps prevent paint seepage.
Tip
Instead of tape, you can also use a tool called a paint edger to get perfectly straight lines, which has wheels on it to help guide it along the edges of the walls.
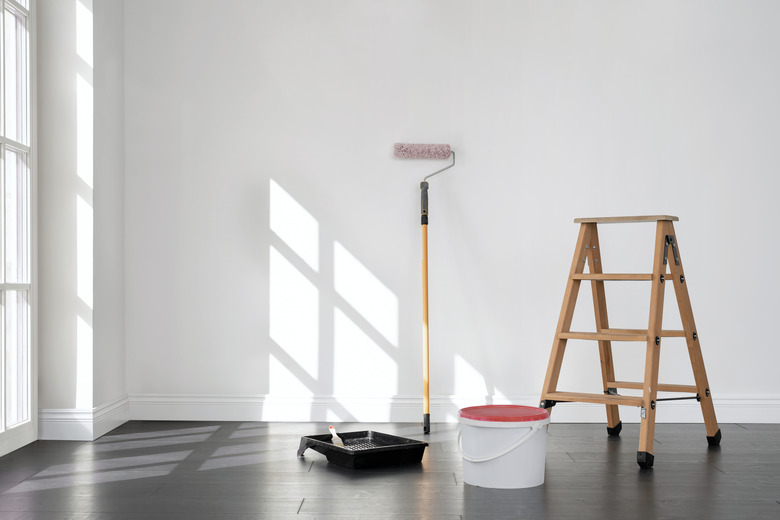
Tools and Materials You'll Need
Tools and Materials You'll Need
You need more than a can of paint, some masking tape, and a paintbrush to paint a room. The list of tools and materials isn't that long, but don't omit any and go for the best quality you can afford, especially if you plan to do more painting in the future.
- Drop cloths: You can buy canvas, plastic, or paper drop cloths. Canvas drop cloths are best by far because they stay in place and they absorb paint spatters so you don't track the paint around the house. Plastic ones are inexpensive but slippery, and paper ones tend to tear.
- Stepladder: A 6-foot stepladder is tall enough for most interior painting. Get one with a paint platform to give you somewhere to put your paint can.
- Cleaning solution: If you're painting over matte living room walls, you probably don't need to wash them, but you should wash semigloss or glossy walls, especially in the kitchen. You'll need liquid soap, a bucket for the soapy water, and a rag or sponge. For very greasy or glossy walls, use a strong detergent, like trisodium phosphate.
- Spackling compound: Small holes, dents, and cracks have to be filled, and the best filler is a lightweight spackling compound. You'll need a putty knife to spread it.
- Caulk and caulking gun: You need to seal gaps between the wall and ceiling and the door, window, and baseboard trim using a good-quality, paintable acrylic latex caulk. You'll need a caulking gun to apply it.
- Sandpaper: You'll need 120-grit or finer sandpaper to level the spackle after it dries and to scuff the finish if the existing paint finish is glossy. If you have to scuff the walls and ceiling, a pole sander will make the job much easier.
- Paint roller: Roller naps range from 1/4 inch to 1 inch, and the longer naps (1/2 inch or longer) work best for large, flat surfaces because they hold more paint. However, the longer the nap, the more texture the finished surface will have. Get an extension pole for the roller if you plan to paint the ceiling. You'll also need a roller tray, but if you're doing a large room, a roller grid that fits inside a 5-gallon bucket works better and prevents spills.
- Paintbrush: You'll use the paintbrush to paint the trim and to cut-in the walls before rolling. An angled 3-inch synthetic-bristle brush works best.
How to Paint a Room
How to Paint a Room
Now that you've assembled your tools and supplies, including enough paint for one coat of primer and two color coats (or alternatively, two coats of all-in-one paint plus primer), it's time to get down to work.
1. Prepare the Room
Move all furniture out of the room if possible. If you can't, move it all into the center of the room and cover it with drop cloths. Spread drop cloths on the floor. Your floor will be better protected if you use more than one to cover the entire floor instead of using a single drop cloth and moving it around as needed. If you use plastic or paper drop cloths, it's a good idea to tape the edges to the floor to prevent them from moving around.
2. Prepare the Electric Fixtures
Remove all outlet covers and switch plates and store them along with their screws in a box so they don't get lost. Tape around the bases of wall and ceiling fixtures you can't remove. If you have low-hanging pendant lights or chandeliers, it's a good idea to cover them with masking paper. You don't have to turn off the power to the room but remember that the exposed wires inside the electrical boxes are live and be careful not to touch them if you use an outlet or a light switch.
3. Clean the Walls and Ceiling
Wipe all dust from the walls with a clean rag or better yet a floor cleaning pad on a pole. If the walls have a matte finish and are in good condition, that may be all you need to do. If the walls have a sheen and are oily, wash them with soapy water. If the walls are very glossy, scuff sand them with a pole sander to make the finish more receptive to the primer. Pay special attention to the trim, which usually has a glossier finish than the walls.
4. Patch Holes, Cracks, and Gaps
Fill holes and cracks with spackling compound or drywall joint compound and sand the patches flat when the compound dries, which usually takes about 30 minutes. If you don't plan to prime the walls or ceiling, it's a good idea to apply touch-up primer to patches with a paintbrush. Spackling compound and joint compound tend to absorb paint, and patches will look a shade deeper than the rest of the wall without primer.
This is also the time to caulk gaps between window and door trim as well as baseboards and the wall.
5. Paint the Ceiling
Because paint spatters are inevitable when painting the ceiling, it's best to do it first. Ceilings are usually matte and seldom need to be primed, but you'll need primer if the ceiling is glossy or especially dirty. Also, if the ceiling has cove moldings, you'll want to paint those before you prime and paint the ceiling.
The first step in painting a wall or ceiling is to cut in, which means painting a 4-inch or so border around the perimeter with a paintbrush. Paint the rest of the surface with a roller immediately after cutting in. There's no need to wait for the paint on the border to dry; in fact, it's better if it doesn't.
Apply one coat of primer if necessary and then apply the first coat of paint. Let the paint dry and then apply a second coat. Depending on the size of the room, this may take a few hours, or it may take all day.
6. Paint the Trim
Using a 3-inch paintbrush, paint the door and window trim and the baseboards. You shouldn't need to put masking tape on the walls because any paint you get on them will be covered by the wall paint. It's a good idea to put masking tape on the floor under the baseboards, though, to avoid getting paint on the floor. You can also slip a long sheet of thin cardboard under the baseboards and move it along as you paint. This is a better technique if the floor is carpeted.
7. Mask Off the Trim
Apply masking tape on the sides of the trim that meet the walls. Be sure to press the tape firmly on the bottom edge to make a good seal and prevent paint from seeping underneath it. If there are ducts or pipes in the way, this is also the time to mask them so they don't get painted.
8. Work on One Wall at a Time
Cut in around the perimeter of a wall and then immediately roll the wall rather than cutting in the whole room. When you work on a single wall, the cut in is likely to still be wet when you roll and is less likely to dry to a different sheen. Start with primer if necessary and then apply two topcoats. If you're using all-in-one paint plus primer, skip the primer and apply two coats of paint.
Tip
When rolling, load up the roller so it's full of paint but none is dripping. Work in 3-foot-square sections from the top of the wall down, rolling in a "W" shape and going back with the roller to fill in. It's a good idea to have a paintbrush handy as you roll to brush out drips caused by excess paint. This ensures a quality paint job.
9. Clean Up Your Tools
It's good practice to clean your brushes and rollers as soon as you're finished with them, but if the job is going to take more than one day, leave them wrapped in plastic overnight to prevent them from drying out. Clean tools with soapy water in a bucket and dispose of the paint water responsibly; don't just dump it down the drain, especially if you have a septic system.
10. Remove the Masking Tape
Wait for the walls to dry completely (about 24 hours) and then remove the masking tape. Instead of pulling it straight off, which is guaranteed to remove some paint with it, run a utility knife along the edge of the tape to cut through the paint and then pull the tape off carefully at a 45-degree angle. Some of the paint on the tape may still be wet, so wear your painting clothes while doing this. Roll the tape into a ball and dispose of it.