How To Paint A Ceiling
We may receive a commission on purchases made from links.
If you can paint a wall, you can paint a ceiling. Granted, it's easy to wind up with a sore neck, but if you get some good information under your belt before you begin, you'll probably wind up spending less time on the project than you thought you would. So, familiarize yourself with how to paint your ceiling neatly and efficiently: Check out technique, gather your supplies, make sure you take precautions against painting what isn't supposed to be painted or dribbled on, and tackle it like a pro.
Painting Materials and Tools
Painting Materials and Tools
Most ceilings are painted with paint that has a flat sheen rather than a more shiny sheen such as semigloss. Flat paints do a better job than other sheens of hiding surface imperfections. And because ceilings do not get as dirty as walls or woodwork, the paint does not need to have the scrubbable qualities of more glossy sheens.
Any interior flat paint will do, but most major paint manufacturers offer special ceiling paints. These paints take a little longer to dry and they splatter less than regular paints.
Prepping for Painting a Ceiling
Prepping for Painting a Ceiling
Your painting project will go much more smoothly if you work in a room that's been properly prepared. When you decide to paint a room, you're usually excited about getting the show on the road, but it's important to be patient and to take all the necessary preliminary steps.
- Move out as much furniture as you can, and roll up and move area rugs.
- Cover what can't be moved, including floors, with drop cloths.
- Remove ceiling-mounted lights and fans, if possible. Ceiling fans often have a collar held in place by screws. You can often unscrew the collar and move it down the shaft of the fan. If you can't remove the fan's paddles, cover them and the fan motor with plastic.
- Ceilings usually don't have the nicks and dents that are found on walls. But if there are imperfections, repair them.
- Use a pigmented shellac primer to cover water stains and ceiling discoloration. If you paint over them without priming, the stain will eventually bleed through.
- Give living room or bedroom ceilings a quick brushing with a clean dust mop.
- If the ceiling is dirty or greasy, wash it using TSP (tri-sodium phosphate), following the directions on the label.
- Let the ceiling dry completely before painting. For new drywall ceilings, apply a primer/sealer before painting.
How to Paint a Ceiling With a Roller Extension Pole
How to Paint a Ceiling With a Roller Extension Pole
The directions that follow apply to ceilings that can be reached by standing on the floor and using a roller extension pole. For higher ceilings, you will need tall ladders or you can buy or rent interior scaffolds. These are usually narrow enough to fit through most door openings, and they are mounted on wheels so that you can roll the scaffolding to where you need it.
1. Organize the Work Area
While not absolutely necessary, one suggestion is to place the 5-gallon bucket, small paint container and spare rags in a low-sided plastic bin. The bin keeps everything where you can get to it quickly, drips are captured by the bin, and the hard plastic provides a firm base for your paint bucket.
Pour the paint into the bucket. Run a lint brush, or even the sticky side of masking tape, over the roller cover to remove any stray fibers.
2. Begin by Cutting In
Apply painter's tape along the top edge of the walls. Then, starting in a corner, use the sash brush to apply a narrow band of paint along the edge of the ceiling. Work out about 5 or 6 feet in each direction from the corner. When painting, work toward a wet edge: After laying down some paint, reload the brush, or roller, begin in an unpainted area and work back toward the wet paint. This helps to avoid lap marks when the paint dries.
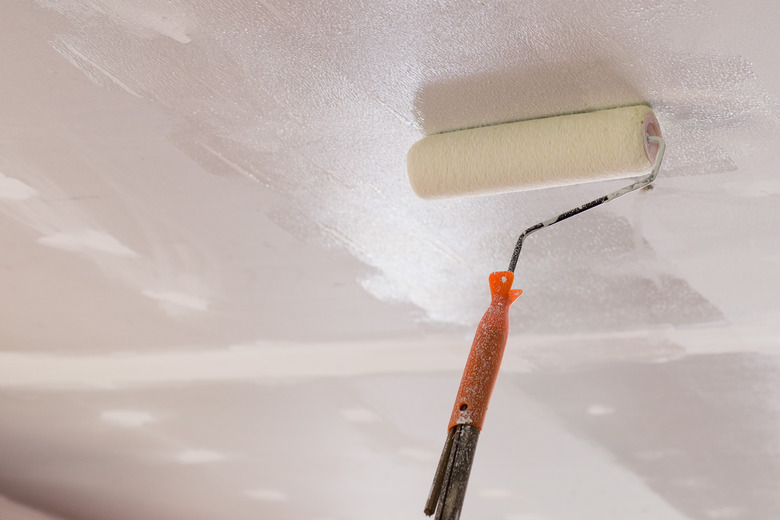
3. Roll the Cut-In Area
Load the roller by dipping it into the paint in the bucket and rolling it against the roller screen hanging inside the bucket. Begin rolling the area between the cut-in sides. Roll in one direction and then roll at a right angle to ensure even coverage.
4. Continue Across the Room
By alternating between cutting in and rolling you will set up a comfortable working rhythm.
5. Textured Ceilings Require a Soft Touch
Sometimes painting a textured or popcorn ceiling can damage the finish. Test the finish in an inconspicuous area before starting. If there is a problem, one solution is to have a professional spray paint the ceiling. But if the finish holds up, roll lightly and don't go back and forth as much as you would on a flat ceiling.
6. Pausing for the Day
If possible, try to complete the entire ceiling in one session. If you plan on working the next day, wrap the rollers and brushes in cling wrap and place in plastic bags. You can buy snap-on covers for 5-gallon paint buckets so there is no need to pour the paint back into the can.
If you won't be continuing, the only chore left to do is clean up.