The Complete DIY Guide To Plumber's Tape
We may receive a commission on purchases made from links.
If you're about to begin a plumbing project — whether that's swapping out a faucet in the bathroom or installing a new showerhead — you'll need a variety of tools to get you going, and it's crucial that you add plumber's tape to your toolkit. Plumber's tape may not be a lot to look at, but it has the utmost important job of helping to prevent plumbing leaks, and it does so brilliantly. It's super thin and very inexpensive, and it has some interesting characteristics, including a complete inability to get wet. The more you know about it, the more rolls you'll want to keep handy for your next DIY plumbing project.
What's In a Name?
What's In a Name?
The first thing to know about plumber's tape is that it goes by many names. While they will likely know exactly what you mean if you ask for plumber's tape at the hardware store, you may hear others refer to the product as thread-sealing tape, Teflon tape, or PTFE tape.
PTFE is short for polytetrafluoroethylene, which is the proper chemical name for the material from which plumber's tape is made. For obvious reasons, most people don't want to say (or spell) polytetrafluoroethylene, so PTFE became a convenient shorthand. Here's where things get interesting. People often call PTFE Teflon tape because PTFE is the chemical commonly known as Teflon. PTFE is Teflon, but PTFE tape is not Teflon tape.
Confused yet? Here's the deal: Teflon is actually a brand name for PTFE patented by a company called Chemours in 1945. Chemours doesn't make the PTFE tape used in plumbing applications, so technically, Teflon tape has never existed and is a misnomer. However, because PTFE and Teflon are chemically identical, people began referring to the tape as Teflon tape.
Characteristics of Plumber's Tape
Characteristics of Plumber's Tape
Perhaps the coolest thing about plumber's tape is that it's hydrophobic, meaning it repels water. You can't get it wet with water or a water-based liquid. This is why you'll notice the water beading up on Teflon pans when you wash them, and it's what makes the tape so good for plumbing applications. It's not impossible for a tape-wrapped plumbing joint to leak, but plumber's tape helps a great deal by blocking water rather than absorbing it.
Plumber's tape attaches itself well to pipe threads, but it is adhesive-free. This means that there is no sticky residue left behind if a pipe joint needs to be taken apart and refit later. This unique tape also stays flexible and pliable over time, so you need not worry about it failing with age. Although not necessarily critical for most household plumbing scenarios, plumber's tape is also chemically inert, arc-resistant, and able to handle the stress of fuel injection and other pressurized systems.
Choosing the Right Tape
Choosing the Right Tape
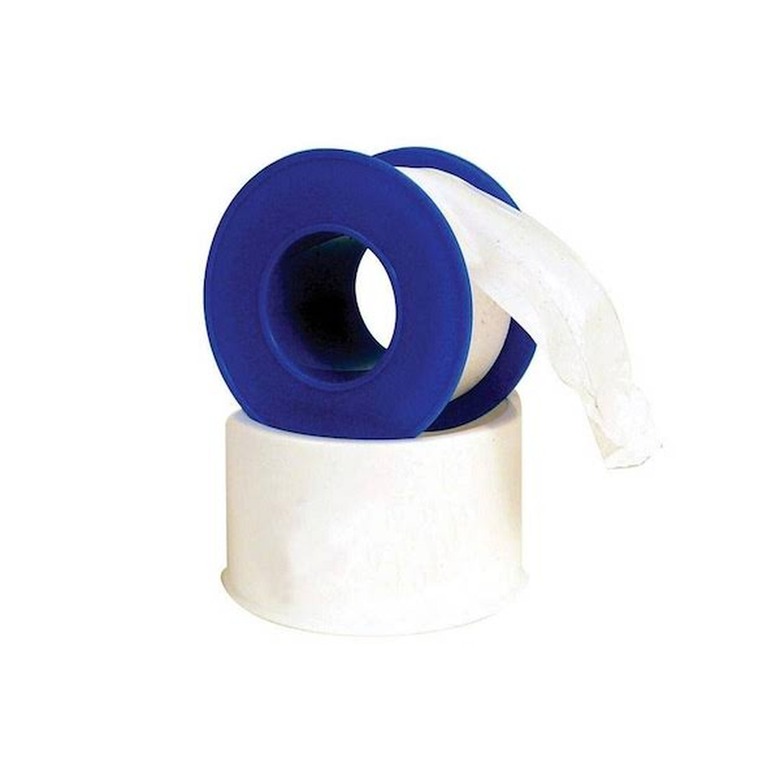
When standing in the hardware store, you'll find plumber's tape in different widths and colors. Choosing the right width is simple. You don't want the tape to be wider than the pipe threads you are wrapping. If your plumber's tape is too narrow, you can solve the problem by adding a few extra wraps. If it's too wide, you'll have to run back to the store and buy narrower tape, but wider tape is easier to work with if you have a lot of pipe thread to wrap. When in doubt, opt for a narrow roll as opposed to a wide one.
Next, you'll want to choose the right color, which is a choice that isn't about color at all. Plumber's tape comes in different thicknesses, and some applications, such as joining gas pipes, require thicker tape. These thicknesses are color-coded and you should use certain colors for specific applications. White is a general-purpose tape, pink is heavy duty, yellow is for gas lines, green is for oxygen pipes, and gray is for stainless steel.
While these colors are generally accepted, there is no official industry standard for specific tape application. As such, you should always check the thickness and recommended use of plumber's tape rather than assuming it is or is not adequate for a particular job based on color alone. Fortunately, most DIY home plumbing applications for water supply and drainpiping don't require anything fancy, and standard white tape is suitable in most cases.
How It Works
How It Works
It seems pretty incredible that a thin piece of nonadhesive tape can be such a powerful barrier against leaks, so you're probably wondering how this all works. When you wrap the threads of a pipe in plumber's tape, this super-thin material imbeds itself in the threads. This allows it to fill in any tiny gaps or pits present in the threads where water might creep through.
Plumber's tape also facilitates a smooth coupling. Almost friction-free, the tape helps the threaded male pipe twist seamlessly into the female pipe or fitting without resistance, helping to make a secure fit. Because it stays flexible and smooth even over time, plumber's tape can also make it easier to unthread pipes later if you need to take a plumbing joint apart.
When to Use (and Not Use) Plumber's Tape
When to Use (and Not Use) Plumber's Tape
When to Use
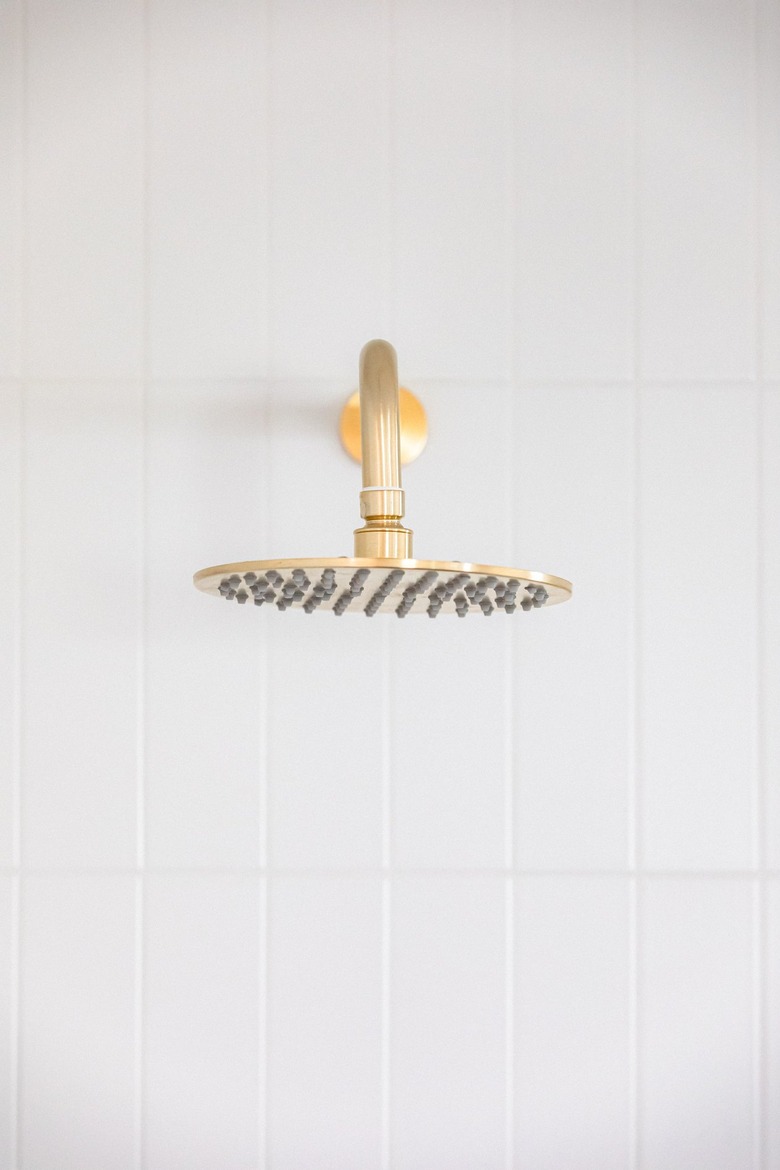
Plumber's tape is used to wrap the male end of threaded connections when joining pipes and couplings that screw together. It works particularly well on showerheads, tub spouts, and water supply lines. As helpful as it is, however, there are a few times when you'll want to skip the tape.
When Not to Use
One is when dealing with the female end of a pipe. Never try to smooth plumber's tape into the threads of a female pipe fitting. Use it on male ends only. Don't apply plumber's tape to compression fittings or in other situations where there is an O-ring or washer built into the connection.
How to Apply Plumber's Tape
How to Apply Plumber's Tape
When applying plumber's tape, the first step is to clean out the threads on the pipe with a small brush. This will remove any debris or material that could interfere with the seal. Leave the first one or two threads of the pipe bare so you can easily get the threads started later. Place the tape flat against the pipe below the skipped threads, hold it in place with your finger, and begin wrapping the threads.
You want to wrap the tape in the opposite direction the pipe will turn when it is attached to the mating fitting or pipe. This usually means wrapping it in a clockwise direction (when you're looking at the end of the pipe) but not always. It's important to get this right: When you turn the pipe into the mating threads, it should tighten the tape around the pipe. If you wrap in the wrong direction, the tape will unravel a bit when you turn in the pipe.
Keep the tape taut as you work and overlap each wrap a bit, placing each consecutive wrap over about half the width of the tape layer that came before. Keep wrapping until you run out of threads. Press the tape with your thumb and with the other hand, pull the tape taut until it breaks. This is a quick, easy motion, and it stretches the tape a bit so it seals to the pipe. Smooth the entire taped area with your hand, moving in the same direction that you wrapped it to make sure it lies flat against the pipe. You're now ready to join the pipe.
References
- NC Department of Insurance: Thread Compounds and PTFE Tape
- Northern Engineering (Sheffield): Teflon Vs PTFE ... What Really Are The Differences?
- Plumb University: Teflon Tape: How To Use And Choose The Right One For You
- RS Components: A Complete Guide to PTFE Tape
- BoshartU: Thread Sealant Tape: Where and How to Properly Use it
- YouTube: Roger Wakefield – How to Apply Teflon Tape/Plumber's Tape Like a Plumbing Pro!