Washing Machine Drain Standpipe: A Beginner's Guide
We may receive a commission on purchases made from links.
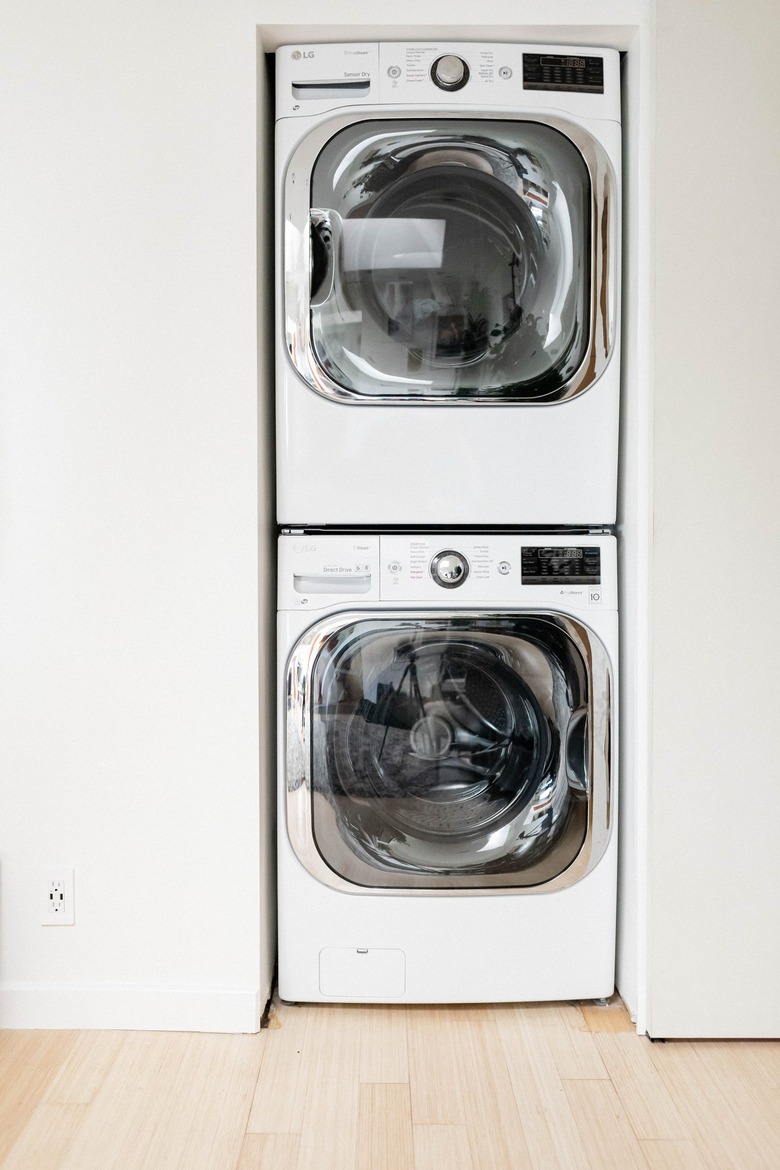
A standpipe is an efficient way to drain a washing machine, and it has advantages over relying on a wash tub or laundry sink for drainage. For one, a standpipe is more compact than a sink, so it takes up less space in the laundry room, and because the standpipe can be hidden behind a wall, it allows you to move your washer out of the basement or laundry room and into a more convenient area, such as a second-floor closet. If you still want a sink in the laundry room, however, don't fret: You can still drain it through the standpipe.
Whether you're moving your laundry machines to a new location, or just upgrading the laundry hookups to current standards, here's everything you need to know about a washing machine standpipe.
The Basics of Standpipes
The Basics of Standpipes
On the face of it, a standpipe is a fairly simple device: It's a vertical pipe into which the washing machine drains. The standpipe can be placed next to the washer or in the wall behind the washer.
As with all drains, a standpipe must be connected to a P-trap. (Traps, like the one under your kitchen sink, are always filled with water to prevent sewer gas from seeping into your home.) From the trap, the wastewater flows through a section of pipe that connects to the drain and vent system of the house. Plumbing vents are pipes that go up through the house and through the roof so that they can introduce air into the drainage system. This air balances the pressure within the system so that when you flush a toilet or drain a dishwasher, the water in the trap is not siphoned out of the traps.
Unless you're a fairly skilled DIYer, installation of a standpipe is typically best left up to a professional plumber — but still, it's helpful to note that washing machines drain from the bottom of the cabinet, and the drain hose should extend about 5 or so inches into the standpipe. Check the installation instructions for your machines to determine the recommended length. To keep things in place (as well as neat and tidy), hold the hose in place with a zip tie.
And although it may seem logical to seal the opening at the top of the standpipe, don't do this. The building code requires an air gap at this point to prevent a vacuum that could cause water to be siphoned from the washing machine.
Standpipe Building Codes
Standpipe Building Codes
Standpipes are usually made of either PVC (polyvinyl chloride) or ABS (acrylonitrile butadiene styrene). These plastic pipes are relatively inexpensive and easy with which to work. As with all things plumbing, standpipes must adhere to a number of building codes.
- Standpipe P-traps: They are 2 inches in diameter, and the top portion of the trap must be installed between 6 inches and 18 inches from the floor. Traps installed below the floor are prohibited.
- Standpipes: They are 2 inches in diameter. They can extend not less than 18 inches and not more than 42 inches above the trap.
- Connecting pipe: The pipe that connects the trap with the drainage and vent system must be at least 4 inches long (twice the diameter of the trap) and pitched about 1/4 inch per foot of run. The vent cannot be more than 6 feet from the standpipe trap.
A laundry sink can be hooked up so that it shares the same trap as the one on the standpipe. In these cases, the standpipe should be taller than the top of the sink so that if there is a blockage downstream, the basin of the sink would fill up before overflowing the standpipe. In addition, the drain for the sink must be 30 inches or less from the standpipe trap.
The 18-inch minimum height for a standpipe is designed to prevent water from overflowing as the washer drains. Besides overflowing, if a standpipe is too short, it could create a siphon effect as the washer drains, meaning the washer would continue to drain even if the pump is off. There could be a situation where the washer is filling and draining at the same time, such as between cycles. If the standpipe is too high, the washing machine pump may not be able to adequately move the water into the pipe, causing the water to backflow into the washer.
Alternative Venting for Standpipes
Alternative Venting for Standpipes
Sometimes, it is impossible to connect a standpipe or any fixture drain to the house's venting system. In those cases, an air admittance valve (AAV) can provide the necessary venting. These valves are also known as Studor valves, which is a brand name for these products.
An AAV lets air into the drainage system to prevent water from being siphoned out of the trap. The valves can serve one fixture, in which case it must be located not less than 4 inches above the horizontal portion of the drain after the drain trap. In these cases, the AAV would be installed in a sink cabinet.
They can also be installed in a stack that serves a number of fixtures. These are often placed inside walls, but the top of the stack must be 6 inches or more above the flood level of the highest fixture being vented. The flood level for a sink, for example, would be the top of the sink.
AAVs sometimes need to be replaced, so they must be accessible. If installed within a wall, provide access hatches or grilles to be able to service the vent. They can be installed to terminate in the attic, but make sure the vent is at least 6 inches above any attic insulation.
The installation of these types of valves is covered in the Uniform Plumbing Code and the International Residential Code, but they are not accepted everywhere. Check with the local building department before installing them.
 Home Depot
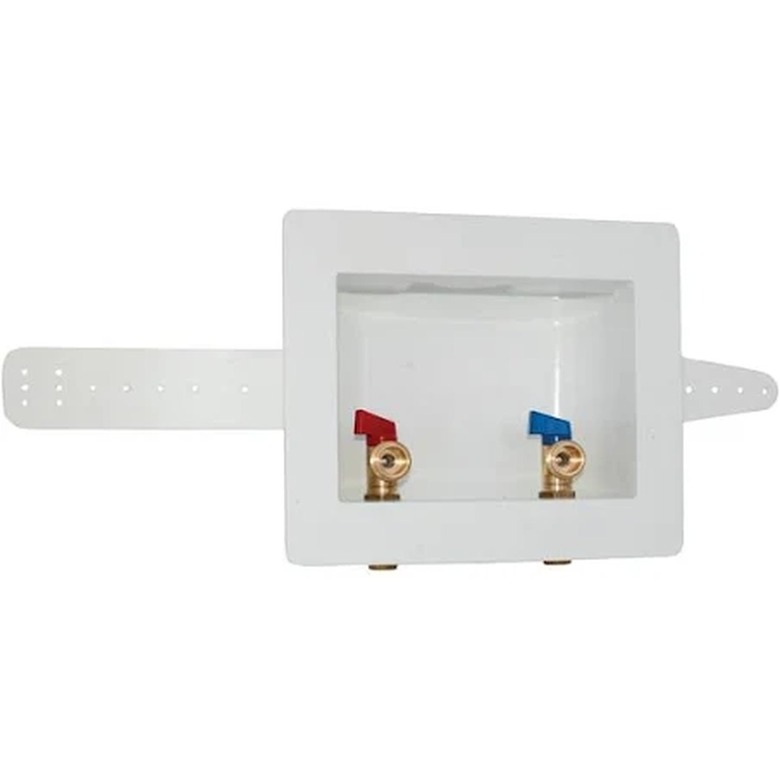
Outlet Boxes and Standpipes
Outlet Boxes and Standpipes
Washing machine outlet boxes provide a way to install the incoming water lines and the standpipe in a neat package. The boxes are made of plastic and provide knockouts (aka removable sections that are intended to be cut out) for the water valves and the standpipe. Some can be turned upside down for those instances where the water lines come from above.
The boxes are designed to be installed between the wall studs behind the washing machine, but be sure to follow the washing machine manufacturer's recommendation for the location of the box if DIYing the install. Installation is easiest before the drywall goes up, but if the drywall is already in place, a section can be removed and then patched after the box installation.
Most boxes come with the water valves for connecting to the washing machine hoses, and you can find them in any type of plumbing connection, including soldered, PEX, and threaded. The valves are available with or without water hammer arrestors (which are essentially devices that protect against the annoying and damaging effects of water hammer). When a fast-filling water valve closes, as it can on a washing machine, it potentially causes the pipes around the valve to bang, and the hammer arrestor stops the noise and vibration.
To connect the standpipe to the box, remove the knockout plug using a flat-head screwdriver, and attach the PVC pipe to the box using the appropriate cement.
Dealing With Standpipe Clogs
Dealing With Standpipe Clogs
If the standpipe overflows when the washer drains and the hookup meets the requirements regarding the diameter and length of the pipe, there is probably a clog in the standpipe or the trap. You can get an idea of the clog's approximate location by removing the washing machine drain hose and inserting a garden hose into the standpipe. If the standpipe fills quickly, the clog is located in the pipe or the trap rather than further downstream.
To clear the clog, you will need to use a drain snake, also called a drain auger. If the standpipe is behind the washer, move the washer out of the way. You will also need to remove the drain hose from the standpipe. Place drop cloths around the work area. Snaking a drain can get very messy, especially when you remove the snake from the drain after removing the clog.
Follow the manufacturer's directions for using the drain snake. Basically, you will insert the metal cable into the drain until you feel resistance. Then, you will lock the cable and begin poking at the obstruction. At some point, you should feel the clog give way. Withdraw the cable slowly.
Insert the drain hose back in the standpipe and turn on the washer so that the tub fills with water. Drain the washer to test your work. It may take more than one try to remove the clog entirely.