Tips For Hanging A Curtain Rod Just Right
We may receive a commission on purchases made from links.
If there were ever a home improvement project you can DIY, it would have to be installing a curtain rod and hanging curtains. Even still, there's plenty of opportunity — while climbing up and down ladders, making measurements, and drilling into drywall — to make small errors that you won't be able to ignore. Even though hanging curtains calls for some precision, it's still one of the most doable of DIY projects for anyone who can use a tape measure and operate a drill.
Ready to transform your home with window treatments? Here's how to hang curtain rods right every single time.
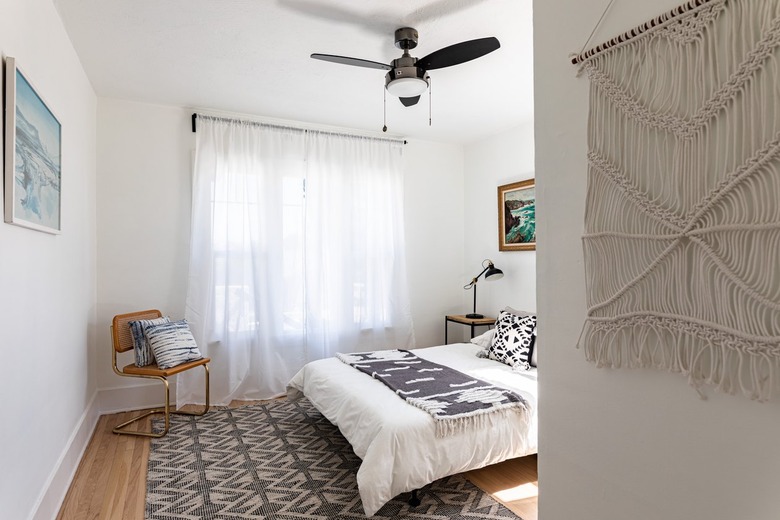
Bracket Placement and Window Exposure
Bracket Placement and Window Exposure
When the curtains are closed, they should completely cover the window, so as a rule of thumb, the width of the curtain panels should be at least twice the width of the window frame. When the curtains are open, you may want them to partially block the sides of the window to create an atmospheric feel, or you may want them completely out of the way to let in as much light as possible and make the window appear larger. Your choice affects the placement of the brackets that hold the curtain rod.
If your preference is to partially hide the window, you should measure 2 to 5 inches on either side of the window frame to determine where the brackets should go in relation to the frame. If you prefer the window to be completely exposed, set the brackets farther out — from 5 to as much as 15 inches from the outside of the window trim depending on whether or not you want the trim to be visible when the curtains are open. The wider you make this space, the larger the window will appear when the curtains are open.
Keep in mind, however, that you may be constrained by the placement of the window in relation to the corner of the room. The bracket needs to be far enough from the adjoining wall to leave room for the finials — the decorative end pieces you find on many curtain rods — and don't forget to leave a little space between the end of the finial and the wall so it doesn't look crowded. Whatever distance that placement allows between the bracket and the frame should be duplicated on the opposite side for symmetry.
Tips for Leveling the Curtain Rod
Tips for Leveling the Curtain Rod
In a house in which everything is straight, it makes sense to use the top of the window frame or the ceiling as a reference for the curtain rod using a tape measure to ensure both ends of the rod are the same distance from either the ceiling or the window frame. That's also a good plan when you set the rod closer than 2 inches to a window frame or ceiling that isn't level. If the rod is very close to an out-of-square ceiling or window frame and you make it level, it will draw attention to the out-of-level room feature and create visual discord, so it's better for the rod to follow the line of the feature closest to it.
When the rod is farther than 2 inches from both the window frame and the ceiling, it should be objectively level. Check both the top of the window frame and the ceiling with a spirit level and if either one is level, you can use it as a reference. Otherwise, use the spirit level to level the rod when you're installing the brackets.
You also have to worry about an uneven floor. Straight curtains hanging just above it will accentuate the unevenness and make it obvious. If a level check reveals the floor to be uneven and if you don't plan to put furniture in front of the window, you might want to consider increasing the gap to 2 inches or more or letting the curtains puddle on the floor.
Making a Bracket Template: Step by Step
Making a Bracket Template: Step by Step
Installing curtain rod brackets is a simple procedure, but it's easy to make a mistake, so if you have a square window frame to use as a reference, you might want to make a template from a flat piece of cardboard to help place the brackets precisely on either side of the window. Here's how:
- Cut a notch out of the cardboard to fit around one of the top corners of the frame.
- Use a combination square to draw a straight horizontal line outward from the corner of the notch and mark the horizontal distance of the bracket from the frame on the line.
- Draw a vertical line through that mark and make a second mark for the vertical distance of the bracket above the frame.
- Place the template on a work surface. Center the bracket on the second mark, use the combination square to make sure it's straight, and mark the positions of the bracket's screw holes. Drill through the holes with a 1/8-inch drill bit.
Now, you can set the template back in place, fitting the notch around the corner of the frame, and mark the positions of the holes on the wall with a pencil. Turn the template over and you can use it to mark the holes on the other side of the window frame.
 Stephen Paul for Hunker
How to Install Curtain Rod Brackets
How to Install Curtain Rod Brackets
After marking the holes for the brackets, drill pilot holes in the drywall for plastic screw anchors using a drill bit slightly smaller than the anchors (a 3/16-inch drill bit usually works). For heavy curtains, use heavy-duty wall anchors, such as toggle bolts. If a stud finder reveals a stud or a window header behind the holes, that's a bonus because you won't need wall anchors. You can drive screws directly through the drywall without making pilot holes and sink them directly into the wood framing.
When anchors are needed, tap them into the holes with a hammer until they are flush with the drywall. Set each bracket back in place and drive the screws partway using your drill or a screwdriver. Then, use the level to double-check that the bracket is vertical before tightening the screws all the way.
When you don't have a square window or ceiling to use as a reference, use a tape measure to mark the position of one of the brackets relative to the side of the window frame and the top of the frame or the ceiling, mark and drill holes in the drywall, and go ahead and install the bracket.
Set the curtain rod in the bracket, tighten the other bracket loosely onto the other end of the rod using the setscrew in the bracket, and lift the rod and level it with a level while you move the bracket the required longitudinal distance from the frame using a tape measure to measure this distance. When the rod is level and the bracket is the right distance from the side of the window frame, mark the screw holes, take down the rod, and install the second bracket.
Install the Curtain Rod and Hang the Curtains
Install the Curtain Rod and Hang the Curtains
When both brackets are secure, feed the rod through the grommets or hangers on the curtains, set the rod on the brackets, and tighten the setscrews on the brackets to secure the rod.
When you hang curtains that are heavy, such as insulating or blackout curtains, you may need a third bracket to prevent the rod from sagging depending on the width of the window. It should be centered midway between the other two, and the best time to install it is after you've installed the curtain rod because the rod will tell you exactly where it goes. Clamp the bracket onto the rod by tightening the setscrew, push up on the rod to make it level, and mark the screw holes on the wall. If you need screw anchors, remove the bracket and install them. Then, drive screws to secure the third bracket to the wall.
Complete the installation by screwing the finials onto the ends of the curtain rod. If the window is close to an adjoining wall, you may want to screw on the finial closest to the wall before mounting the curtain rod. If you're using tie-backs, use a tape measure to make sure they are the same distance from the floor and screw the holders to the wall or window frame using the hardware that came with them.