How To Install A Video Doorbell
We may receive a commission on purchases made from links.
A video doorbell was once regarded as an expensive high-tech wonder, but today's models are standard accessories that are both affordable and fairly easy for homeowners to install themselves as part of their smart home system. Better yet, a video doorbell can now offer a surprising range of additional features besides simply seeing who is at your door. A modern video doorbell attached to your smart devices through a downloaded app can also:
- Activate via motion sensor
- Offer night vision
- Provide a recorded vocal message to visitors
- Allow for two-way intercom voice communication
- Be monitored via smartphone or tablet when you are far away from the house
- Record high-definition video segments
- Alert you to neighborhood activity via the online app
- Coordinate with Alexa and other voice operation systems
Installing a video doorbell is a cinch — and you only need a few basic tools and a smartphone to get the job done in just an afternoon.
Video Doorbell Basics
Video Doorbell Basics
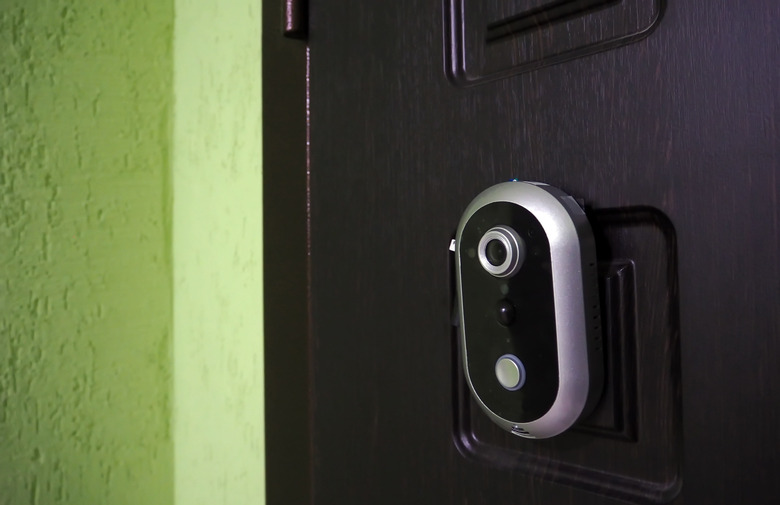
A typical modern video doorbell consists of a weatherproof doorbell button integrated with a motion sensor and small camera eye. Some models also have a built-in two-way speaker. Power to the camera can be provided in several ways: by a rechargeable battery, by connection to the old low-voltage doorbell wires or by a wired connection to an indoor plug-in power source.
The video doorbell requires a wireless internet router in order to transmit its video and audio signals between the camera unit and a smartphone, tablet, computer or monitoring device, such as Nest's video hub or an Alexa display monitor. The doorbell may "ring" only by sending an audible alert to your smart devices, or it may also send a signal to a traditional chime unit.
Video doorbells can be purchased in many different configurations, ranging from the doorbell/camera unit only to elaborate kits including a video doorbell, monitoring display screen, several home security sensor devices and an indoor chime. The cost can range from under $100 to well over $400 for the more complete kit forms. There are many variations to consider.
Hardwired vs. Battery Video Doorbells
Hardwired vs. Battery Video Doorbells
The first decision to make is whether you plan to install a battery-operated video doorbell or one that is hardwired to a power source — either the low-voltage wires that currently power a traditional doorbell or a plug-in power source specific to your new video doorbell. Some video doorbells can be adapted for either type of installation, but many are designed for one or the other.
Battery video doorbells can be the better solution for apartment dwellers, as landlords may restrict the installation of hardwired units. Another good option for apartment tenants is a video peephole, which is a unit that fits over the existing peephole, records video and offers two-way intercom communication with anyone standing at your front door.
Cloud Storage vs. SD Card Storage
Cloud Storage vs. SD Card Storage
The second major decision is how the video segments are stored by the system. Hardwired units usually offer more robust storage capability, with some recording video 24/7 and saving data to cloud storage. Others, especially battery-operated units, save relatively short videos when activated by motion sensors. Video doorbells that don't offer cloud storage often record their video by means of an onboard micro SD card that is mounted in the doorbell itself. When you want to review the video, the card can be removed and loaded into a computer.
Free vs. Subscription Video Storage
Free vs. Subscription Video Storage
Be aware that video doorbells using cloud storage may require a monthly subscription fee to enable all their capabilities. Some doorbells, for example, will store motion-activated video for 60 days in the cloud before erasing it but may charge you a fee if you want to review or download video segments. Others don't activate the cloud storage at all unless you sign up for a monthly subscription fee. This can add substantially to the cost of the doorbell, so read the specifications carefully when you are buying a doorbell.
 Amazon
Leading Manufacturers of Video Doorbells
Leading Manufacturers of Video Doorbells
There are dozens of manufacturers of wireless video doorbells, but a handful of companies have come to dominate the market. It may be a good idea to limit your choice to these manufacturers, as customer support is usually very good, and installation is very friendly to DIYers. Among the top manufacturers are:
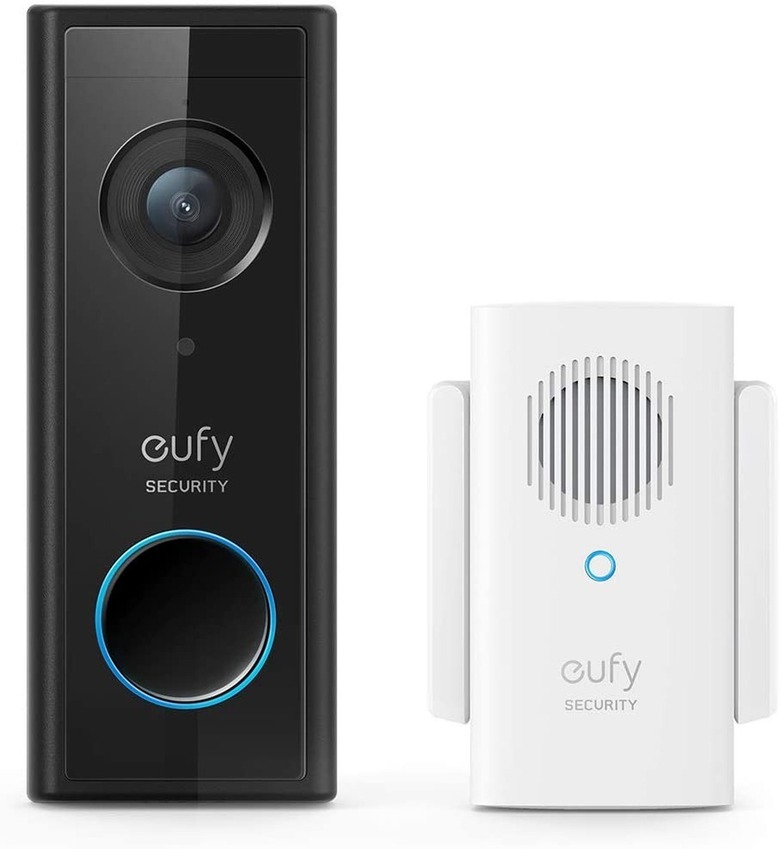
- eufy: Owned by Anker Innovations, a Chinese company, eufy makes a limited number of very good home security devices. Easy to install, these video doorbells come with no hidden costs. Video storage is via an internal SD card. These are basic video doorbells, but they are very functional.
- Samzuy: Although product offerings are limited, this company offers some very highly rated high-definition video doorbells. They include both an onboard SD card for video storage as well as the option for subscription-based cloud storage. These doorbells offer good performance for a reasonable price.
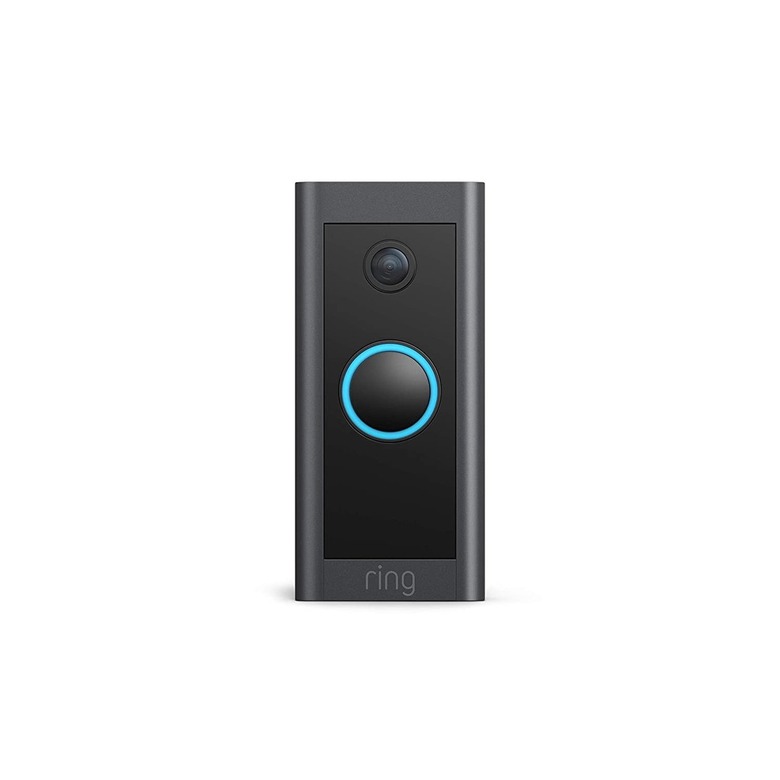
- Ring: This brand has become almost synonymous with video doorbells and other home security video devices. They offer video doorbells at many levels, often configured in kits with peripheral devices, but Ring devices all require a monthly subscription in order to use the video storage and retrieval features. Over the long haul, this can be an expensive brand.
- SimpliSafe: If you are already using a SimpliSafe home security array, adding a video doorbell is an easy job. However, these doorbells are not designed to be installed by themselves.
- Nest: Although designed to be part of the larger Nest home automation system, the Nest video doorbell can be installed as a stand-alone unit when paired with a smart device app. These are highly regarded but fairly expensive video doorbells, available only through Google.
Planning a Video Doorbell Installation
Planning a Video Doorbell Installation
The most trouble-free, easy-to-maintain installation is a video doorbell that is powered from a low-voltage transformer already present for an existing traditional doorbell. This will provide a constant power source, which means you'll never need to recharge batteries. It's usually fairly easy to identify whether your current doorbell is a low-voltage system simply by unscrewing the doorbell, pulling it slightly away from the door casing and looking for wires. If the doorbell has two attached wires, then you have a low-voltage system.
If there are no wires present, then your option will be to install a video doorbell that is battery-operated or one that makes use of an indoor plug-in power source offered by the manufacturer. Installation is easy to DIY, but it will require that you drill some holes to run wires to the indoor power supply.
How to Install a Battery-Powered Video Doorbell
How to Install a Battery-Powered Video Doorbell
Things Needed
-
Battery-powered video doorbell unit
-
Smart devices to run the video doorbell app
-
Dedicated chime unit (may be included with kit)
1. Charge the Doorbell Battery
Before installing the doorbell unit, fully charge the battery. With most, this involves plugging the doorbell to a micro USB cable that attaches to a power supply. You'll need to remove the doorbell unit each time you need to recharge the battery. A few models have a removable battery pack that can be removed from the doorbell unit when recharging becomes necessary.
2. Mount the Doorbell
With most video doorbells, installation begins with attaching a mounting bracket to the door casing outside the exterior door. Normally, this is simply screwed in place, but special anchors may be necessary if you're attaching the bracket to stone, brick or stucco.
After attaching the bracket, secure the video doorbell unit to the bracket. Most doorbells also have special security screws that are installed with a screwdriver provided by the manufacturer. This unique design prevents theft of the video doorbell.
3. Set Up the Smart Device App
Before the video doorbell will operate, you'll need to download the manufacturer's app on all devices that will run or monitor the doorbell. Connection to your home's wireless network will be established through this app. In rare instances, you might have problems connecting to the network, in which case it's possible that you'll need a Wi-Fi extender to boost the signal.
Once the app is installed, there are several customized settings you can adjust, such as the sensitivity of the motion activation, facial recognition, length of recording and adding two-factor identification to add security to your system. The degree of customization will vary depending on the manufacturer, and it can take quite a while to get the system operating just as you want it.
4. Install the Doorbell Chime
If you want your video doorbell to operate an audible chime as well as send alerts to your smart devices, complete the installation by installing a chime unit. It may come as part of the video doorbell kit, or it may be an add-on accessory. Normally, this will be a plug-in device that is best mounted in a central location where it will be audible throughout the house.
Once plugged in, follow the instructions for pairing it with your doorbell through the smart device app. Set the chime tone to whatever sound you wish.
 Amazon
How to Install a Hardwired Video Doorbell
How to Install a Hardwired Video Doorbell
Things Needed
-
New 16- to 24-volt transformer (if needed)
-
Indoor chime unit (optional)
-
Video doorbell unit
-
Smart devices to run the video doorbell app
-
Multimeter (if needed)
-
Screwdrivers
-
Drill and bits (if needed)
1. Shut Off Power to the Doorbell Transformer
Although doorbells operate on a low-voltage system that can't produce serious shocks, it's best to turn off the circuit breaker that powers the doorbell transformer. To verify that you've found the right circuit breaker, test the doorbell. If the power is off, it will not chime.
2. Find and Inspect the Transformer
The power provided by the transformer must be correct for the new video doorbell, usually 16 to 24 volts. Though you can usually trace the thin low-voltage wires that lead from the doorbell or from the chime unit, finding the transformer can be tricky. Sometimes, these transformers are attached to the side of the main service panel, or they may be attached to a junction box in the rough vicinity of the doorbell chime unit.
The voltage of the transformer will usually be stamped right on the unit. If there are no markings, you can test the voltage using a multimeter tool. If the old transformer doesn't meet the 16- to 24-volt requirement, you can replace it with a new transformer to make it work.
3. Inspect and Modify the Chime Unit
Find your chime unit and open the cover to determine whether it is a mechanical or digital chime. Mechanical chimes operate with a small hammer that strikes a chime tube, while digital chimes are essentially small electronic speakers. It is usually quite evident which type you have as soon as you remove the cover.
Follow the video doorbell manufacturer's instructions for how to adapt your current chime for the new doorbell. In some cases, no modification is needed, but with digital chimes, you may need to install a special adapter or diode where the wires from the doorbell are connected. If your chime unit doesn't work with the new video doorbell, it will be a fairly easy matter to disconnect it and instead install a new chime unit designed for your video doorbell brand
4. Remove the Old Doorbell
Unscrew the old doorbell from the case molding next to the entry door and then disconnect the two wires that are found on the back of the doorbell. Make sure not to allow them to slip into the opening; taping them to the molding can prevent this.
5. Install the Video Doorbell
Attach the mounting bracket for the new video doorbell to the case molding over the doorbell wires using the provided screws. With the mounting bracket in place, carefully attach the doorbell wires to the terminals on the back of the video doorbell unit. Then, attach the doorbell to the mounting bracket.
Conclude by attaching the security screws, which use a special design and are driven using a tool provided with the doorbell kit. These screws make it hard to steal the doorbell.
Tip
If you are installing a hardwired video doorbell but don't already have a low-voltage wired system, you will need to drill holes and run wires from the doorbell to an indoor power supply provided by the manufacturer. This will require a drill and twist bits.
6. Install the Doorbell App
Turn on the power to the system and then download the video doorbell app from the manufacturer to any smart devices from which you plan to operate the video doorbell. Follow the app's procedure for pairing the system with your Wi-Fi system and then proceed through the customization routine. This can include adjusting the system's motion-sensor sensitivity, adjusting the length of recorded video, recording a welcome message and detecting packages left on your steps. The app instructions will also walk you through how to subscribe to video storage or alert services. It is also a good idea to set up two-step authentication if the system allows this.