How To Build 4 Different DIY Compost Bins
We may receive a commission on purchases made from links.
Anyone with a garden of any size should have a compost bin to turn yard waste and food scraps into rich, organic material for amending the garden soil. Of course, you can simply pile compost in a corner of the yard, but the problem with this minimalist approach is that the best material for the garden is in the middle of the compost pile, where you can't reach it. One of the main purposes of a compost bin is to provide a way to turn the pile so you can access all the compost, and turning also ensures uniform heating and decomposition.
When it comes to DIY compost bins, there's no shortage of ideas, and most can be implemented with a minimum of effort and outlay of cash. Some involve lumber, and many call for some sort of barrel for which you can often substitute a recycled plastic drum or an old plastic trash can. If you don't have access to materials or you're on a budget, you can make a rudimentary compost bin using only a cardboard box.
What Makes a Good Compost Bin?
What Makes a Good Compost Bin?
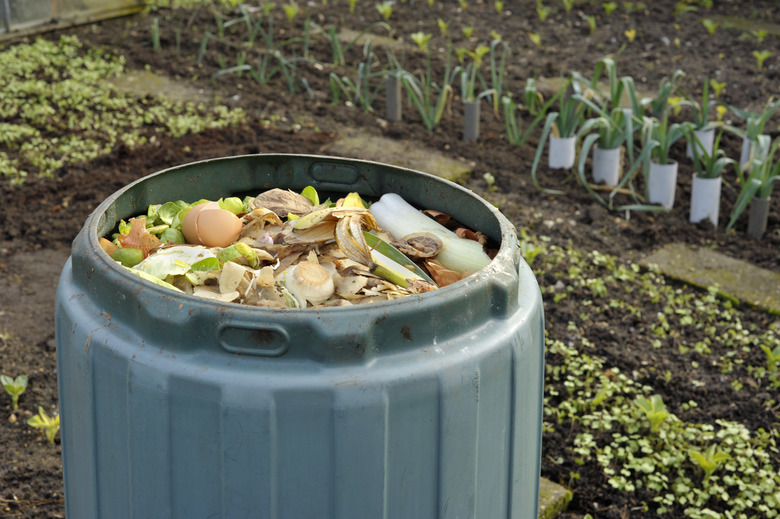
Compost is basically decomposed organic matter, and the raw materials can be grass clippings, dry leaves and kitchen scraps that don't include animal products (although egg shells add calcium to the compost and are good to include). Earthworms, centipedes, and other critters consume organic matter as they turn it into compost. Microbes, such as bacteria and fungi, feed on the compost and further decompose it into the soil. For all this to occur efficiently, there needs to be good airflow, so a good compost bin has open sides or plenty of holes for aeration.
Finished compost is a crumbly, loose material rich in organic matter, and its primary function isn't necessarily to act as a fertilizer but to improve the quality of the soil, loosening clay and fortifying sand with loamy material. To achieve this consistency, the compost needs to be turned periodically to evenly distribute the heat generated during the composting process and to prevent clumping of the raw materials. You can design a bin that allows you to do this by hand or with a pitchfork, or you can choose a rotating drum design that turns the compost with each rotation of the drum.
A good compost bin provides an easy way to add compost to the pile, to extract finished compost and to monitor the mixture for excess moisture. Good compost is a mixture of carbon and nitrogen — roughly 50:50. If there is too much nitrogen (which you get from green materials, such as grass clippings), the mixture turns into a smelly sludge, while if there's too much carbon (from brown materials, such as woody stems, cardboard and leaves), decomposition proceeds very slowly.
1. How to Build a Wood and Wire Compost Bin
1. How to Build a Wood and Wire Compost Bin
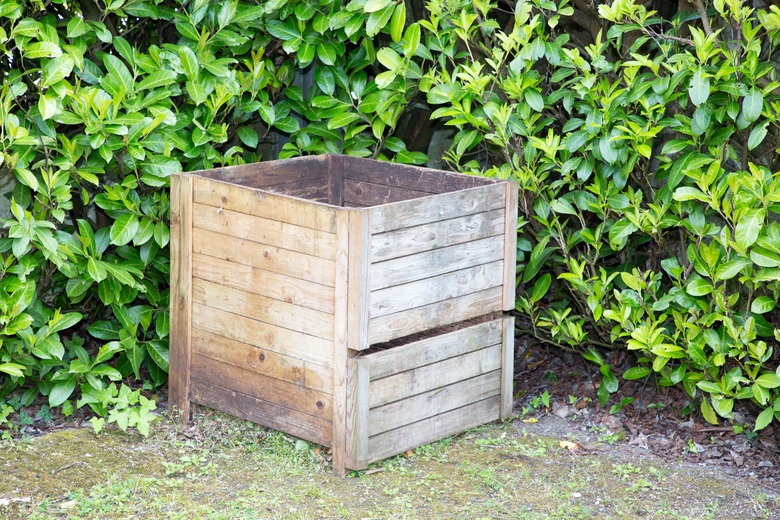
A wood and wire composting bin is one step up from an open compost pile, and its advantage is that it has three compartments so you can "turn" the compost by transferring it between bins. One compartment is for adding raw organic materials, one is for removing finished compost and one — usually the middle one — is an intermediate compartment where composting occurs. You can make this three-compartment composter using old wood from the yard or even pallets, but it's best to avoid pressure-treated wood because it could contaminate the compost and ultimately your garden.
- Construct four identical rectangular panel frames using 2x4 lumber. Stretch steel mesh, such as chicken wire, across each frame and staple it to the wood with fence staples. Two frames will form the outside of the bin and will need mesh on only one side, but two will separate the middle compartment and should have mesh on both sides. You can use wood pallets for the frames if you can find four that are the same size. The pallet slats will hold the compost, so there's no need for wire mesh.
- Construct three more panels for the back in the same way with mesh on one side. These don't have to be the same size, but they must be the same height as the side panels. You might want to make the back panel for the first compartment, where all the raw compost is deposited, larger than the other two so there is more room in that compartment.
- Fasten the back panels and side panels together with screws or nails to form a bin with three compartments. Reinforce the bin by fastening two pieces of 2x4 lumber long enough to span the length of the bin to the bottoms of the side panels and two identical 2x4s to the tops of the side panels at the front and rear. Set the finished bin on level ground before filling the first compartment with composting materials.
 Grahamphoto23/iStock/GettyImages
2. How to Build a Simple Compost Tumbler
2. How to Build a Simple Compost Tumbler
If you're adding only kitchen scraps to your compost every day or you're composting dense organic material, such as chicken manure, a single-compartment drum composter that you can rotate horizontally is more efficient than a bin or compost pile. To make the simplest version of a rotating drum composter, all you need is an old plastic garbage can with a tight-fitting lid and a pair of bungee cords.
- Find an old trash can to convert to a compost drum. If you don't have one, your neighbor might. As a last resort, head over to your local building center and buy one. Whichever one you use must have a tight-fitting lid, preferably one that snaps shut.
- Using a 3/8-inch drill bit, drill a large number of holes in the sides and bottom of the trash can.
- Insert 3/8 x 6-inch bolts through some of the holes and screw on nuts from the inside to hold them. These bolts create spines inside the drum that will separate the compost as you turn the drum and prevent it from forming clumps.
- Remove the handles of the trash can. Saw them off with a hand saw or a reciprocating saw. Doing this will make the drum easier to turn.
- Stretch a pair of bungee cords over the lid and insert the hooks through the holes you drilled to prevent the lid from falling off.
When it's time to add material to the composter, unhook the bungee cords, remove the lid, drop in the compostable material and replace the lid and bungees. To turn the composter, lay the drum on the ground on its side and roll it back and forth with your foot. To ensure proper composting, you should turn the drum at least once a day.
3. How to Build a Cardboard Box Composter
3. How to Build a Cardboard Box Composter
In Japan, which is a country full of apartment dwellers with no space for a conventional composter, composting in cardboard boxes has become trendy. It sounds as simple as composting in a 5-gallon bucket, and it is, but you have to take precautions against deterioration of the cardboard, and you do that by filling the box with dry material and adding kitchen scraps only in the middle of the box.
- Secure the seams. Use duct tape, heavy-duty packing tape or PVC tape on the sides and bottom of the box. Insert an extra sheet of cardboard in the bottom to keep the compost out of contact with the box.
- Fill the box 2/3 to 3/4 full with coco coir, peat moss, rice hulls or a combination of these materials. Stir the mixture.
- Dig out a cavity in the center for adding your food waste to the mixture. Be sure there are at least 4 inches of material between the bottom of the cavity and the bottom of the box. When you drop food waste into the cavity, be sure to cover it with topsoil. If you use a 2-foot-square box, you can safely add about a pound of food scraps each day, and in about three to four weeks, you should have plenty of rich soil to add to your garden.
4. How to Build A Rotisserie-Style Compost Tumbler
4. How to Build A Rotisserie-Style Compost Tumbler
A more sophisticated version of the rolling tumbler made from an old trash can has a plastic 55-gallon drum suspended on an axle attached to a wooden frame. Use a barrel that is closed at both ends, such as one that would be used to store and transport vegetable oil or some other edible liquid (not a fossil fuel or solvent for cleaning or painting). If you mount the tumbler at an appropriate height, you can roll a wheelbarrow underneath the drum when it's time to empty it. Several frame designs are possible, but one of the simplest consists of two identical triangular sides joined at the bottom by braces.
- Create the triangular sides. To create each side, cut a 30-degree angle on one end of each of a pair of 8-foot 2x4s and screw the ends together to form a triangle with an open base. Fasten a shorter length of 2x4 across both sides of the triangle about 3 feet from the apex as a cross-brace to stabilize the triangle and support the drum.
- Cut a rectangular opening in the drum that is large enough for a shovel, using a reciprocating saw — 14 inches long by 11 inches high is a good size. The door will need hinges and a latch. An efficient way to attach the hinges is to cut the line for the top of the door and screw on the hinges before cutting out the rest of the opening. Attach a metal strip to the inside bottom of the door opening, using roofing screws, to provide a landing (like a door stop) for the bottom of the access door. Attach a latch that will keep the door securely closed while you're turning the drum.
- Make the axis. To create the axis, first mark the center of each end of the drum using a ruler or tape measure. Drill a 1 1/4-inch hole at the mark, using a drill and a hole saw. Feed through a length of 1 1/4-inch PVC pipe that is long enough to extend through the drum and 2 inches beyond each end. Feed a length of 3/4-inch galvanized steel pipe through the PVC pipe. The steel pipe should be long enough to extend about 6 inches beyond each end of the drum.
- Drill several 1/4- to 3/8-inch aeration holes in the drum. Optional: You can insert 6-inch bolts into some of the holes and fasten them with nuts on the inside of the drum (creating spines inside the drum) to prevent the compost from clumping as you turn the drum.
- Measure the length of the PVC pipe and cut two lengths of 2x4 lumber that are 6 inches longer. Use these to fasten together the two sides of the frame, placing them about a foot off the ground. The 2x4s should overlap the edges of the triangle boards, with the ends coming flush with the outsides of the triangles. This should make the distance between the cross-braces same as the length of the PVC pipe.
- Drill a 3/4-inch hole in the middle of each of the cross-braces. Support the drum with the ends of the PVC pipe lined up with these holes and pass through the 3/4-inch galvanized steel pipe so it runs through the cross-braces to support the drum. The steel pipe should extend about 2 1/2 inches past the frame on both sides. To prevent the steel pipe from moving, drill a 3/8-inch hole through each end, insert a nail and use pliers to bend the end of the nail so it won't come out.
References
- University of Missouri Extension: Making and Using Compost
- University of Arkansas Cooperative Extension Service: Wood-and-Wire Three-Bin Turning Compost Bin
- Tenth Acre Farm: Building a Compost Bin (6 Ways)
- The Japan Times: How to Compost in a Cardboard Box at Home
- Community Chickens: DIY: Chicken Manure Tumbling Composter