How To Build A Simple Raised Garden Bed
We may receive a commission on purchases made from links.
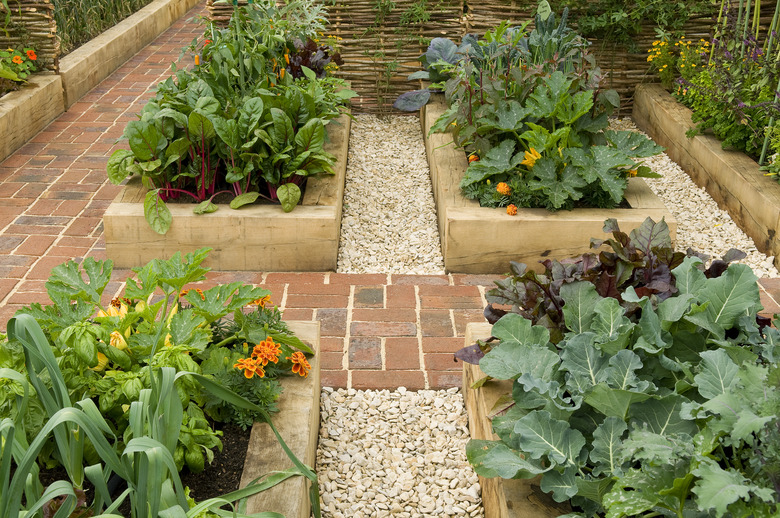
One important reason to build a raised garden bed is to make use of a patch of land that would be otherwise unsuitable for a garden, and there are plenty of other reasons to go along with that one. Consider the difference in the amount of effort involved with digging up compacted clay soil full of rocks and turning it with organic matter versus building a raised garden bed, which will take just a few hours if you keep the design simple. A DIY raised bed won't be hard on your bank account either, and you'll probably spend less than $100 making it.
A raised garden bed provides so many advantages over a garden planted in the ground that you'll probably wonder what took you so long to build one, and you may end up building another one. There will be no more working on your hands and knees to pull weeds and otherwise maintain the garden, and with proper foresight, you can all but eliminate your gopher problem. A raised bed helps keep the garden out of the reach of toddlers and pets, and it's better for the plants too because the soil warms up more quickly and stays warm longer, which can extend the growing season. If you fill the bed with quality soil the first time you use it, you can reuse the soil year after year, just adding soil amendments as needed to replenish nutrients.
Best Raised Garden Bed Materials
Best Raised Garden Bed Materials
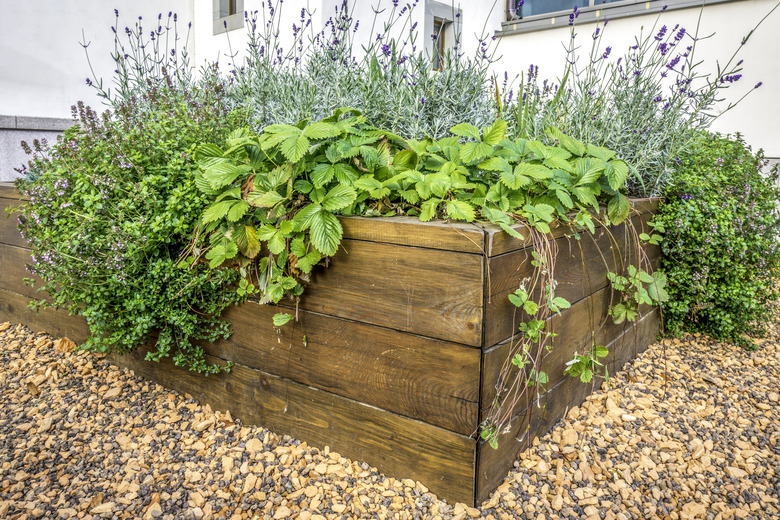
You can make a raised garden bed from a variety of materials, but for many reasons, wood is probably the best. It won't overheat in full sun the way metal and concrete do, it's one of the easiest materials to work and it's relatively inexpensive. You may even have some lying around the garage that you can use, although only unpainted wood is suitable.
Warning
Any type of wood coating, including paint, varnish and stain, contains harmful chemicals that you don't want leaching into the soil around your garden, especially if you're starting a vegetable garden. It's especially important to avoid painted wood that is very old because the paint may contain lead, and that's something you definitely do not want in your garden soil.
It's easy to find raised garden bed kits online, and if you browse through them, you'll find some that look like converted stock tanks and many more featuring wooden boards that you fasten together. Both wood and galvanized steel are subject to deterioration, and it's a toss-up as to which will last longer, but the facts that the chemicals used for galvanizing can leach into the soil and that metal becomes extremely hot in the sun make wood a safer choice, even though some assembly is required. Now that you've browsed the kits and put away the computer since you don't really need a kit, all you need is some unpainted lumber, and it doesn't even have to be pretty.
Choosing Wood for a Raised Bed
Choosing Wood for a Raised Bed
Technically, you can use any kind of wood to make a raised bed as long as it's sturdy enough to hold dirt, which means it should be at least 3/4 inches thick, although twice that thickness is preferable. If you want the bed to last as long as possible, you should use a rot-resistant wood species, such as redwood, cedar or a less familiar material, like juniper or yew. All of these will last longer than raw Douglas fir, pine, or spruce, and they'll even outlast hardwoods like oak, but all types of wood should last at least five years, and if you keep the bed design simple enough, you can replace boards when they rot.
Pressure-treated pine and fir are probably the most durable options of all, especially if they are rated for ground contact, but approach pressure-treated wood with caution. You have to know which chemicals were used in the treatment process because only some are safe to use around the garden. Rule number one is to avoid treated wood that you find on old woodpiles.
According to the Environmental Protection Agency, the following treatment processes are safe:
- Alkaline copper quaternary (ACQ)
- Borates
- Copper azole
- Copper naphthenate
- Copper-HDO
- Polymeric betaine
ACQ is the most common treatment for residential wood, and ACQ and copper azole are the two types you'll find at most building centers. Wood treated with creosote and chromated arsenicals (CCA) used to be readily available but is no longer prevalent, primarily because it's toxic. You won't find creosote-treated or CCA-treated wood in stores, but you may find it in piles of recycled lumber, and without a label, you can't identify it. That's why if you choose to use pressure-treated wood for your garden bed, you should buy it new. Stay away from old railroad ties because they are treated with creosote.
Tip
If you're concerned about wood treatment chemicals leaching into the soil of beds for growing vegetables or other edible plants, use untreated lumber made from a naturally rot-resistant species instead.
Raised Garden Bed Design Considerations
Raised Garden Bed Design Considerations
Although you have a lot of flexibility when it comes to the design of your raised garden bed, there are a few limitations to keep in mind. Here's what to consider when designing a raised garden bed:
- Depth: The bed has to be deep enough for the plant roots, and that varies according to what you're planting. A depth of 8 to 12 inches may be enough for a flower garden, but if you want to grow trees, root vegetables or plants with deep taproots, like comfrey or horseradish, a depth of 24 inches is more suitable, and nothing stops you from making the bed even deeper if you want.
- Width: It's best to limit the width of the bed to 4 feet to make it easy for you to reach the center, and if you build more than one bed, leave at least 18 inches between them so you can pass through.
- Strong support: If you make a raised bed out of wood, which is the most common material, you can do it simply by screwing 1x (3/4-inch-thick) lumber together at the corners, but that's a flimsy design that could fall apart if any of the boards split when they dry out in the sun. A sturdier design calls for posts at all four corners sunk into the ground, and if you don't scrimp on their size, the bed can be strong enough to support a trellis for growing peas, tomatoes and other climbing vines. Similarly, using beefier 2x (1 1/2-inch-thick) lumber for the sides of the bed will add many years onto its service life.
- Pest control: An important factor to consider before you construct the garden bed is how to keep out unwanted critters, including hungry gophers from below and marauding deer from above. You can handle both with well-placed gopher wire either at the base of the bed or stapled to stakes attached to each of the posts, which is another reason to make the posts as sturdy as possible.
- Watering: You should also think about the irrigation system you plan to use. If you're planning to install a drip system, it may be prudent to make holes in the sides of the box and feed through drip tubing before you fill the bed with soil.
Things Needed
-
Angular drain rock gravel
-
Cardboard
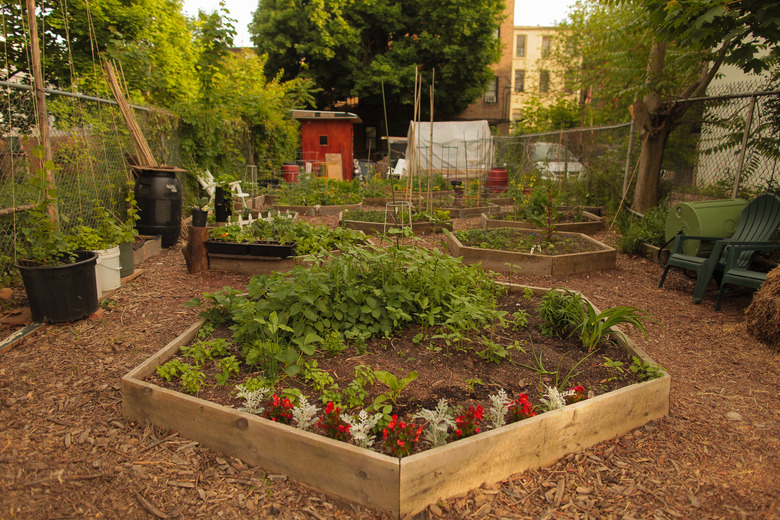 photo by Kris Wong. www.kriswong.com/Moment/GettyImages
How to Build a DIY Raised Garden Bed
1. Pick a Good Spot
Most flowers and veggies thrive in full sun, so pick a sunny spot, preferably on flat ground to make construction easier. Keeping an eye toward your general landscaping theme, you'll want to put the bed in full view if you're growing flowers, but if it's a vegetable garden, you may want to hide it in an out of the way corner of the yard. You don't have to worry about the quality of the soil under the bed as long as the ground is stable and not subject to erosion.
2. Lay Out the Bed
Measure the width and length of the bed with a tape measure and mark the corners where the posts go with chalk. You can make the dimensions anything you want, but if you use 8-foot 2x6 boards, which are the most economical, it's best to place the posts so their outside edges are 8 feet apart lengthwise and 3 feet 9 inches apart widthwise to minimize cutting and waste. The width is shorter than 4 feet so that a 4-foot board will overlap the ends of the 8-foot boards, which will be attached first.
3. Dig Post Holes
Dig a post hole at each corner using a post-hole digger. As you would for a fence, make the depth of the hole equal to 1/3 the total length of the post. This means if you're making your raised bed 2 feet high (actually 22 inches since that's the height you get by stacking four 2x6s), the hole should be 12 inches deep. Dig the hole about 4 inches deeper than necessary so you can fill the bottom with gravel to aid drainage.
4. Set the Posts
Set a 4x4 pressure-treated post in each hole, check it with a torpedo level to make sure it is plumb (perfectly vertical) and backfill the hole with angular drain rock gravel to ground level. Each post should extend 22 inches above the ground to be flush with the top of the bed. Double-check the post spacing before backfilling.
5. Prepare the Bottom of the Bed
Create a weed barrier by covering the ground in the bottom of the bed with landscape fabric followed by two or three layers of cardboard. If you expect gophers to be a problem, set gopher wire on the ground before placing the landscape fabric. Using tin snips, notch the gopher wire at the corners so you can extend it past the posts a few inches beyond the boundary of the bed.
6. Attach the Sides of the Bed
Affix an 8-foot board to one side of the bed at ground level using 3-inch deck screws to fasten it to the posts and then attach an 8 footer to the opposite side. Be sure to level each board before attaching it because if the boards at the base are out of level, so will be all the others you attach after it, and that will ruin the appearance of the bed. The ends of the boards should be flush with the outside edges of the corner posts. Attach a 4-foot board along each end of the bed at ground level. If your measurements are accurate, the ends of the end boards should be flush with the outsides of the 8-foot boards.
Continue attaching subsequent rows to bring the bed to the height you want. Be sure to use more than one deck screw at each end of each board — two may be enough, but three is better.
7. Fill the Bed with Soil
Add enough soil to bring the level to within 2 or 3 inches from the top edge of the highest board. If you construct the bed to be 24 inches high, you'll need about 64 cubic feet of soil, which is 22 bags if you choose ready-made potting soil in 3-cubic-foot bags. You can also use soil from another part of the garden, although you should test it first and amend it as needed. It's a good idea to add the soil in 6-inch layers, soaking down each layer with a garden hose before adding the next to ensure a rich, moist mixture that is ready for planting.