Home Composting: The Definitive Guide
We may receive a commission on purchases made from links.
Are you tired of buying fertilizer or bags of soil? Give home composting a try. Thanks to different types of composting equipment and techniques, you don't even need a yard to turn kitchen scraps into a nutrient-rich soil amendment. Discover the key ingredients and care practices for a healthy compost pile.
Benefits of Home Composting
Benefits of Home Composting
Home composting is convenient, easy on the wallet and healthier overall for your garden. Using organic fertilizer (i.e., compost) improves soil health and plants' ability to absorb nutrients, which can serve as a huge benefit when you struggle to have a green thumb.
Making your own compost gives you the peace of mind of knowing exactly what's in it. If you want to stay as far away from chemical products as possible, you have the ability to carefully choose what goes into the compost so you don't pass on any unwanted byproducts to your own garden.
Backyard composting also truly embodies the "reduce, reuse, recycle" slogan by allowing you to reduce or even eliminate your reliance on store-bought bags of soil amendments or commercial fertilizers (and not to mention keeping your food waste out of landfills). Stepping away from these products not only saves money but also allows you to reduce your environmental footprint because you'll be responsible for less plastic waste and fewer fuel emissions or chemical byproducts.
Types of Home Composting
Types of Home Composting
Do you think you don't have enough space for a compost pile? Think again! Home composting is accessible to everyone, even apartment dwellers. For example, instead of maintaining an outdoor pile, you can practice vermicomposting (worm composting) in a container or set up a composting tumbler. Both can sit in your garage, basement or a patio.
Otherwise, a compost pile or bin represents the iconic image of home composting. Ideally, you'll be able to dedicate a fairly wide area for your compost bins to facilitate easy turning and to maintain the appropriate dimensions for a hot pile. (A pile that's too small will rapidly lose its heat, which slows down decomposition.)
If you don't have much space, you can also try methods like sheet composting and trench composting. With sheet composting, you'll layer well-shredded compost ingredients directly onto a resting garden bed, much like a lasagna. By next year, you'll have nutrient-rich soil and can plant directly into the bed. With trench composting, you'll dig a hole or trench alongside the garden and place compost ingredients in the hole, where they'll slowly break down and provide nutrients to nearby roots.
The Science of Composting
The Science of Composting
When you create a compost pile, you're actually feeding bacteria (and, to a lesser extent, worms and fungi). Bacteria require sources of carbon, nitrogen, oxygen and water to thrive and reproduce. If your compost pile lacks any of these ingredients, you'll just have a pile of yard waste, but when you provide the right conditions for the bacteria, they'll eat through the debris and leave behind a pile of humus (along with some water, heat and carbon dioxide).
All compost maintenance is done with the health of the bacteria in mind. For example, they require oxygen, so you must introduce more oxygen into the heart of the compost pile by turning it. They also need water (but not too much) so you need to set up proper drainage on the composting site and hose down the pile on hot days. And speaking of heat, you have to monitor the temperature of the pile so the friendly bacteria don't accidentally roast to death.
In the end, if you take good care of these invisible microbes, they'll pay you back with high-quality "cooked" compost. If you set up a compost pile and walk away, decomposition will still occur but at a much slower rate. Called anaerobic composting, this hands-off method isn't quite as popular because it doesn't result in a hot pile, which means seeds, weeds and pathogens may persist in the compost.
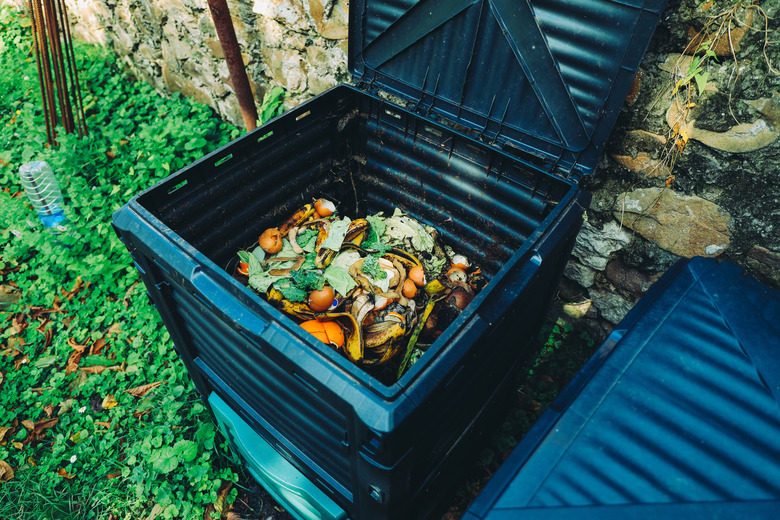
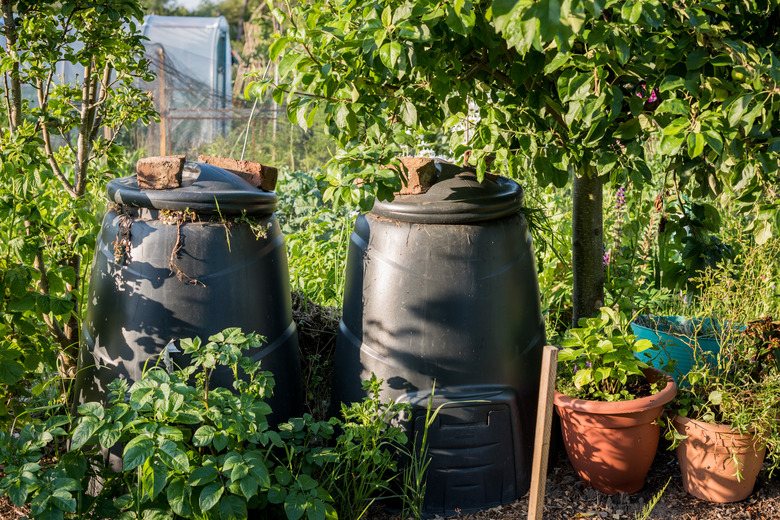
Getting Started: Compost Bins
Getting Started: Compost Bins
For traditional aeration composting, you'll want to purchase or build your own compost bins. Place the bins in a location that doesn't collect water after a heavy rain. Alternatively, you can purchase special composting tumblers that look tidy in an urban yard or start vermicomposting with a few storage totes.
A compost pile goes through three distinct phases before it is considered cooked and ready to spread in a garden. Therefore, many home gardeners prefer to build three compost bins. The first receives fresh material until it reaches the ideal dimensions for becoming hot (at least 3 feet cubed). The second bin contains a pile in the thermophilic or hot phase and the third bin holds mature compost cooling off from its hot phase.
Add fresh kitchen or yard waste to the first bin. Don't remove or add anything from the second bin. When you need to spread compost in the garden, retrieve it from the third bin. When most of that humus is gone, the third bin becomes your new "fresh material" bin. It can take several months for a compost pile to transition out of the hot phase.
Other Equipment for Composting
Other Equipment for Composting
In addition to bins, you'll want a pitchfork to help you turn the pile. You may also want to have a tarp on hand to cover the pile as needed, which can help it to stay warm and/or moist. A compost thermometer is a neat but optional composting gadget that will help you definitively determine if a pile is in the thermophilic phase.
Although bacteria are everywhere in the environment and will eventually find and reproduce in your pile, you can kick-start the composting process by purchasing a compost starter. Alternatively, you can use other organic compost as a starter or mix in some rich soil from your garden since both sources should contain a healthy supply of bacteria. Consider also introducing earthworms into the compost pile to increase aeration and speed up decomposition.
Finally, don't forget to place a container on your kitchen counter to easily reroute kitchen scraps to the compost pile instead of the trash bin. Empty it on a daily basis to keep fruit flies and rotten smells out of your home or purchase a countertop compost collection container with a lid and charcoal insert.
 piotr_malczyk/iStock/GettyImages
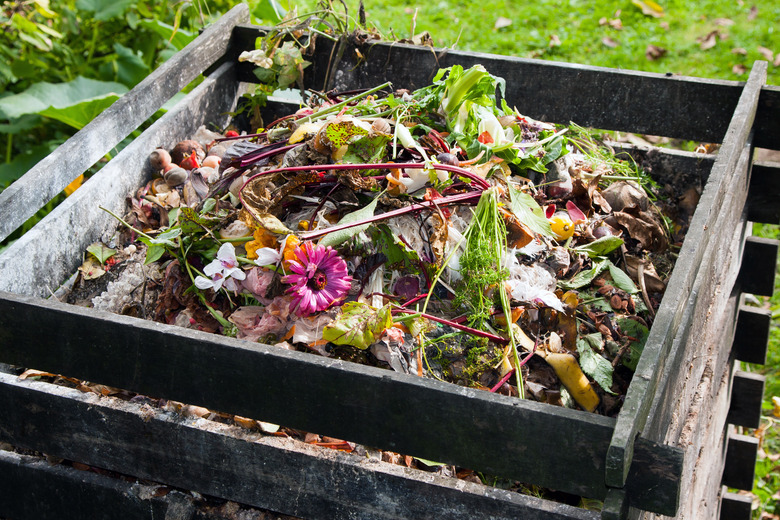
Feeding Bacteria: Carbon to Nitrogen Ratio
Feeding Bacteria: Carbon to Nitrogen Ratio
Composting is a little like baking: You not only need the correct ingredients but also the correct ratio of ingredients to achieve the desired result. The major ratio to take into account when composting is the amount of carbon relative to the amount of nitrogen. Too much carbon in the compost pile causes bacteria to starve due to a lack of nitrogen. On the other hand, too much nitrogen in the compost pile creates a stinky mess due to the prevalence of ammonia.
The favored carbon to nitrogen ratio is 30:1. You don't have to take a terribly precise approach and measure or weigh each contribution. Just keep in mind that your compost pile should consist primarily of carbon sources with a sprinkling of nitrogen sources mixed in. Err on the side of too much nitrogen. You'll know you should back off if the pile starts to smell like ammonia.
Carbon is found in brown materials: dried leaves, straw, sawdust, pine needles, etc. Nitrogen is found in relatively fresh or green materials: grass clippings, fruit and vegetable scraps from the kitchen, etc. If you have a significant amount of green waste that you'd like to compost, consider creating multiple compost bins to accommodate the influx of nitrogen. You can typically collect bags of leaves from your neighbors in the fall to provide an appropriate amount of carbon.
What You Should Not Compost
What You Should Not Compost
Turning food scraps and organic matter into humus is a pretty cool superpower, but a compost pile does have its limits. For example, the compost-eating bacteria produce heat, but they die if the temperature of the pile exceeds 165 degrees Fahrenheit — the same temperature that kills the pathogens found in meat or fish scraps. Therefore, it's best to leave all raw meat and fish products out of the compost pile. Even if the food has been cooked, leave it out of the compost pile due to its salt and fat content.
Some carbon and nitrogen sources take a long time to break down and aren't worth composting, such as sticks, citrus peels and onions. It's also a bad idea to try to compost any part of a weedy plant since it may take root in your compost pile. Dispose of diseased plant scraps elsewhere as well.
Other composting no-nos include dog, cat or human feces, which can infect your compost pile with bad bacteria. Instead, add chicken, rabbit or horse manure to the pile as nitrogen sources.
Watering Your Compost Pile
Watering Your Compost Pile
Thanks to rainfall and the moisture found in freshly chopped plant material, compost piles don't typically dry out completely. Dry spots indicate the absence of bacteria. Regularly spray the compost pile with water and keep a tarp over it to prevent too much evaporation. On the other hand, take care not to allow the pile to get soggy because excess water will push oxygen out of the pile and suffocate the aerobic bacteria.
Aerating Your Compost Pile
Aerating Your Compost Pile
To ensure your compost pile breaks down quickly, you'll need to regularly open it up and allow oxygen to permeate the material. If the aerobic (oxygen-using) bacteria die, the anaerobic (non-oxygen-using) bacteria will continue the decomposition process, albeit at a much slower pace.
The foolproof way to add oxygen to the compost pile involves turning it with a pitchfork. It helps to have an empty bin or space next to the pile. Use the pitchfork to pick up a piece from the top of the pile and then flip it over into the empty space like a pancake.
Repeat with the entire pile until you've formed a new pile. Flip it back into the first space the next time you need to aerate the pile, which should be every three to seven days when the pile is in its thermophilic phase. If you don't have extra space with which to work, do your best to toss the pile like a giant salad. If you use a tumbler, turn it vigorously every three to four days.
 Martin Hambleton/iStock/GettyImages
Using Your Compost
Using Your Compost
Your compost is ready to use once it feels cool, and its ingredients are no longer recognizable. Ideally, it will look dark brown or black, smell decent and feel soft, moist and crumbly.
If you're tilling a new garden bed, add enough finished compost to the soil so that it becomes about 25 to 30 percent of the total soil mix. For example, if you're digging down 4 inches into the existing soil, spread about a 1-inch layer of compost over the area and mix it in.
Apply a 1/4 to 1/2 inch top-dressing layer of compost around plants during their peak growth period in lieu of commercial fertilizers. For extra-hungry plants, you can create a quick-release fertilizer called "compost tea" by allowing a few handfuls of compost to steep in a bucket of water overnight. Pour the liquid concoction over any plants that show signs of a nutrient deficiency to give them a quick pick-me-up.
References
- Cornell Composting: Compost Microorganisms
- U.S. Environmental Protection Agency: Types of Composting and Understanding the Process
- Carry On Composting: Compost Microorganisms
- Cornell Composting: Compost Chemistry
- Land Degradation & Development: The Effects Of Organic And Mineral Fertilizers On Carbon Sequestration, Soil Properties, And Crop Yields From A Long‐Term Field Experiment Under A Swiss Conventional Farming System
- PLOS ONE: Effect Of Compost And Inorganic Fertilizer On Organic Carbon And Activities Of Carbon Cycle Enzymes In Aggregates Of An Intensively Cultivated Vertisol