How To Hang Outdoor String Lights
We may receive a commission on purchases made from links.
There are a lot of reasons to hang outdoor string lights—to add interest to your outdoor space, to provide an additional bit of brightness in the evening hours and to create the boundaries of an outdoor living room where you and your guests can kick back, sip on a drink and enjoy the scenery. These festive lights come in a seemingly endless variety of styles, sizes and shapes to suit your space and putting them up is a snap. There are many factors to consider when deciding on outdoor lighting for a particular space, but whether it's draping strings of lights over a pergola or outfitting the yard with a canopy of bulbs, it can be done with just a few tools.
Planning to Hang Outdoor String Lights
Planning to Hang Outdoor String Lights
Homeowners hang outdoor string lights in trees, put them up in gazebos or porches and display them across poles near a fire pit for a bit of ambiance. You'll even find them decorating arbors and pergolas. There are no hard and fast rules for where they can go, so put party lights anywhere in your outdoor living space. What is required, however, is a bit of layout and planning to make sure the lights stay up and look their best.
First, check to make sure there is an outlet near the place where the lights will hang. For areas that don't have good access to a power source, consider installing solar-powered lights. If an extension cord will be needed, be sure it is rated for the outdoors, and if you are running more than one strand of lights, be sure the product is outfitted to plug into other light strings. Most importantly, lights and extension cords should be waterproof and rated for outdoor use.
Always plug lights or cords into a GFCI-protected outlet. Most outdoor outlets are GFCI-protected (it's been a code requirement since the 1970s), but older homes may have standard outdoor outlets. If necessary, you can easily swap out a standard outlet with a new GFCI outlet or hire an electrician for the job.
Before buying or hanging outdoor string lights, figure out how many strings will be needed for the project. Some layouts may be easier than others, but they all require some measuring and planning to make sure they look right and will stay put for the long run. Small yard areas can often get by with 50 feet of lighting, medium areas range between 50 feet and 100 feet and larger patios often need 100 feet or more. That should provide a good starting place for quantity, but be sure to take into account the pattern and density desired as well and adjust accordingly.
Popular lighting patterns include simple draping, a zig-zag pattern, a V pattern or running along the border of an area, but these are by no means the only way party lights are configured. Choose a layout and use a tape measure to get an estimate on the linear footage. Decide if the lights will be swagged or will hang in more of a straight line. If you are swagging, add to the overall measurement to account for the extra lights needed. Remember that there will need to be at least some slack in the line, as pulling the string lights too tightly can weaken them over time.
Height is another important detail to take into account when you are coming up with an initial plan and layout. Make sure that all of the bulbs are high enough for tall people to walk underneath them comfortably. Shoot for somewhere around 8 feet to 9 feet as a minimum, but you can go higher if you prefer. Keep in mind that this means a ladder will be needed to put them up at this height. If you are swagging the lights, be sure to add to the overall height so that the dip doesn't come down too low.
 Cavan Images/Cavan/GettyImages
Hanging Party Lights in a Covered Area
Hanging Party Lights in a Covered Area
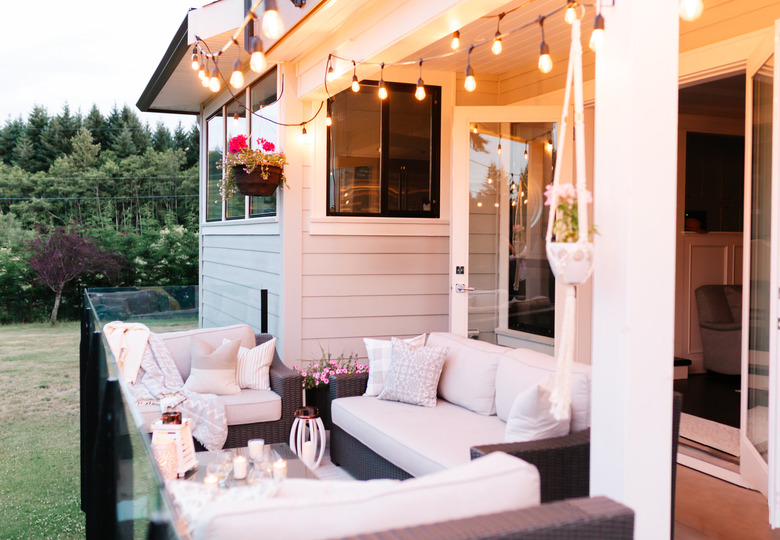
A covered patio, gazebo or deck probably won't require heavy-duty party lights, as these areas are more protected from the elements, but they should still be rated for wet outdoor conditions. In these cases, it's a simple project to hang outdoor string lights around the border of the ceiling. Simply drill pilot holes and then screw in eye hooks up high to provide a hanging point for the lights. Next, attach each light strand to the hooks with a zip tie. Be sure to cut the end of the zip tie short for a neat appearance.
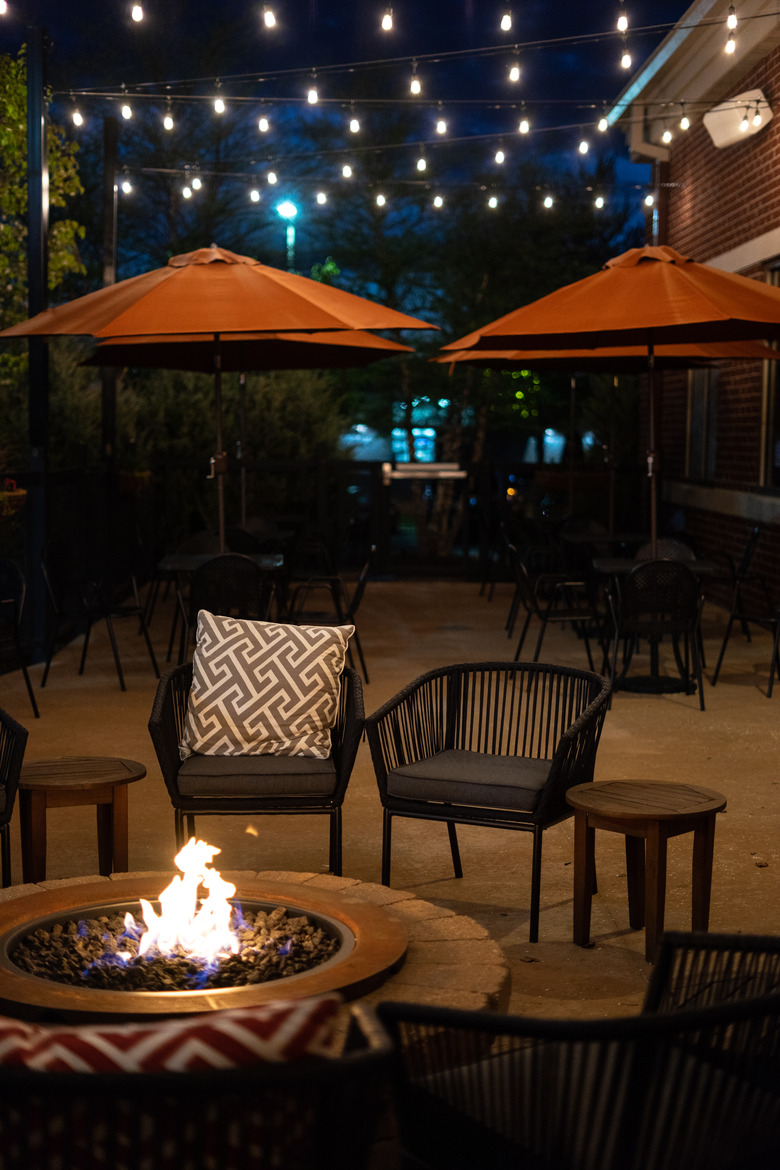
Outdoor umbrellas are one of the easiest places to run party lights, and they provide some cover for the string lights as well. Many of these umbrellas have Velcro loops that will hold lighting strands, which is about as easy as it gets. If not, a battery-operated kit is another option. These install very easily by using a system of ties and clips to attach each strand to an umbrella rib. The battery box sits neatly in the top of the umbrella.
 supersizer/iStock/GettyImages
Hanging Outdoor Lights in a Yard
Hanging Outdoor Lights in a Yard
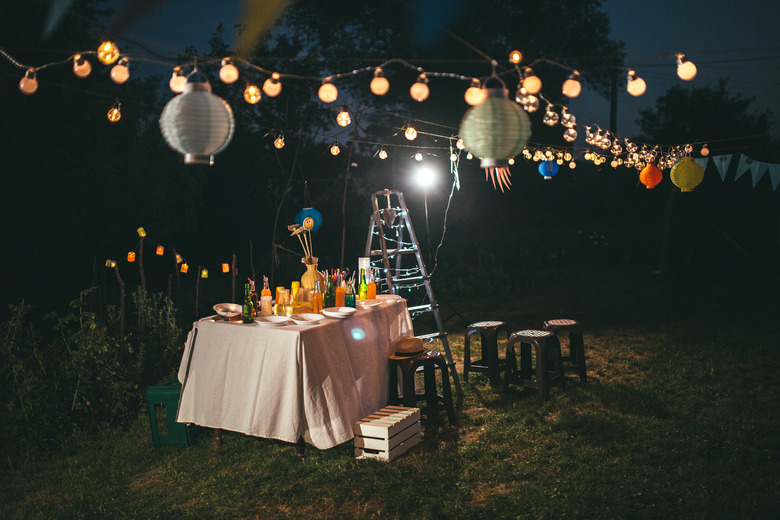
Another outdoor area that looks great with hanging lights is a side yard or backyard. Unless the space is small, it may require a bit more planning as well as an investment in a better-quality string light system. Commercial-grade lights work especially well for this type of outdoor area and typically come with a loop to make hanging an easy task. They also have a more heavy-duty cord.
To install lights across these large spaces, pair them with a string light suspension kit, which is very useful. They are made to span larger distances that don't have intermediate supports. This system usually comes with wire cable, turnbuckles, hooks or other materials that are made to provide a secure support network for the lighting strands to hang. Some outdoor lighting kits will have everything needed in the package. If not, the items can all be purchased separately at a home improvement store.
To hang outdoor lights in a yard using this system, first locate and mark the places that will serve as anchor spots, taking both the height and span into consideration. These can be areas of wood on your house, trees or even fencing. The more secure they are, the better. If someone can help you estimate this span with the lights (or with some string if you don't have lights yet), it will help with accuracy and be far easier to get a solid measurement.
Hanging kits vary, but most have a length of wire cable, eye hooks and attachment hardware such as a carabiner (or a metal loop). Some include ties for the light strings as well, which will go up first. To install the attachment point, drill a pilot hole at the marked spot and then screw the eye hook into the hole. Next, add the carabiner or hook with the wire. String this cable across the yard to the other attachment spot and then secure it using the same method. If the wire needs to be trimmed, use wire cutters. Continue adding these lengths of wire until the layout is finished.
Turnbuckles, which are often included in these light suspension kits, are a convenient feature, as these accessories allow the tension to be dialed in once the wire has been hung. They are basically two threaded eye bolts (or an eye bolt and hook) that are connected by a metal frame. When a turnbuckle is added to a light suspension kit, it allows the slack to be increased or decreased based on an adjustment (twisting it). This is helpful for dialing in the right look for the light strings straight away—helping you avoid those frustrating hours of hanging, taking a step back, adjusting and repeating the entire process until it's just so.
Once the cable system is installed, it serves as a solid support for the outdoor hanging light system, which can then be attached to it with zip ties or whatever was provided in the kit. The dual system prevents undue stress on the wires of the light cord and adds another layer of stability. It's almost a necessity in large areas, but it can make smaller installation jobs easier as well.
Installing String Lights on a Pergola
Installing String Lights on a Pergola
Arbors or small pergolas make a lovely spot to hang outdoor string lighting. If it's a small structure that goes across a walkway, lights can simply be wound around the supports on each side and secured with staples. Be sure to use larger, U-shaped staples so there's plenty of room to attach without hitting the cord. Also, invest in stainless steel staples if possible, as they will hold up much longer than plain steel staples. When installing, make sure to secure the string of lights by putting at least one staple on each side of the light fixture.
When lighting a larger pergola area, decide how much of the structure will have light strings attached. Some designs call for just the top to be lighted, while others cover the supports as well. Depending on the size of the pergola, you may be able to staple the light strings to the wood, especially if the lights will be hanging down. If a cleaner, straighter look is preferred, install the cable system along the top in the areas where lights will be placed.
 Nektar Productions
Hanging String Lights by a Fire Pit
Hanging String Lights by a Fire Pit
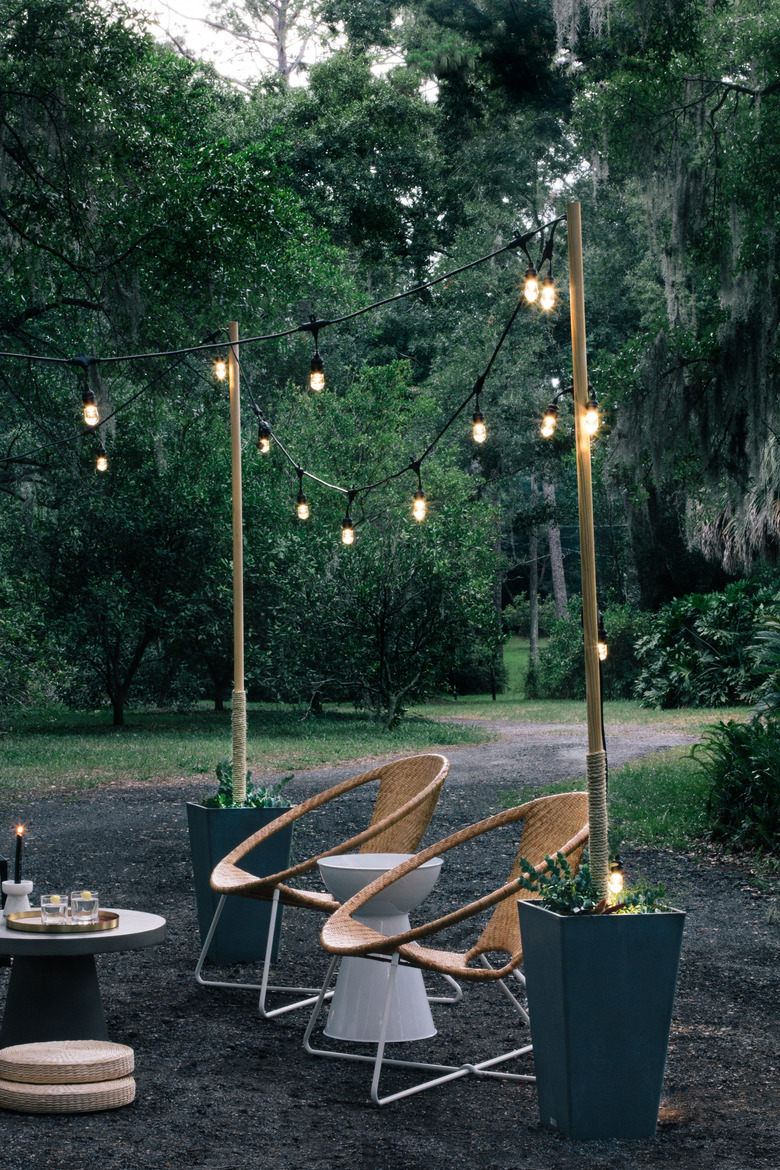
Fire pits by their very nature are usually located in an area away from the house. This can make it difficult when it comes to installing outdoor string lighting. Unless there are trees or other structures nearby to which you can secure the lights, some infrastructure will need to be installed before the lights can go up. Also, be sure that the lights won't hang directly over the fire pit area.
One very popular solution is to fill planters with concrete and set wooden posts into them. This gives the string lights an attractive attachment point. Make sure the containers are large enough to provide a good base for the posts and decide how many will be needed. Wooden barrels or square containers can look appealing, and this can also be a DIY project if desired.
Sketch the area and decide where the planters will go. Purchase one treated 4x4 post for each container as well as quick-setting concrete, eye hooks, zip ties and some pea gravel. Level the ground in these spots and add the gravel so the planters don't shift over time. Put the planters in place, add the concrete mix and set the post. Be sure to secure it with wood braces or other supports until the concrete dries. Attach screw hooks to the posts, zip-tie the lights and cut off the extra plastic at the ends. Top the planter with soil and plants/flowers or decorative rock for added appeal.
If large spans of outdoor string lights are going to be used near the fire pit, it's a good idea to add a guide wire system just like those used on a deck or large patio. Once again, these supports provide additional strength to help support the longer spans of hanging outdoor lights. Smaller fire pit areas may get by just fine with smaller planters and poles. For areas not near the house power, an outdoor extension cord or solar light system may warrant some consideration.