How To Build A Brick Paver Garden Path Or Walkway
We may receive a commission on purchases made from links.
Even if you've never heard of feng shui, the Chinese art of space harmonization, you're probably familiar with its main principle, which is to promote the positive flow of energy. In both visual and practical ways, nothing does this better than a brick paver walkway. That's why it's an often-recommended and effective feng shui cure for a landscape that's out of balance or needs more definition or visual interest.
Constructing a brick paver walkway is a DIY project you can really call your own. Sure, it involves a fair amount of digging, lifting and spreading filler material, but you don't need to buy expensive power tools — if you need one, you can rent it — and there's no concrete to mix or pour. If you're considering a large project and the amount of digging involved looks daunting, you can always build your walkway in manageable sections rather than tiring yourself out by doing the whole thing at once.
Brick Paver Walkway Design Ideas
Brick Paver Walkway Design Ideas
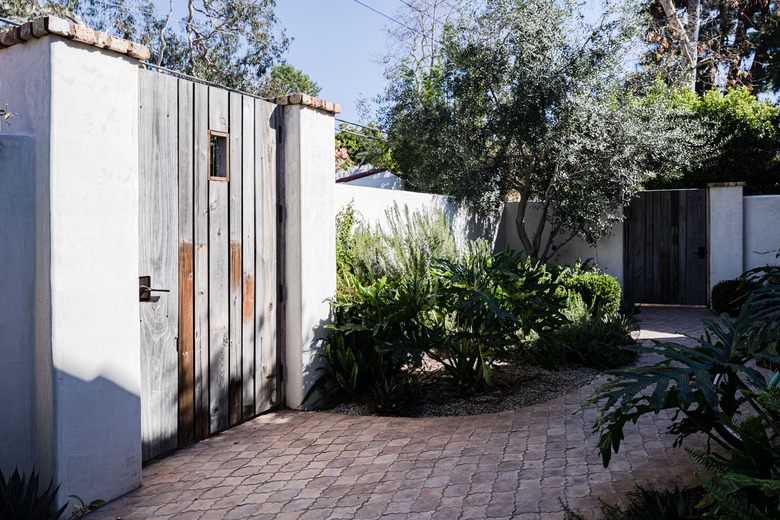
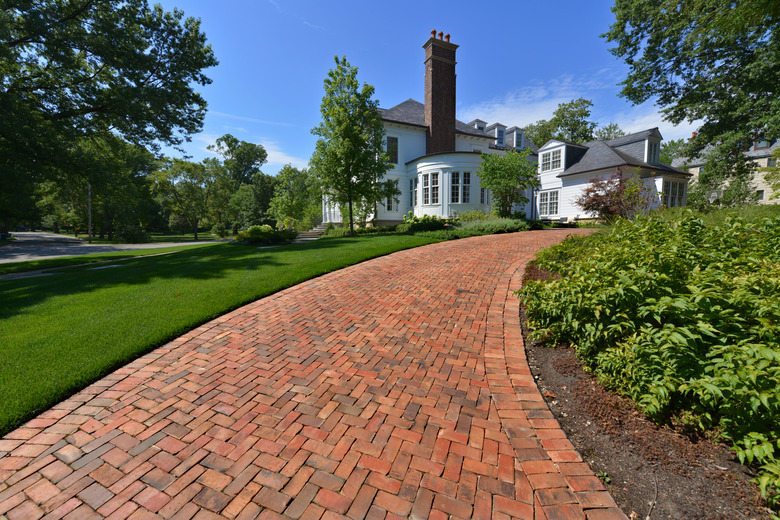
If you're short of brick paver walkway ideas to suit your landscape, you'll find plenty online at such sites as Lushome and Nextluxury.com. A walkway can go straight from point A to point B, or it can curve and meander to promote a relaxing atmosphere, and it can also include landing areas with benches for resting and taking in the scenery. Bricks can be made of concrete, sandstone or fireclay, and like the ones in the cobblestone streets you see in many old towns worldwide, they don't have to be regular or all the same size.
You can arrange pavers end to end, side by side in a running bond pattern or in a circular or herringbone layout depending on the shape of the outline. The sky's the limit in terms of design possibilities, and the great thing is that in terms of the basic groundwork and preparation, none requires any more work than any other, although some do take more time. All you need is a cleared-out area that has been leveled and flattened, some sand and enough pavers to do the job, and you're ready to lay down your design.
Choosing Your Brick Pavers
Choosing Your Brick Pavers
Even though it's possible to mix brick pavers of different sizes, you'll finish your standard paver walkway a lot quicker if you make them all the same size. A standard brick is 7 5/8 inches long and 3 5/8 inches wide, but you can find paving stones as large as 1 and 2 square feet. Your pavers don't have to be made of fireclay brick, and they don't have to be red. Some of the paver materials mentioned at Home Stratosphere aren't red at all:
- Fireclay is the quintessential brick material. You can find bricks in a wide variety of sizes and qualities ranging from flawless to seriously flawed, and while flawed or recycled bricks would be unacceptable for a building or a wall, they are great for artistic walkways.
- Concrete brick pavers are similar to natural brick and are among the easiest to lay in a regular pattern because they are perfectly uniform. They can have rounded edges for a cobblestone look, and they come in a range of colors and patterns.
- Bluestone pavers are an option to consider if you aren't on a budget. They are hewn from natural sandstone and start their life on your walkway with an attractive blue hue that eventually fades to gray.
- Flagstone pavers are also natural stone with an emphatic claim to popularity, but because they are basically broken pieces of sedimentary rock, they are the most difficult to lay in a regular pattern. Choose these if you like jigsaw puzzles.
- Artificial pavers made of rubber or plastic are manufactured in factories, so they are very regular and easy to arrange. They don't last as long as stone, clay or cement.
Pavers come in various thicknesses ranging from 1 1/4 to 3 1/8 inches. A minimum thickness of 2 3/8 inches is recommended for a walkway unless it has to support a vehicle, in which case you should use 3 1/8-inch pavers.
 ThomasTakacs/iStock/GettyImages
An Overview of the Process
An Overview of the Process
As it is with any structure you build in your garden, the process begins with laying the outline, and you can do this by driving stakes to mark the contours of the pathway and filling in the spaces between them with marking paint. When calculating the width of a brick paver walkway, you want to make sure it's equal to a whole number of pavers, and leave a few extra inches for wiggle room.
Once you've laid out the contours, you dig out the ground to the depth of the pavers plus an extra 3 or 4 inches for a base of gravel, landscape fabric and sand. The next step is to install edging, which is traditionally cedar or redwood bender board, although most contractors these days use plastic or metal, which is less expensive and lasts longer than wood. After determining that the edging rises to the same height on both sides of the walkway, the edging gets spiked to the ground or to the sod surrounding the walkway. The path area is then filled with a compacted gravel base, landscape fabric and a layer of sand, which also gets compacted prior to installing the pavers.
You can install interlocking pavers for a more stable surface, but if you're using bricks, you simply butt them against one another in the pattern of your choice, leaving as small a gap as possible between them. The last step is to cover the walkway with sand, work it into the gaps to hold the pavers in place and sweep away the rest. After a final rinse with a garden hose, the walkway is complete.
Things Needed
 dlewis33/iStock/GettyImages
How to Build a Brick Paver Walkway
1. Mark the Outline of the Path
Pound as many stakes into the ground as needed to define the outline of the path. You may need only four or six stakes to define a straight pathway, whereas you'll need stakes to define every curve on a meandering one. You can also use two garden hoses to establish the path's shape and then add stakes along the hoses. Spray marking paint on the ground between the stakes (or use sand) to create the outline and then remove the stakes.
Measure the distance between the two sides of the path with a tape measure to be sure they are far enough apart to accommodate a whole number of pavers plus about 2 inches of wiggle room. A typical garden pathway is about 2 or 3 feet wide. If you make it any wider than that, it will dominate the landscape and look out of place.
2. Dig Out the Dirt
Before you dig, call 811 (the "call before you dig" hotline) and wait for the utility companies to come out and map your property for underground cables and pipes. You should also check for sprinkler pipes, for which utility companies won't check.
Cut the edges of the path with a spade to a depth equal to the thickness of a paver plus a few inches for gravel and sand. The typical depth is about 7 inches. Dig out the dirt in the center using a round-point shovel and cart it away in a wheelbarrow. This is the most labor-intensive part of the job, and if you're considering hiring a helper, this is the part of the job for which you'll most need that person.
Scrape the bottom of the pathway flat when all the dirt is gone. If any of the soil is loose due to digging, compact it thoroughly with a hand tamper.
3. Install Edging Along the Sides
Position plastic edging against the turf on the sides of the path with its top about 1 inch above ground level (or as desired) and stake it in. The installation method depends on the type of edging you're using, but it usually involves driving spikes into the turf or into the ground.
Some types of edging, such as Vigoro scalloped no-dig edging, can be installed after you've set the pavers. You insert the bottom flange under the pavers and drive spikes to secure the edging in place.
4. Construct a Screed Board
Cut notches on both ends of a 5-foot length of 1x6 lumber, leaving a middle portion that is the exact thickness of one of the pavers as measured from the bottom edge to the notch. The distance between the notches should be the exact width of the path.
The screed board helps maintain a uniform path width and a uniform sand level. Place the notched ends on the edging and run the board along the pathway, adjusting the edges if the path is too wide or too narrow in any place. If you didn't install edging, you can use any straight board that is the width of the walkway to screed the sand.
5. Fill the Bottom With Road Base Gravel
Shovel in road base gravel, which consists of a mixture of drainage rock and fines, to a depth of about 2 inches. Some landscapers prefer to lay landscape fabric on the bottom of the bed instead of gravel, but Sacred Habitats offers many good reasons not to do this, which includes the fabric movement underneath as well as damage to the soil. Compact the road base with a hand tamper. If you're making a large walkway, you may want to rent a plate compactor for this job. You'll also need it to tamp the sand that comes next.
 mperkins/iStock/GettyImages
6. Fill With Sand, Screed and Compact
Shovel sand into the pathway and use the screed board to distribute and level the sand. Position the board so the notches rest on the edging and run the board along the edging, pushing sand in front and leaving a smooth, level surface behind. If you didn't install edging yet, run the screed board along the sand and measure the depth in several places with a tape measure to make sure it's uniform.
Compact the sand with a hand tamper or plate compactor, add more sand and compact again until you have a compacted bed at the right height to bring the pavers to ground level.
7. Lay the Pavers
Lay brick or concrete pavers by positioning each one where it needs to go and dropping it in place instead of sliding it along the sand. Tamp them down with a rubber mallet. Stagger the pavers so that the joint lines in adjacent rows don't line up. This looks better, and it makes the pathway more stable.
When using pavers with poorly defined edges, you may need to adjust the spacing after laying a row. Do this with a flat pry bar. When you need to cut a paver to fit at the end of a row, put on a pair of safety goggles and use a mini sledgehammer and a mason chisel to cut the paver to size.
8. Backfill With Fill Sand
Spread sand over the entire walkway and work it into the gaps between pavers using a hard-bristle push broom. Push the remaining sand to the end of the walkway and collect it or simply sweep it into the surrounding grass. Rinse off the walkway with a garden hose fitted with a nozzle in the shower position. The water will help settle and compact the sand between the pavers. Repeat the same process as needed until the sand joints are filled up to the surface and then give the path a final sweeping to remove excess sand.