How To Install A Metal Fence: A DIY Guide
We may receive a commission on purchases made from links.
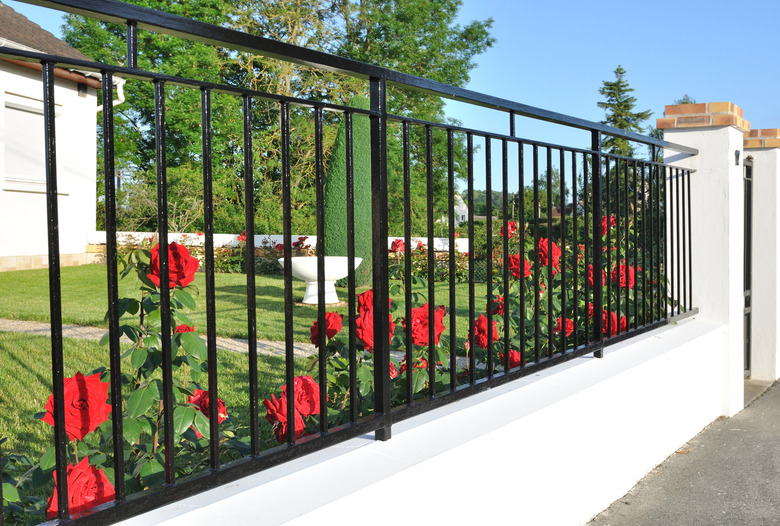
You can opt for privacy or ornamentation when you build a fence, and if you choose to build a metal fence, you're leaning heavily toward the latter. This isn't to say that a chain-link fence has suddenly become ornamental, because it hasn't. There are many types of metal fences made of aluminum, steel and wrought iron, and though few can rival a traditional wrought-iron fence for ornamentation and staying power, any metal fence can easily outlast a vinyl or wooden fence and definitely adorn the landscape better than a chain-link fence.
Metal fencing comes in kits that include posts and fence panels and all the fasteners and other hardware you need to connect them. The gate may not be included in the kit you choose because there are many gate options, and many are adaptable. In many ways, installing a metal fence is easier than installing a wooden one—and because holes for the fasteners are predrilled (and you don't have to figure out where they go), it's an even easier DIY task than installing a vinyl fence.
 sanddebeautheil/iStock/GettyImages
Choosing Your Metal Fence
Choosing Your Metal Fence
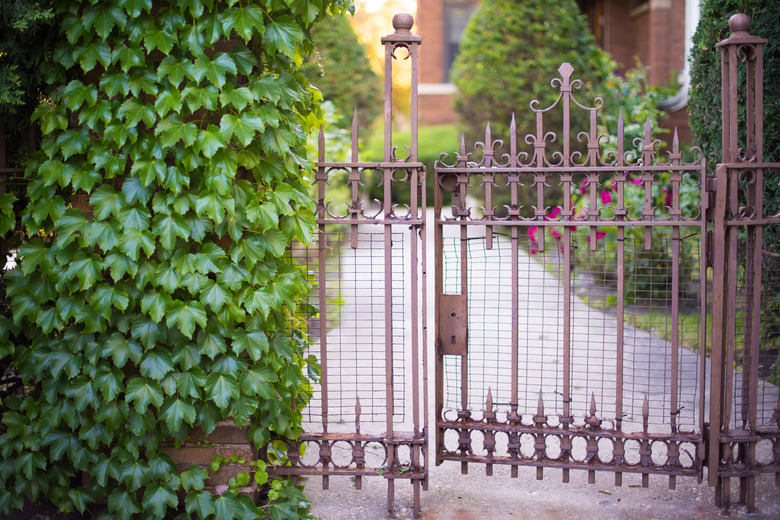
If you haven't already decided on the type of metal fence you want, it pays to do some comparison shopping because many types exist, and they all have their pros and cons in terms of looks, stability and price tag. The gold standard for ornamental metal fencing is wrought iron, but you aren't likely to find it easily because the foundries that produce wrought-iron materials are largely a thing of the past, although they do still exist. It's probably better to consider other options first because besides being hard to find and expensive, wrought-iron fencing is heavy and notoriously difficult to install, and the job usually calls for professional tradespeople.
Some modern metal fencing may look like wrought iron, but it's usually steel, a much more widely available material that's just as strong and that can be molded into modern geometric shapes as well as Victorian-era embellishments. A steel fence is just as vulnerable to rust as a wrought-iron one and must be assiduously maintained, especially if it's molded into tubing with a hollow core to make it more manageable and less expensive. The most vulnerable areas of an ornamental metal fence are in the corners where the pickets and posts meet the rails, and when holes develop there, they threaten the stability of the fence.
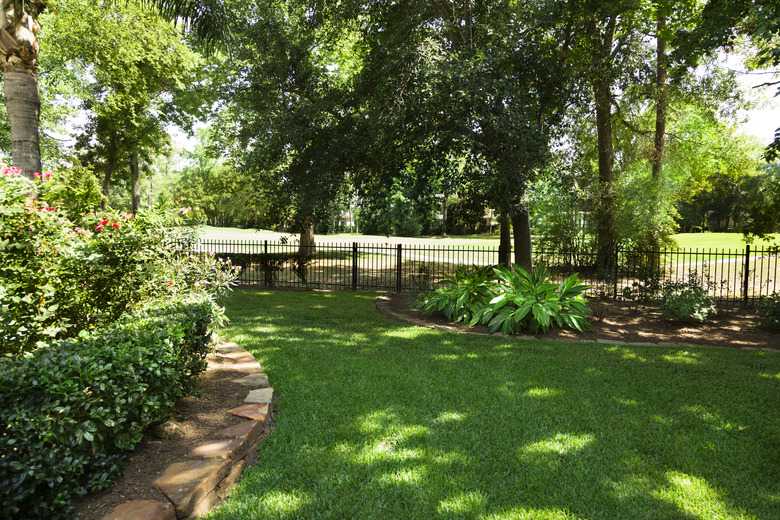
The most lightweight fences are made of tubular aluminum, which is about four times lighter than steel and virtually rust-proof. On average, an aluminum fence costs $10 to $14 per linear foot compared to $15 for hollow steel, $84 for solid steel and a budget-breaking $125 for wrought iron. One more advantage of aluminum, says Best Pick Reports, is its flexibility, which makes it more amenable to gently sloping ground than steel.
 Page Light Studios/iStock/GettyImages
What's Included in a Metal Fence Kit?
What's Included in a Metal Fence Kit?
A typical metal fence kit comes with enough posts and panels to enclose an area of a specific size, so it's important to measure the perimeter of the fenced area before ordering. You can usually buy extra posts and panels if you need them, but it's better to have everything on hand before you start the installation. Some kits, such as the Perimtec FenceTrac, contain only posts and rails, which allows you to create a hybrid fence with wood or vinyl fence panels, and if you're using one of these, you obviously have to purchase the panels separately.
A typical metal fence kit includes end, line and corner posts, and if the area you're enclosing isn't a simple rectangle, you'll have to custom order the posts to make sure you have enough of each kind. The end posts are the ones that go against a building or other structure, the corner posts are used to change the fence direction and the line posts are the ones that go between the corners and ends. In addition, the kit should include gate posts, which are predrilled for the gate hinges.
You'll also find all the fasteners you need to assemble the metal fencing, including all the necessary screws, nuts and bolts, and all are prefinished to match the fence. What you won't find in a metal fence kit is the concrete mix for setting the posts, and you'll need a lot of it — about one 60-pound bag per post. Apart from string, stakes and tools, however, you won't need much else to install your metal fence.
3 Things to Know Before You Start
3 Things to Know Before You Start
It's essential to keep the fence on your side of the property line, so if you're not sure where that is, it could save you a lawsuit to hire a surveyor to mark it out. To be on the safe side, keep the fence a few inches on your side of the line unless you have a written agreement with the neighbor to share it. This is important even on rural properties that border public land because you can't be sure that the land will remain public forever.
It's just as essential — and required in most communities — to call 811 and have all the buried utility lines on your property mapped before you start digging. The posts have to be set 2 feet into the ground, which is deep enough to slice through water pipes, telephone lines and some underground electrical cables.
A third important detail to resolve before you start, advises Pacific Fence & Wire Co., is the possible existence of ordinances that prohibit the type of fence you're planning to erect. Checking with the local building department or homeowners' association before you start can save you headaches down the road.
Things Needed
-
Gravel
-
Tape measure
-
Metal-boring drill bit (if necessary)
How to Install a Metal Fence
1. Mark the Positions of the Posts
Map out the perimeter of the fence and mark the corners and ends with spray paint. Then, drive the stakes and stretch string tightly between them and a few inches off the ground. Using a 100-foot tape measure, mark the positions of the line posts with spray paint, ensuring the spacing between them is the same as the panel width. There will probably be a few places in which a full panel won't fit, which is OK because you can cut the panels, but don't make the spacing any wider than a full panel width.
When marking the positions of the gate posts, Outdoor Essentials reminds you to leave space between them for the gate hardware and a gap for the gate to swing freely. This extra space usually amounts to a few inches, but you'll want to either check the gate specifications or measure the hardware yourself.
2. Dig the Post Holes
Use a post hole digger or an auger to dig the post holes. As a rule of thumb, the holes should be deep enough to accommodate a third of the length of each post. For example, a standard 4-foot fence has 6-foot posts that are buried 2 feet in the ground; a 6-foot fence has 9-foot posts that are buried 3 feet deep. This can vary, though, because the posts must be set 6 inches below the frost line to prevent heaving in the winter and may have to be deeper in soggy soil, according to Hoover Fence Co. The diameter of the hole should be three to four times the diameter of the post.
It's good practice to dig the holes a few inches deeper than the bare minimum to allow space for gravel under the post. To ensure the post is set to the correct depth and that all posts are set at the same height, mark a line on each post to denote ground level. In an aluminum fence installation demonstration on YouTube, Jason Caicco recommends driving one or two screws into the base of each post to anchor it in the concrete and prevent it from pulling out.
3. Set the Corner, End and Gate Posts
Set new stakes in the corners that are slightly behind the holes and in the fence line and draw tight strings between them. You need two stakes for each corner — one for each perpendicular direction — and one for each end and gate post. Use these strings to align the faces of the corner posts as you set them.
Shovel 2 to 4 inches of gravel into the bottom of the hole, insert the post and make sure the line you drew is at ground level. Then, mix concrete mix with water in a wheelbarrow to a fairly stiff consistency and shovel it in the hole as you plumb each post with a 4-foot spirit level. Fill the hole with concrete to about 4 inches below ground level and ensure that each post is plumb in both directions, parallel to the string lines, and that the slots for the panels are facing in the right directions. Let the concrete set overnight.
 fstop123/iStock/GettyImages
4. Set the Line Posts and Install the Fence Panels
Rather than setting all the line posts in concrete and installing the panels afterward, which opens you to the disaster of a miscalculation, set the line posts and panels at the same time and fill the holes with concrete after completing one side of the fence. Connect a fence panel to a corner or end post using the fasteners provided along with a drill and screw bit, and then drop a line post into the next hole and connect it to the other end of the panel. Continue installing panels and posts in this way until you reach the other corner or end and then go back, plumb each line post and fill the hole with concrete.
5. Cut Panels to Fit in Shorter Spaces
Aluminum fence panels are easy to cut with a hacksaw, and they are designed for the rails to fit into the slots on the posts. Just cut the panel to the length you need and install it as you installed the others. Some fencing designs and materials may not accommodate such a simple technique, so be sure to read the instructions before you start the installation process.
6. Install the Gate
Assemble the gate if necessary and screw the hinges to the gate posts, driving the screws into the predrilled holes. If the gate doesn't have predrilled holes or they don't align with the hinges for the gate you're installing, you may have to drill pilot holes with a metal-boring bit. Choose a bit with a diameter slightly smaller than the screws to ensure that the screws bite sufficiently into the metal to hold the gate securely.
Your gate may be particularly wide and may require extra support, or it may slide on a track instead of swinging and require extra hardware and electrical equipment. You may be able to handle this procedure if you're working with lightweight aluminum fencing, but if you're installing a steel or wrought-iron fence, you might want to consider having the gate installed by professional fence contractors.