Surprisingly, This Upholstered Headboard Does Not Cost A Lot To Make
We may receive a commission on purchases made from links.
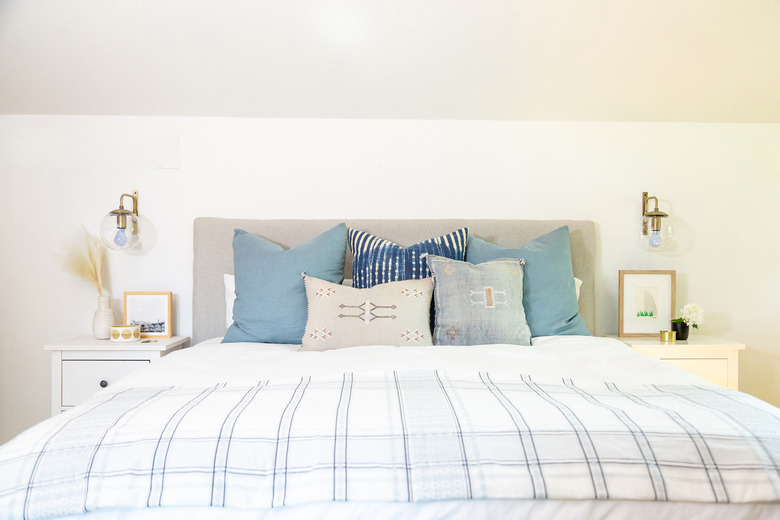
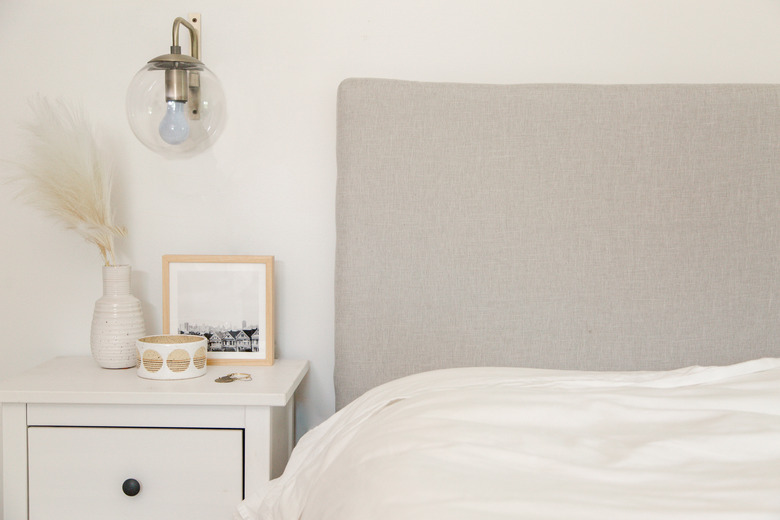
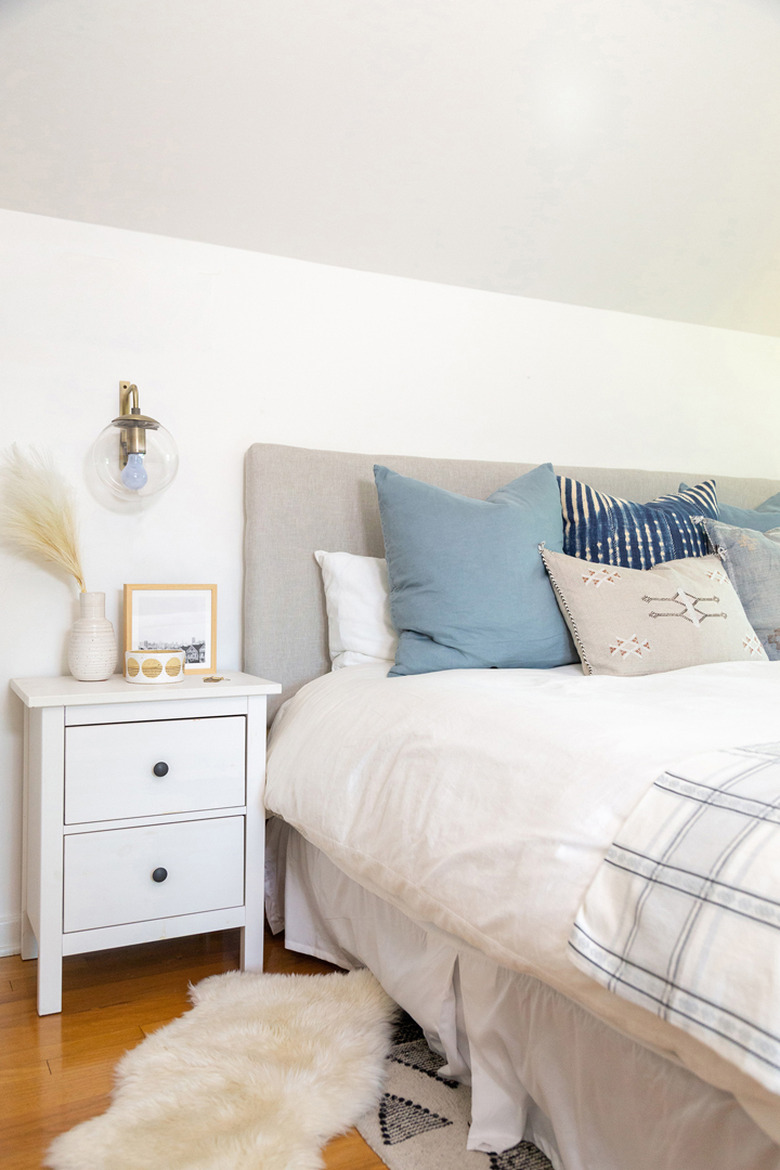
Ready for a bedroom upgrade? You won't believe how we made this upholstered headboard for under $100. It is made from plywood, a foam mattress topper, batting, and a linen curtain panel. Adding a headboard gives your bed a statement piece, something to ground the bed. Buying an upholstered headboard can cost up to $600, so why not make your own?
How to Keep Costs Low When Making a Headboard
How to Keep Costs Low When Making a Headboard
A few tricks to save money when making any home DIY projects is think outside the box when it comes to supplies. Instead of buying pricey linen fabric by the yard, opt for a cost-effective curtain panel instead. Make sure to get the right size panel to fit the headboard (for a king size headboard, an 84 inch panel is perfect). Another area to save money is using a foam mattress topper instead of expensive foam from the fabric store.
Things Needed
-
Plywood cut to desired dimensions (for this project, we used OSB 4 feet by 8 feet, 1/2 inch)
-
1-by-2-by-8 boards cut to size (we used one board, cut in half at 48 inches)
-
Screws
 Sara Albers
1. Determine Measurements
First you will need to figure out the dimensions for your headboard. For this tutorial, we feature a king size headboard on a low profile bed frame. Measure the length of bed and add two inches to each side. Then decide how high you want your headboard.
Tip: Sit up in bed against a pillow and make a mark on the wall right above your head. This is a good way to decide the height.
Get a piece of plywood or OSB cut to your dimensions. Our king size board was cut to 78 inches by 28 inches. You will also want to get the dimensions you'll be using for the 1-by-4-by-8 board — this will be for the leg supports. (These pieces will be used to hold the larger piece of plywood for the headboard.) You will need to measure from the ground to the top of where you want the headboard to hit the wall. We cut this piece to 48 inches.
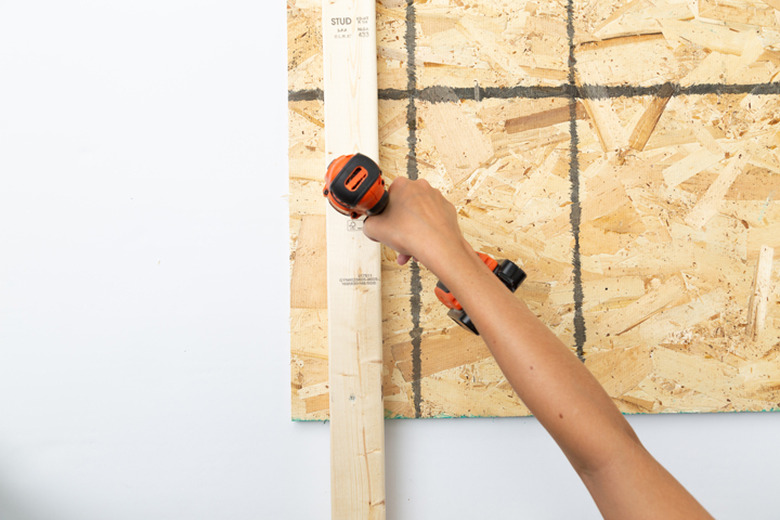
2. Attach Leg Support to Board
Cut the 1-by-2-by-8 board to your desired measurements for the leg supports. Make sure to measure where the bottom of the bed frame will attach to the leg supports, and then attach them to the back of the plywood headboard at those measurements using the power drill and screws. For reference, we attached the leg supports at two inches and 76 inches.
 Sara Albers
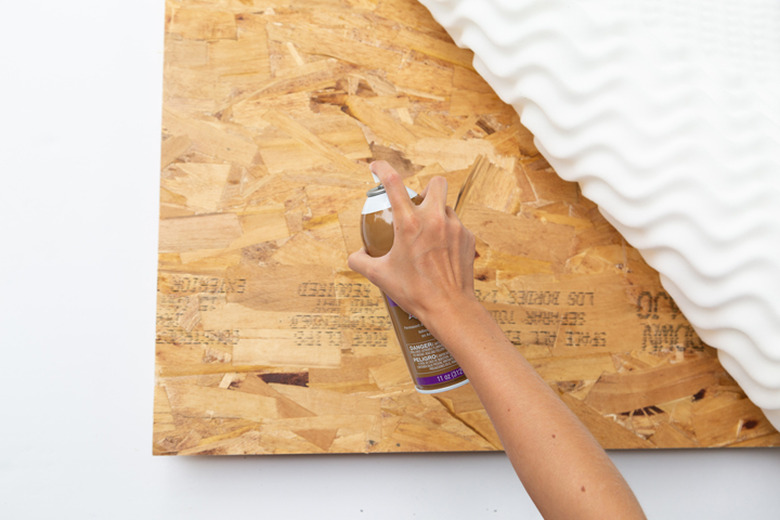
3. Adhere the Foam to the Board
Use spray adhesive to adhere the foam mattress topper to the board. Trim any excess.
 Sara Albers
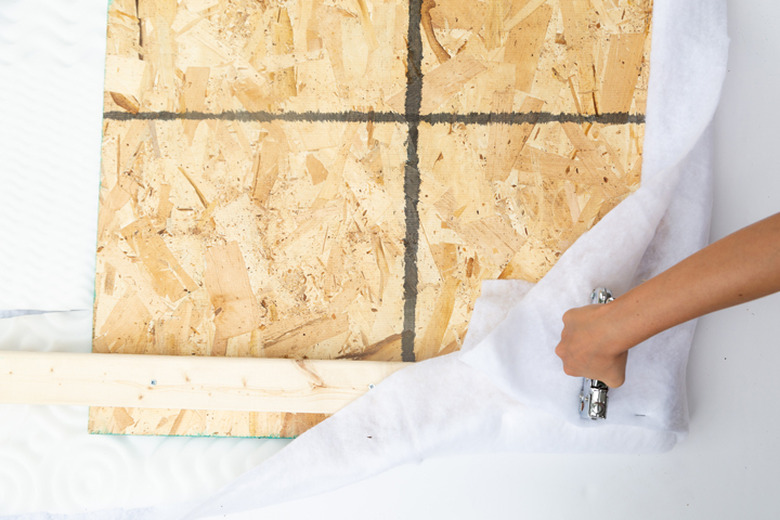
4. Attach the Batting to the Board
Next, lay the batting on the floor and place the foam side of headboard face down (on top of the batting). Pull the edges of the batting to the back side of the headboard and staple down. It is best to start in the center and then staple each side in order to be able to pull it taut. You will need to cut around where the leg and the bottom of headboard meet.
 Sara Albers
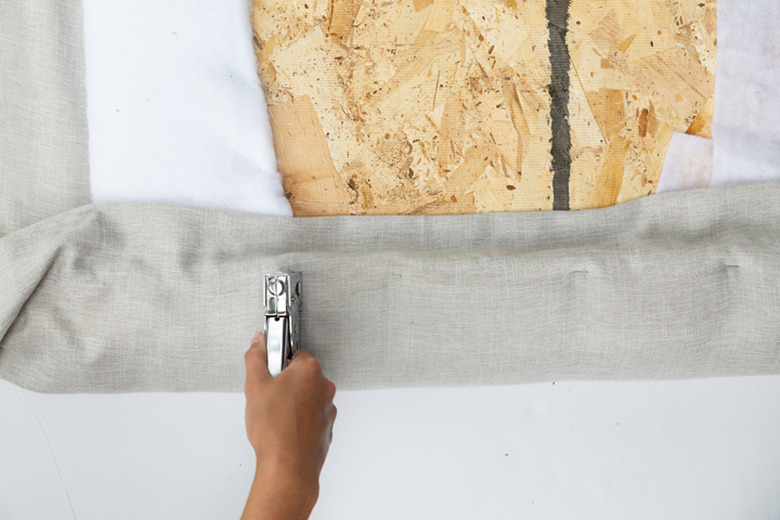
5. Attach the Linen Fabric to the Headboard
Lay the linen panel on the ground and smooth it out so that it lays flat. Place the headboard on the top with the batting side down. Repeat the same process as you did for the batting. Start in the top center and staple the fabric onto the back side of the board. Then the bottom center, followed by the center of the left side, and then the center of the right side. Continue around. For the corners, you can cut some the fabric so it does not get bulky. Fold the corner edges to give a clean look. When stapling the fabric, pull it taut, but not excessively as it will flatten the foam. When stapling the fabric around the legs, trim the fabric and fold, then staple.
 Sara Albers
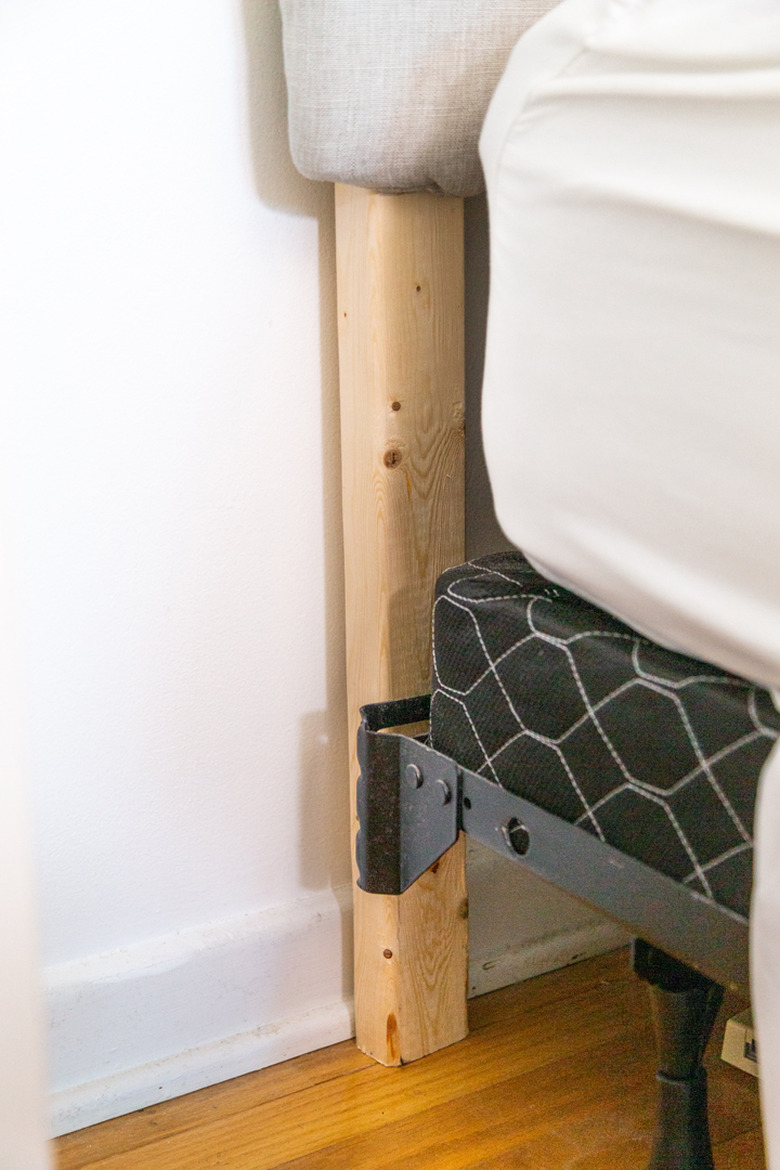
6. Place Onto the Bed
You can secure the headboard to the bed frame by using a power drill and screws. Most metal bed frames have a slot that you can attach the leg supports onto.
 Sara Albers
Tip: You can also wrap the wood leg supports in the same linen fabric. Another idea is to paint the legs the wall color so they will blend.
 Sara Albers