Yes, This Modern Storage Bench With Hanging Backrest Is Actually An IKEA Hack
We may receive a commission on purchases made from links.
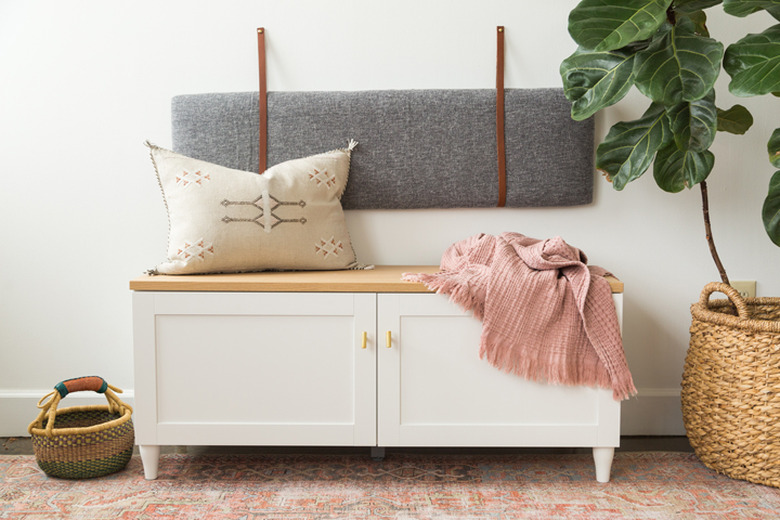
Storage is something we can always use more of, whether it's for putting away shoes in a mudroom to organizing our everyday stuff in an entryway. Benches are always a smart solution because they can provide two things at the same time: seating and storage.
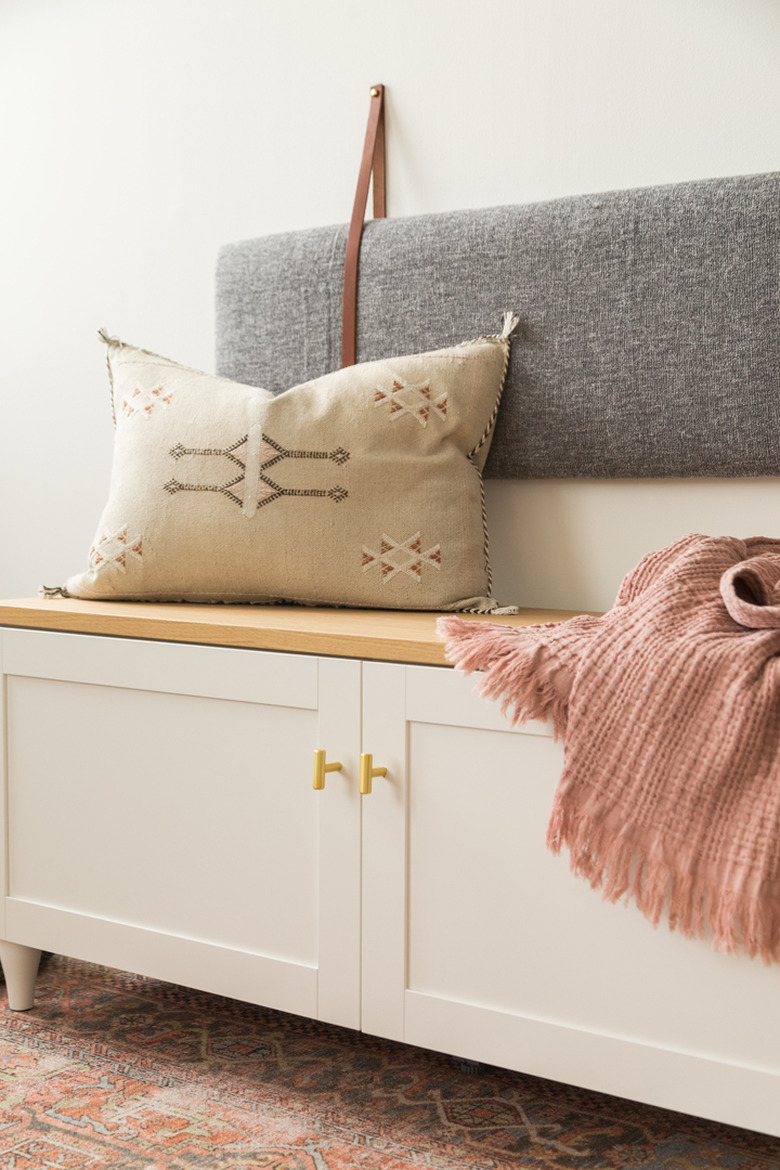
The popular IKEA Besta frame is the perfect height for a bench. The low-frame model is 47 inches by 15 inches by 15 inches. Adding some legs and a wood top gives it a few extra inches for optimal height. To make this IKEA hack extra, we designed a simple hanging upholstered pad to serve as a backrest above the bench. Guess what fabric we used for the upholstered pad? The IKEA INGRUN throw blanket. This blanket adds perfect texture and tone, and it is an incredible way to cut costs on expensive fabric.
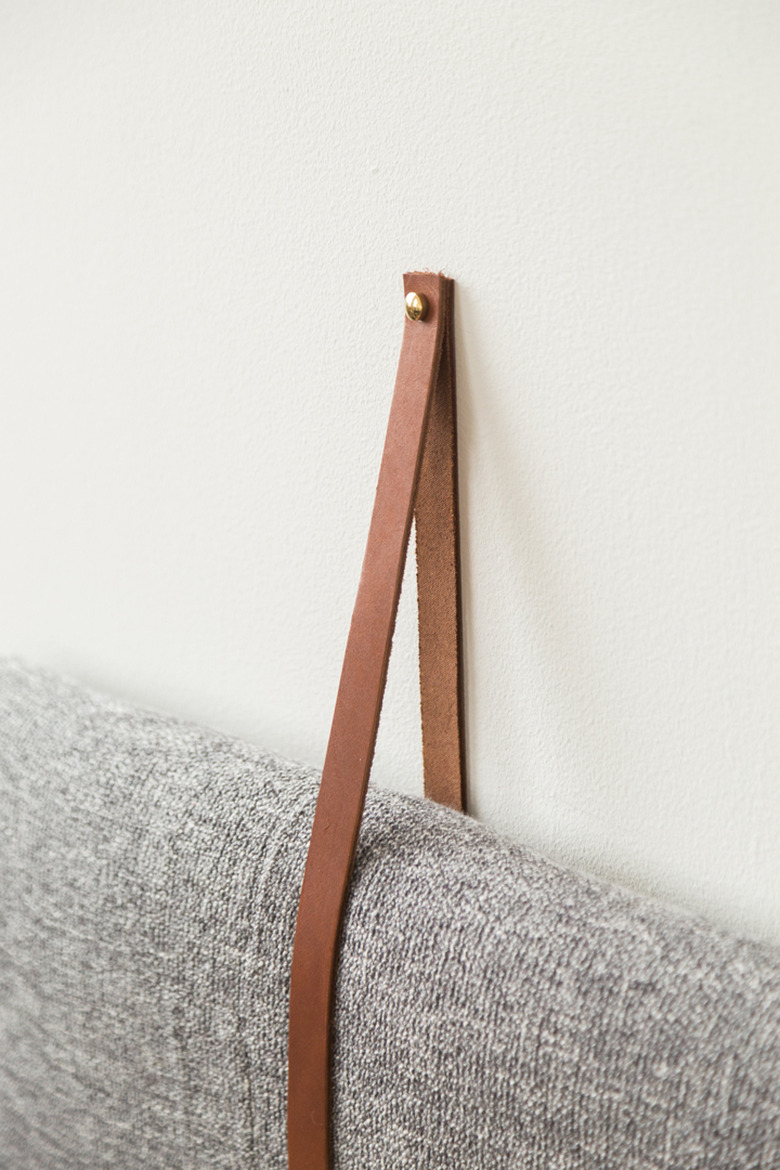
We hung the upholstered pad from two leather straps using brass screw caps. Seriously, brass screw caps are one of our favorite finds from the hardware store! It gives such a finished look.
Things Needed
-
IKEA Besta top panel wood top (or use a wood sheet from hardware store)
-
Plywood, 47 inches by 12 inches
-
Gorilla wood glue (optional)
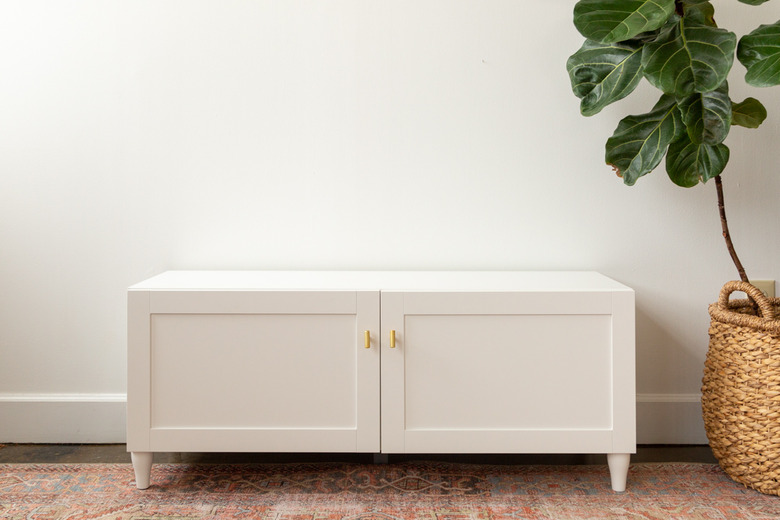
1. Build the IKEA Besta Cabinet
Build the BESTA frame and add the cabinet door fronts with hinges. Attach the legs and one leg support. The leg support piece will give the piece more structured support to use as a bench.
 Sara Albers
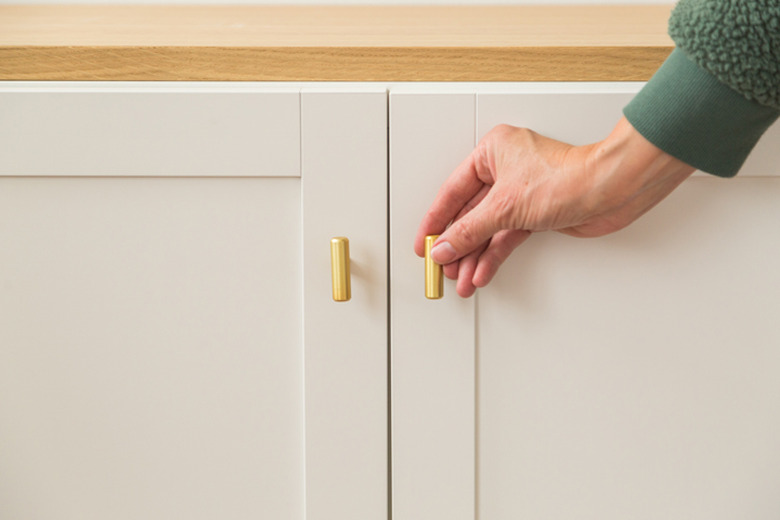
2. Add the Wood Top and Hardware
You can either use the premade IKEA wood top (new!) or get a wood top from your local hardware store. You will need to cut the wood to 47 1/4 by 16 1/2. Sand the edges and adhere to the top of the Besta frame using strong glue (like Gorilla Wood Glue) or heavy duty double-sided tape. Drill two holes into cabinet fronts and attach the cabinet hardware. We love how the brass pulls add a sophisticated touch to the piece.
 Sara Albers
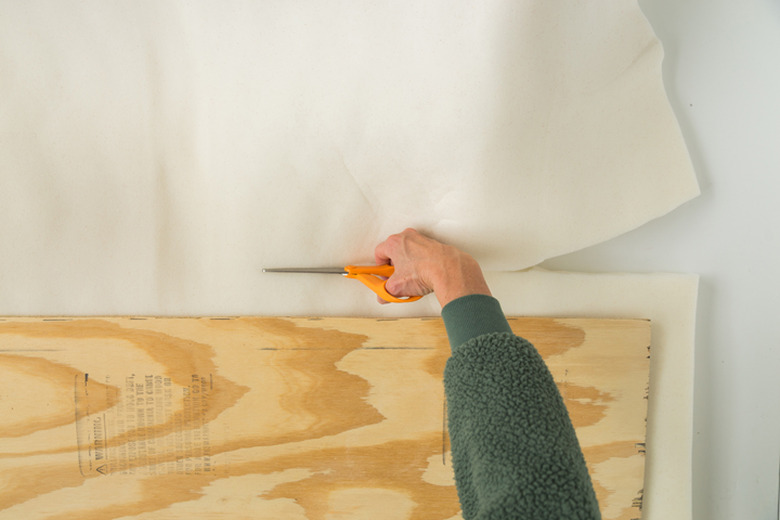
3. Start Making the Upholstered Bench Wall Pad
Start by cutting the plywood piece to 47 inches by 12 inches. Lightly sand the edges where you cut. Place the plywood base onto of the mattress foam topper and cut the foam. Leave an extra four inches all the way around the base.
 Sara Albers
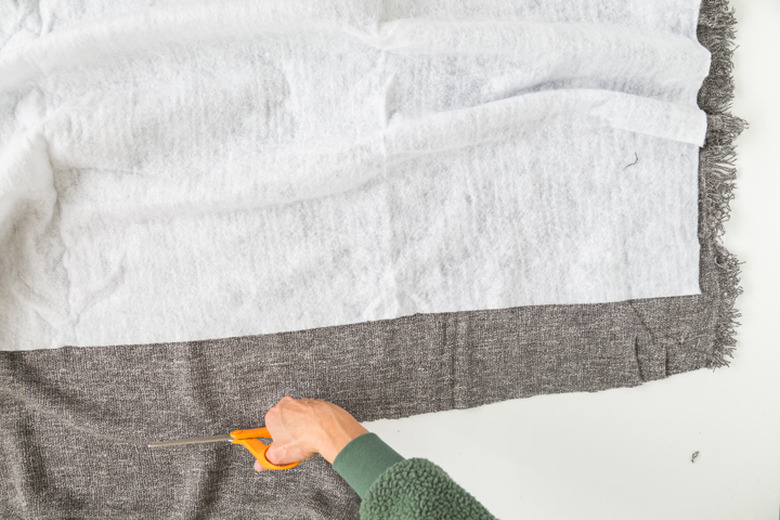
4. Cut Batting and Blanket Fabric
Place the foam on top of the batting and cut. Do the same for the throw blanket fabric. Now you are ready to start stapling. You can also add spray adhesive to the back of the plywood and adhere the foam onto the board.
 Sara Albers
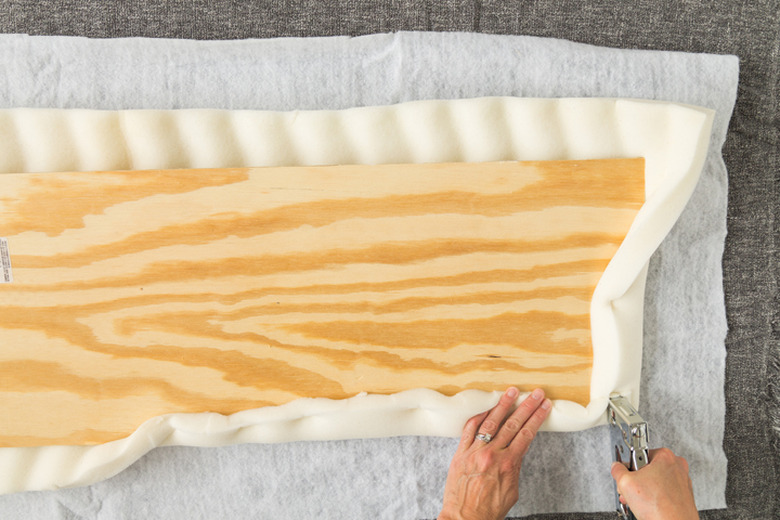
5. Staple the Foam Onto the Plywood
Pull the foam onto the back of the plywood and staple. A good trick is to start the stapling at the bottom center. Next staple the foam down on the top center. Lightly pull the left side and staple. Same on the right. Then continue to staple around the edges. Make sure the foam is even on the edges of the plywood.
 Sara Albers
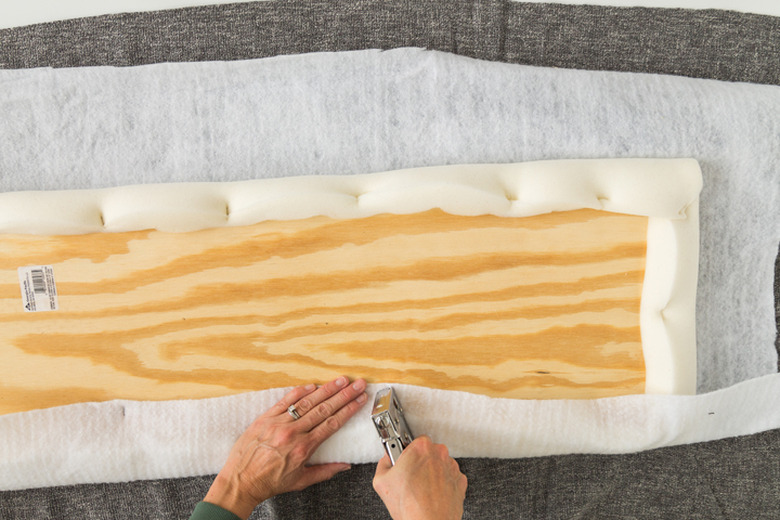
6. Staple the Batting Around the Foam
Follow the same method as above.
 Sara Albers
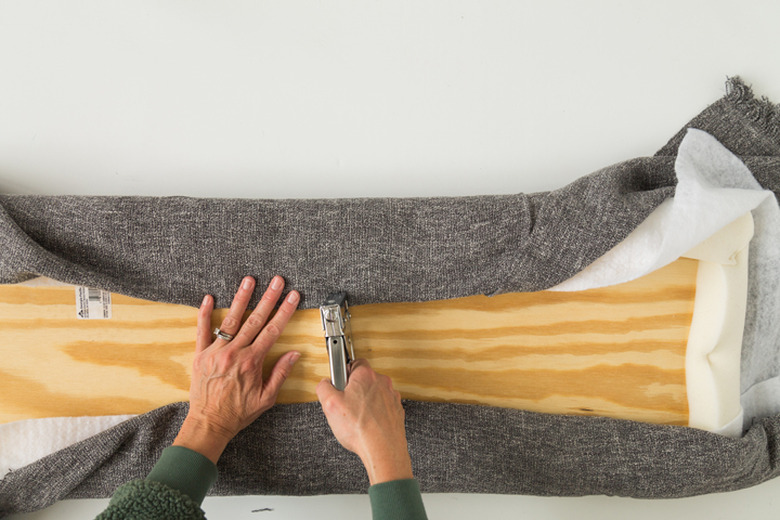
7. Staple the fabric around the batting onto the board
Lay the blanket on the ground and smooth it out so that it lays flat. Place the plywood on the top with the batting side down. Repeat the same process as you did for the batting. Start in the bottom center and staple the fabric onto the back side of the board. Then the top center, followed by the center of the left side, and then the center of the right side. Continue around. Fold the corner edges to give a clean look. Almost like you are wrapping present. When stapling the fabric, pull it taut, but not excessively as it will flatten the foam.
 Sara Albers
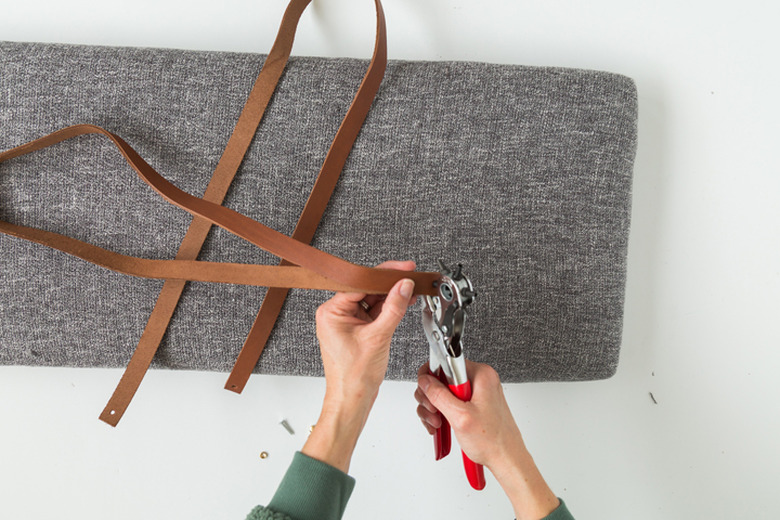
8. Measure the Desired Length of Leather Straps
Hold the pad onto the wall above the bench to your desired height. We hung this pad six inches above the bench top. Cut the leather straps to 42 inches. Using a leather hole punch, punch holes through the ends of straps. Make sure the holes line up.
 Sara Albers
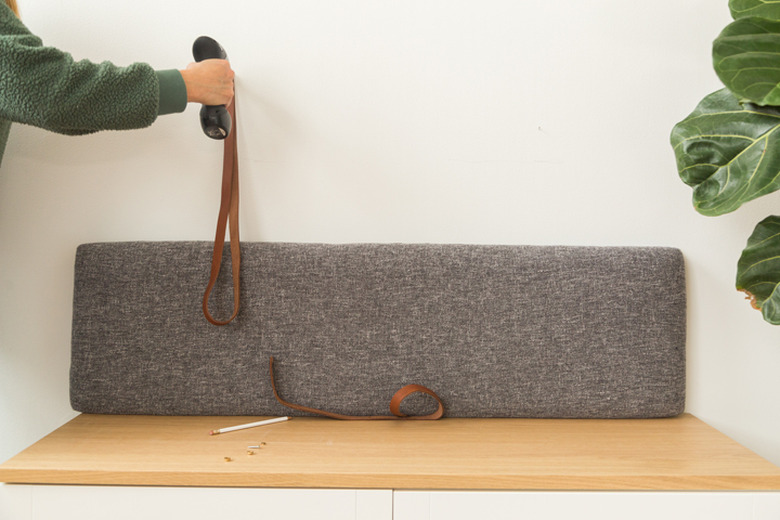
9. Attach Straps to the Wall
Using the three-piece set of the brass cap screws, screw into wall. Then add the screw top for a beautiful finished look. Once you hang both straps, slide the pad into the straps.
 Sara Albers
 Sara Albers
 Sara Albers