How To Install Kitchen Cabinets In 13 Easy Steps
We may receive a commission on purchases made from links.
Installing kitchen cabinets isn't the simplest home improvement task in the world, especially if your home has slanted or uneven floors or walls. However, if you have enough DIY home improvement experience to feel comfortable using shims to make cabinetry plumb and using filler strips to fill in any gaps along the sides, top and bottom of your new cabinets, then installing your own cabinets as part of a DIY kitchen remodel could save quite a bit of money.
Begin kitchen cabinet installation with the upper wall cabinets since it is easier to reach inside to screw the cabinets to the walls if you don't have to lean over the base cabinets. To make the work easier, attach ledger boards, or horizontal strips of wood, made from 1x3 or 1x4 lumber to the walls with screws.
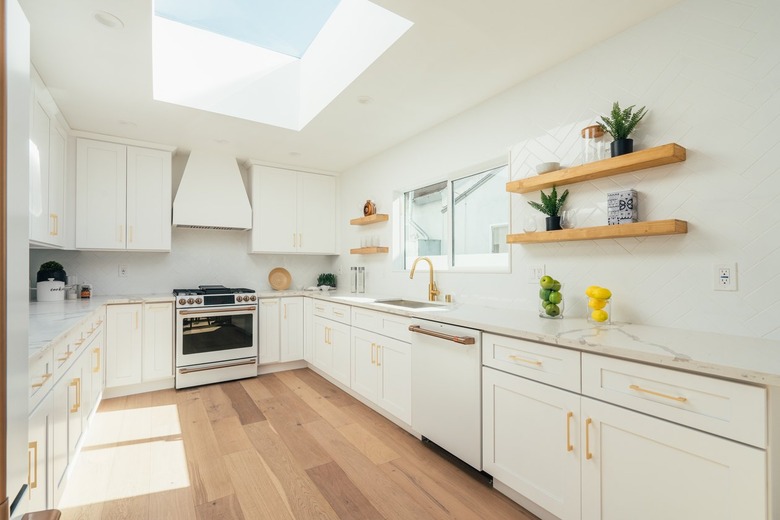
 Stephen Paul for Hunker
How to Install Wall Cabinets
1. Install Ledger Boards
The cabinets will rest on these ledgers as you attach them to the walls. The top edge of the ledger boards should be at the same level as the bottom of the cabinet, normally about 54 inches above the floor.
2. Attach the Corner Wall Cabinet
Starting in a corner of the room, position the corner cabinet on the ledger. Pre-drill pilot holes through the cabinet's hanging strips (at the top and bottom of the cabinet) and attach the cabinet to the wall studs with 2 1/2-inch flathead screws in your pre-drilled holes. Do not tighten down the screws fully at this time; this will not be done until all the cabinets are hung. If the cabinet layout requires filler strips on the sides of the first corner cabinet, first clamp the strip into place with woodworking clamps. Drill counterbored pilot holes through the cabinet face frame or sidewall and into the filler strip and then attach with 2 1/2-inch wood screws.
3. Attach Adjoining Wall Cabinets
Working from the corner cabinet outward in both directions, position wall cabinets one at a time onto the ledger board and loosely anchor them to the wall studs with screws driven through the hanging strips at the upper back of the cabinet. You can use woodworking clamps to hold the adjacent cabinets together along the face frames as you work.
4. Join the Cabinets Together
When all the wall cabinets have been loosely attached to the wall studs, line up the face frames of the cabinets so they are flush and temporarily hold them in place with woodworking clamps. Attach each cabinet to the adjoining cabinets by drilling counterbored pilot holes through the inside surface of the face frames (near the hinge locations) and driving wood screws to secure the face frames together.
5. Anchor Cabinets to the Wall
Using a carpenters' level, check the cabinets to make sure they are level and plumb. You can tighten or loosen the mounting screws to adjust the position of the cabinets relative to the wall. When the row of cabinets is perfectly level and plumb, finish anchoring them to the studs by tightening all of the mounting screws and adding more screws as needed. Where there are gaps between the wall and the back of the cabinet, fill the gaps with wood shims and then tighten down the mounting screws to secure the cabinets. When the cabinets are secure, remove the ledger boards from the wall.
6. Attach Filler Strips and Trim
At the end of a row of cabinets, you may need to cut and attach a final filler strip where the last cabinet meets the side wall. After cutting the filler strip to fit, position it between the face frame on the last cabinet and the wall and then drill counterbored pilot holes and secure the filler strip to the last cabinet.
If your cabinet style calls for decorative trim (such as crown moldings around the tops of the cabinets or edging moldings around the sides), cut and attach the trim pieces using a brad nailer (or by driving finish nails with a hammer).
7. Install the Doors and Shelves
Attach the cabinet doors to the wall cabinets according to the cabinet manufacturer's directions. In some cases, this will mean mounting the hinges and then the doors. In other cases, it will be a matter of attaching doors to hinges that are already mounted on the cabinets. Finish the wall cabinet installation by installing shelves and any inner storage accessories.
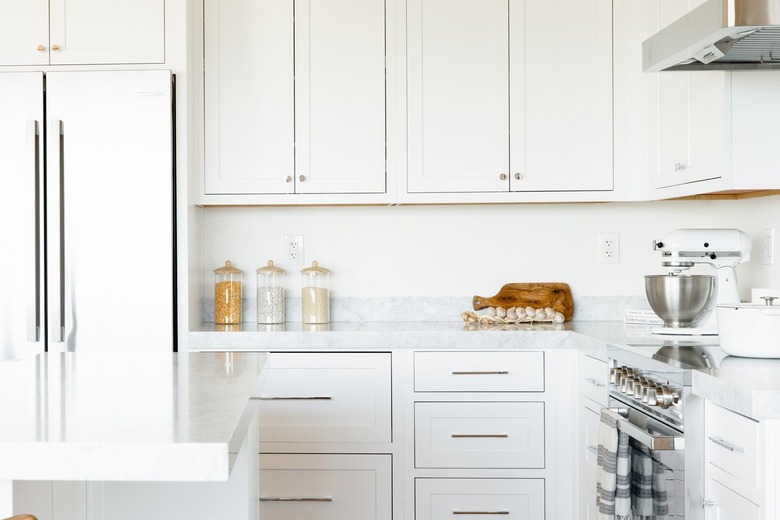 Sanford Creative
How to Install Base Cabinets
1. Outline the Floor Location
Begin by outlining the position of where the bottom of each cabinet will sit on the floor and keep in mind that the front of the cabinet (along the floor) will receive a thin trim board called a toe-kick. Where filler strips will be used between cabinets, make sure to leave a gap between the cabinet outlines. A framing square is helpful for making sure the outlines are perfectly square.
If the wall behind the cabinets is uneven, you may find it necessary for one or more of the cabinets to sit slightly forward from the wall to ensure that the cabinets will all line up flush at the front. However, you must use shims to keep the cabinets away from the wall.
2. Position the First Corner Cabinet
Position the largest corner cabinet in its proper place and check it for plumb and level with a carpenters' level. If necessary, level the cabinet by driving shims under the bottom of the cabinet. Drill pilot holes in the cabinet's hanging strips and loosely anchor the cabinet to the wall studs using screws. If there will be filler strips installed between the corner cabinet and the adjoining cabinets, attach them at this time. Clamp the filler strips in place with woodworking clamps and then attach them by drilling counterbored pilot holes and driving wood screws through the edge of the face frame and into the filler strips.
3. Position Adjoining Cabinets
Working one cabinet at a time, position the adjacent floor cabinets alongside the corner cabinet. Use woodworking clamps to secure the cabinets together, making sure the face frames are flush. Secure the cabinets together with counterbored wood screws driven through the edges of the face frames. Anchor each cabinet loosely to the wall studs with wood screws.
4. Prepare Specialty Cabinets
Sink-base cabinets and wall-oven cabinets may require that openings be cut in the back wall or side wall of the cabinet to provide room for the water supply, drain hookups and electrical or gas hookups as applicable. If so, make these cutouts with a jigsaw.
5. Secure Cabinets to the Wall
Use a carpenters' level to check the entire row of base cabinets for level. Shim beneath the bottoms of the cabinets if necessary to level them. Once all the floor cabinets are level and secured to one another through the face frames, anchor the cabinets by tightening the screws in the hanging strips and adding more screws as needed. If there are gaps behind the cabinets — as often happens if the floor is not level or the walls are uneven — use wood blocks or shims to fill spaces behind the cabinet-mounting strips and then drive screws through the mounting strips and into the wall studs.
6. Install Trim, Doors and Drawers
Gaps along the base of the cabinets and along side walls are normally filled with toe-kick trim moldings, filler strips or decorative trim moldings. A brad nailer makes this work easier, but it can also be done with finish nails driven with a hammer. As a last step, attach the cabinet doors, shelves and inner accessories for the base cabinets.
How to Prep for Installing Kitchen Cabinets
How to Prep for Installing Kitchen Cabinets
Before removing your old kitchen cabinets, turn off the electricity, gas and water to the kitchen so you can disconnect and remove appliances safely. Throw a drop cloth over the floor to protect it from damage. If there are any parts of the old cabinets you wish to preserve, such as hardware or doors, remove them and place them aside.
References
- Old House Journal: How To Install Kitchen Cabinets
- Lowe's: Measure and Prep for Cabinets
- Lowe's: Prepare for a Kitchen Remodel
- Renos 4 Pros & Joes: What Comes First Flooring or Cabinets?
- Ceramic Tile Education Foundation: Should You Install Tile Under Cabinets?
- Paint Talk: How To Fix Uneven or Damaged Drywall With a Skim Coat
- National Kitchen & Bath Association: Tips for Cabinet Installation
- Lowe's: How to Install Kitchen Wall Cabinets
Remove the Countertop and Appliances
Before removing your cabinets, you'll need to remove appliances, such as the garbage disposal and dishwasher. Unplug the garbage disposal and disconnect it from the drain pipe and the dishwasher if you have one. Then, remove it from the sink by loosening its mounting bracket. To remove the dishwasher, disconnect it from the hot-water supply line, the discharge line and its electrical feed. Unscrew the screws that attach it to the underside of the counter and pull it out.
Next, remove the sink from the countertop and then remove the countertop from the base cabinets. If it is a drop-in sink, use a putty knife or utility knife to cut through any caulk around the sink's edge. Then, using a pry bar, pull the sink up from the countertop and lift it out. If it's an undermount sink, get someone to hold it up as you unscrew the brackets or clips securing the sink to the underside of the countertop. Cut through the caulk or adhesive seal along the sink's edge and then remove the sink.
Remove the countertop by loosening its screws from the base cabinets. Slide a pry bar under its rim to pry it loose. You may need help lifting the countertop from the base cabinets. You can also break the countertop in chunks and remove it if you don't wish to save it.
Remove Your Old Cabinets
Dismantling your kitchen cabinets is relatively easy, but you may need a little help with their removal, as the pieces can be cumbersome.
- For base cabinets: Unscrew and remove the doors. Remove any trim between the wall and the sides of the cabinets. Find the screws
fastening the base cabinets to the wall and the other cabinets and remove
them. Start at one end as you pull each section away. Remove all screws or nails left in the wall. - For upper and tall cabinets: You'll need helpers to hold tall and wall cabinets
as you dismantle them. Make sure the cabinet doors and hardware are off
before starting. With someone else supporting them, unscrew the cabinets
from the wall and remove them from the kitchen.
Prepare the Floor
If there is damage to the floor, now is the time to make the necessary repairs. You can install new floors before or after the cabinets depending on the type of flooring you have. However, if you install the flooring after the cabinets, it's a good idea to add plywood to the subfloor under the cabinets so the bottoms of the cabinets are flush with the finished floor.
Repair Walls Before Installation
After removing your old cabinets, you'll need to fix the wall if there are any damaged areas that will be exposed. You may also want to smooth and flatten the wall as needed so the new cabinets fit flush against the wall. Use spackle and a putty knife to fill small dents, dings and indentations and sand down the areas so they're smooth and blend with the wall. Applying thin layers of drywall joint compound, also known as skim coating, will help fill uneven walls where the low areas are less than 1/4 inch in depth.
 Stephen Paul for Hunker
Mark Walls for New Cabinets
For ease of installation, it is best to mark the walls and floors to show the location of all the cabinets you will install. For wall cabinets, outline the position of the sides, bottom and top of each cabinet onto the wall. If two cabinets will have a filler strip between them, make sure to create a separation between the layout marks.
Upper cabinets should sit about 54 inches above the floor. This accounts for the height of the base cabinet (34.5 inches), a standard countertop (1.5 inches) and an 18-inch backsplash — the wall space in the area between the countertop and the bottom of the upper cabinets.
The position of the wall cabinets will change for specialty cabinets, such as microwave cabinets and cabinets above refrigerators or wall ovens. Check the manufacturer's specifications for the proper position of these cabinets.
Draw a level line on the installation walls about 4 feet above the floor using a carpenters' level or a laser level. Use a tape measure to measure from your level line down to the floor every few feet to find the floor's highest point. This will be the shortest measurement between the level line and floor. Measuring up from the highest point of the floor, mark the wall at 34 1/2 inches (to represent the tops of the base cabinets) and 54 inches (to represent the bottoms of the wall cabinets). Draw a level line at each height mark.
As a final step in the layout, mark the locations of the wall studs in the installation area using a level and an electronic stud finder. Draw a vertical line along both sides of each stud so you will be able to see the marks when the cabinets are in place (you can erase or paint over the marks later). This helps ensure that you anchor the cabinet mounting screws into the studs.
Prep the New Cabinets
Big-box retailers, including IKEA, Home Depot and Lowe's, sell ready-to-assemble (RTA) cabinets. They come in standard sizes and in flat packaging, which includes everything you'll need for DIY kitchen cabinet assembly. A homeowner with just a little knowledge of cabinetry can put RTA cabinets together easily by simply following the directions that come with the cabinets. Make sure to piece RTA cabinets together and put the cabinets in place before attempting any cabinet installation.