How To Install Vinyl Flooring Tiles (LVT)
We may receive a commission on purchases made from links.
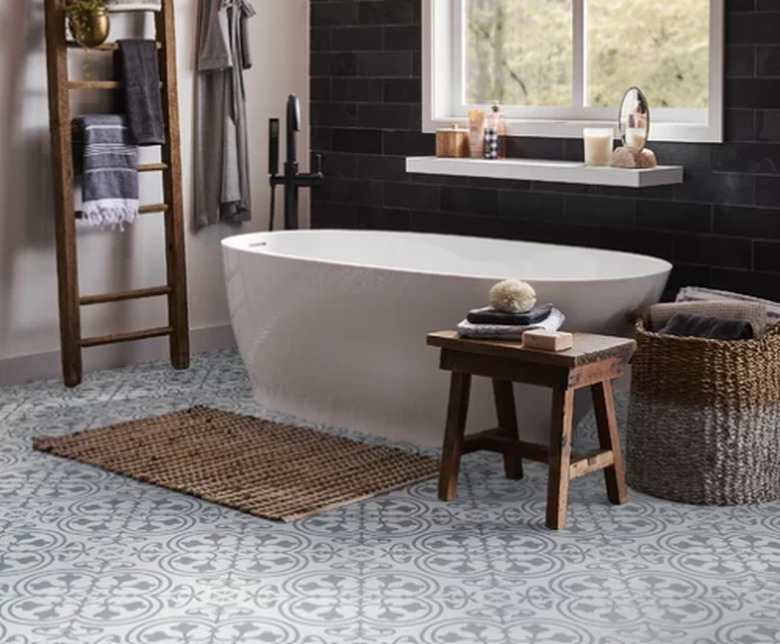
Luxury vinyl floor tiles are an elegant addition to any home and are also surprisingly durable. Commonly known as LVT, this type of vinyl tile comes in a plethora of styles, shapes, and designs and makes home improvement a breeze. You don't have to be a professional to install LVT — you can complete this easy DIY task by following a few simple steps.
What Are Luxury Vinyl Flooring Tiles?
What Are Luxury Vinyl Flooring Tiles?
Originally referred to as "hot-pressed tile," LVT consists of vinyl backing, a vinyl core, a photographic print film layer of the floor's design, and a transparent layer finished with a polyurethane coating known as a "wear layer." This layer may also include ceramic bead, silica bead, or aluminum oxide to reinforce it. It can vary in thickness; high-traffic environments use LVT with a wear layer of 28 millimeters or higher for greater durability.
LVT is softer, warmer, and flatter than ceramic tile. It may scratch, but it will never crack, and it mimics ceramic tile without the expense and potential for damage. Replacing a cracked ceramic tile is not only costly but it may be impossible to find a new piece if the manufacturer discontinued the design.
How to Prep and Install LVT
How to Prep and Install LVT
Before tile installation takes place, it's important to get room measurements so you know how much LVT to purchase. Using a tape measure, assess the room's square footage by multiplying its length by its width. For example, a 10 x 10-foot room would be 100 square feet, an 8 x 6-foot room would be 48 square feet, and so on.
When shopping for tile, you can determine how many cases you'll need by dividing the square footage of the room into the square footage listed on the tile's packaging. For example, if there are 10 square feet of tile in a single case and the room is 100 square feet, you'll need 10 cases to cover the floor. You may also want to purchase an extra case to replace any tiles that get damaged in the installation process.
When measuring the room, don't worry about permanently affixed obstacles, like kitchen islands — you'll purchase enough tile for the overall room and a little extra, so you'll have plenty with which to do the job. Remember to read the tile installation instructions before starting.
 privetik/iStock/GettyImages
How to Install Vinyl Flooring Tiles
1. Evaluate the Condition of the Current Flooring
Before the mid-1980s, most vinyl sheet flooring contained asbestos. If the floor on which you're working is from that era or earlier and it's damaged, consult a professional before any installation occurs. A licensed asbestos abatement contractor must come to your home and test the floor. If it has asbestos, the contractor will remove it safely without causing harm to you or anyone in your home.
If your floor is of that era or earlier and you wish to lay LVT over it, you can do so as long as the original floor is not disturbed in a way that could potentially release asbestos dust into the air.
2. Make Sure the Floor Is Smooth
Before you lay any tile, you need to make sure the existing floor is smooth. You can glue LVT to a floor made from plywood, which is durable and flat. However, if it is wafer board, particleboard or oriented strandboard, it will not be strong enough to place LVT over it.
Even if it's in good condition, your subfloor will likely not be perfectly smooth, so you'll probably need to use floor patch to fill in seams and seal gaps. If your floor has high spots in some areas, sand it down with a belt sander using 60- to 80-grit sandpaper. Sanding floors brings up plenty of dust, so make sure to wear a mask, and if your furnace is on, turn it off to keep dust particles in one location. For floors with more substantial damage, you may want to cover the whole area with floor patch.
If you're installing LVT over concrete, it must be dry, over six weeks old, and generally clean without powder, flakes, solvent, wax, oil, or paint anywhere on its surface. For large cracks in concrete, fill them with floor patch and trowel smooth.
3. Undercut Doors for Placing Vinyl Tile
Removing or leaving door trim depends on the height of your new floor. If the new floor is lower than the previous one, you may want to leave the trim as it is, but if it's higher, you'll need to trim a bit off the bottom door to get the tiles to fit under it. Undercut door trim jambs and casing with either an oscillating saw or handsaw to fit LVT underneath if necessary by using a tile and underlayment as a guide. It's also a good idea to remove baseboards to install vinyl flooring.
4. Install Underlayment
If the subfloor is in good shape, you can skip this step and glue LVT directly onto it. If it isn't, you'll have to place wood or vinyl underlayment between the subfloor and your new flooring. Wood underlayment should be plywood that's about 1/4 inch thick.
You can also place vinyl over a wood subfloor as well as over most any other surface. To use vinyl underlayment, roll it out, cut it, tape it at the seams, and put it in place. Unlike wood, vinyl underlayment doesn't attach to the subfloor. Instead, it "floats" above it, and it will expand, so make sure to create 1/4-inch gap around the room's perimeter and vents. Do not place heavy objects on it, as they may cause it to buckle.
5. Create a Design for Your Vinyl Tile Floor
Before putting the first tile in place, you should have a design in mind. Divide the room in equal quarters with two chalk lines and measure the amount of tiles you'll need from there, or you can lay them out starting from the lines to better see their configuration. Remember to figure in grout lines when studying the layout.
6. Prepare for Vinyl Tile Placement
Mark the location as to where you will lay the first tile. Make it close to the door and center it or its grout line to the middle of the doorway. Keep balance in mind as you go to avoid using too many of the same-size tiles in one area and avoid placing only narrow tiles at the room's perimeter.
 zayatssv/iStock/GettyImages
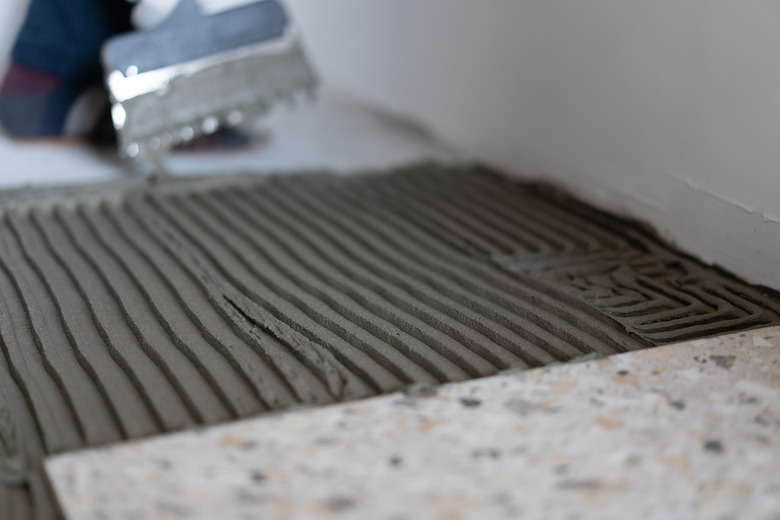
Now that you've configured your design, use a small notched trowel to spread glue evenly over each tile right before you're ready to lay it. Don't glue in advance because this increases the risk of making a mess.
7. Carefully Lay Vinyl Tile Flooring
Your first tile will determine the alignment of the rest of your tiles, so make sure to be precise about how and where you place it. As you work your way into the room, continue to set the tiles. When it comes to setting tile under the trim, you'll need to slide it underneath, but if you're gluing the tile, don't allow it to touch the floor first or it will be too difficult to remove if you make a mistake. Instead, hold it slightly above the floor to gauge where it will land and place it down.
8. Cutting Into Vinyl Tile
For awkwardly shaped spaces in the room, you may need to cut tiles. Before you do, make sure you have something underneath them so you don't cut through to the floor. If you're cutting a straight edge, you can score where you wish to cut, and the tile will snap off at that line. You can use a utility knife for this purpose.
9. Use a Floor Roller to Set Vinyl Tile
If you glued the tiles as opposed to snapping them together like laminate planks, use a 100-pound floor roller to embed the tiles firmly in the adhesive. Roll over each one twice to permanently affix it to the floor. If you don't own a roller of this size, you can rent one. Don't use a rolling pin or laminate roller; it needs to be heavy to secure the tiles in place.
10. Hide the Transition
At the floor's edges, place carpet bars using a hammer and hacksaw to conceal the transition from one surface to the next.
11. Grout the Tiles
When grouting glued-down tile, make sure to go with the type of grout recommended by the manufacturer. Do not use anything cement-based. Using the narrow tip of a trowel, place grout in the gaps between the tiles. Then, with a rubber grout float, work it in. Scrape off the excess and wait before cleaning it with a mist of water and a wet sponge.
When cleaning the floor, don't use too much water or scrub too hard, as you may start to remove the grout you just put in place. Check the tiles the next day. If any excess grout remains on the tile floor, spot clean with ammonia or mineral spirits. Let it dry for at least 24 hours before allowing anyone to enter. Do not wash it for at least a few days to let everything settle.