How To Prep Walls For Painting
We may receive a commission on purchases made from links.
"A good paint job is 90 percent preparation and 10 percent painting." You've undoubtedly heard this adage before, and it's accurate, although a more realistic ratio might be more like 80 to 20. This paint preparation adage applies whether you are painting trim, decks, furniture, or automobiles, and it definitely applies to walls.
Incomplete preparation can cause problems like:
- Lifting paint
- Bubbles
- Poor coverage
- Stain bleed-through
Some of these issues can be serious enough to force you to undo your work and start over from the beginning, and you might not even realize this until the defects become apparent several months later. Even when things aren't that bad, you may find it necessary to spend extra time and money on a spot repair and an extra coat of paint.
What Is Paint Prep?
What Is Paint Prep?
Paint preparation is mostly grunt work, and if you don't like it, you're not alone. The job entails scraping, sanding, washing, masking and filling holes. It's dusty, messy work, and it takes effort. In older homes, preparation also includes testing for lead before you do anything else. Additionally, priming is an important part of paint prep that you should skip only in certain circumstances. Taken together, all these tasks require more time than the actual painting, but if you want to be happy with your paint job five years down the road, it's time well spent.
Warning
The walls may be painted with lead-based paint in homes built before 1978. Lead is toxic, so you shouldn't raise dust by sanding the walls or fill the air with paint flecks by scraping them. Test for lead by using a home test kit or collecting a paint sample and sending it to a lab.
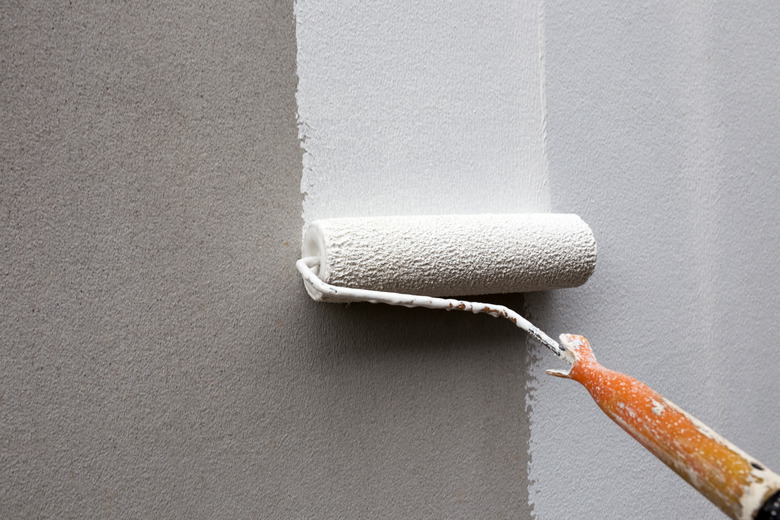
Basic Paint Prep Process
Basic Paint Prep Process
Get out your notepad and a pencil and write down the tasks you have to accomplish before reaching for the paint roller. Whether you're alone or working with a team, a systematic approach helps work flow more smoothly, reduces trips to the hardware store, and makes it easier to delegate work. Not every job requires the same degree of preparation, but the same list of tasks applies to most of them. If desired, create a checklist of the necessary jobs — listed in the order in which they need to be done — and check off each one as you complete it.
Some backtracking might be necessary, but this approach guarantees that you won't forget to do something important. Some prep procedures might be longer than others, but most will include these basic steps:
- Move furniture and cover the floors. It's best if you can move furniture out of the room, but if not, move it into the center of the room and cover it with drop cloths.
- Scrape off loose paint and wallpaper. Use a paint scraper to remove lifting paint as well as separated drywall tape. Pull off old wallpaper. It's hardly ever a good idea to paint over wallpaper.
- Wash the walls. This step is crucial unless the walls have flat paint in good condition. Glossy walls tend to reject new paint, as do walls covered in grease, soot, or oil. Put on your rubber gloves and mix a cup of trisodium phosphate (TSP) per gallon of water. TSP is a strong detergent that will de-gloss shiny surfaces. Rinse with clear water.
- Make repairs. Re-tape drywall joints that need it and make other drywall repairs. You may need to fix the texture or smooth the wall with a skim coat. Fill drywall holes with joint compound or spackling compound, both of which are also good fillers for small nicks and dents in wooden trim.
- Sand. A quick, light pass with 120-grit sandpaper on a pole sander ensures good paint adhesion. You'll also need to sand any repairs you made.
- Clean up. After you've sanded the walls, they're ready for primer. Make sure the primer doesn't become a mixture of paint and dust by brushing off the walls and vacuuming around the edges of the room before you open the paint can.
- Mask. Tape off the edges of the wall and anything you don't want to paint, such as window frames.
- Prime. In most cases, you can use PVA drywall primer, particularly over new drywall or joint compound. If you're painting a wall with a super-glossy coating, one that was particularly sooty or greasy, or one with stains that could bleed through, use a water-based high-solids primer. If you expect bleed-through to be a problem (such as with soot or crayon), switch to a shellac-based primer.
Paint Prep for Basement Walls

Paint Prep for Basement Walls
In a finished, heated basement, the preparation procedure isn't much different from that for a room upstairs. In an unfinished, unheated basement, the main obstacle to paint adhesion is moisture. Excessive moisture may even be the reason you decided to paint, hoping that a waterproof coating can control it. No matter what type of paint you use, the walls must be dry before you apply it. Run a heater or dehumidifier if necessary. If seepage is keeping the walls moist, don't paint until you do something about the seepage, or you'll just be wasting paint. Mold is also common in the basement. You have to kill it before you paint, or it will keep growing.
Tip
Some types of mold actually eat paint. The best way to kill mold is to wash the area with detergent (TSP will do) and water, then rinse and let the area dry out. Bleach is unnecessary.
Paint Prep for Exterior Walls
Paint Prep for Exterior Walls
Exterior walls also have to be clean before you paint, but outside, you have the advantage of being able to use a power washer to do the cleaning, as long as it's safe for your siding. If mold is excessive, scrub it off with soap and water before you power wash. Let the wall dry for at least 24 hours — or longer for some materials, like wood — and paint in dry weather. Avoid excessive sun exposure on the fresh paint, which can crack it, by painting in the early morning or mid- to late-evening.