How To Use A Speed Square
The generic name for a speed square is rafter square. Speed Square is actually a brand name of the rafter square made by the Swanson Tool Company, but the term is now used so commonly it has become the standard (like Kleenex or Xerox). Speed squares come in several different sizes and in both metal and plastic. The classic version is about 7 by 7 inches and fits conveniently in a tool pouch. This is the best size for most jobs around the house. As noted by Swanson, the speed square is five tools in one:
- Try square
- Miter square
- Saw guide
- Line scriber
- Protractor
 DEWALT/Amazon
Speed Square Overview
Speed Square Overview
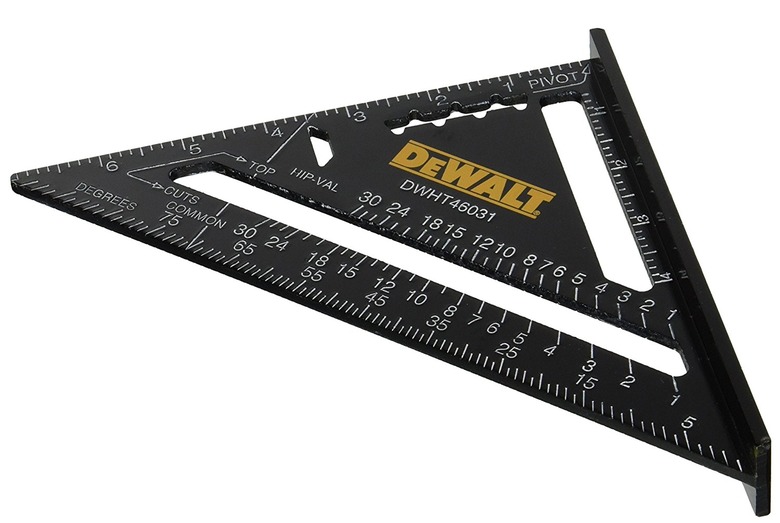
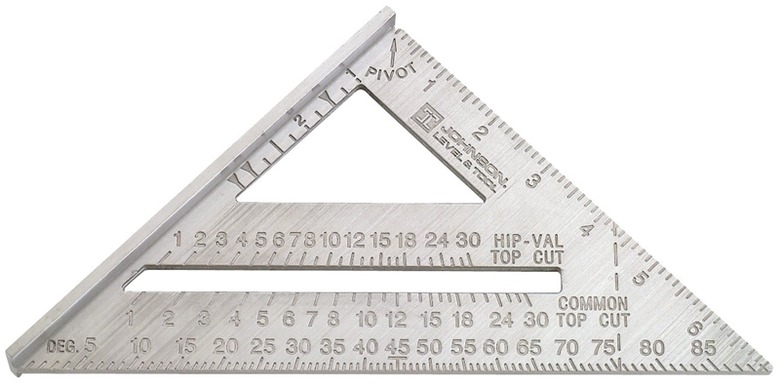
Specific features on a speed square can vary, but most have similar designs and include multiple scales for performing several of the basic tool functions. A speed square has two short sides that form a right (90-degree) angle and a hypotenuse (the long, third side) that forms 45-degree angles to the other two sides. Along one of the short sides is a narrow, flat piece, called a flange, that creates a ledge on both sides of the square. The flange is key to most of the square's functions.
The physical shape of the square alone, along with the flange, allows you to use it as a standard marking square for drawing 45- and 90-degree angles and for checking assemblies for squareness. In addition, all of the square's sides have scales or markings that make it a much more versatile tool. Markings on most speed squares include:
- Standard ruler scale—for quick measurements
- Degree scale—for marking angles between 0 and 90 degrees
- Common rafter scale—for marking end cuts on common rafters
- Hip-valley scale—for marking end cuts on hip or valley rafters
- Scribe scale or notches—for drawing straight (or parallel) lines at measured intervals
 Johnson/Mac's Hardware
How to Use a Speed Square as a Try Square
How to Use a Speed Square as a Try Square
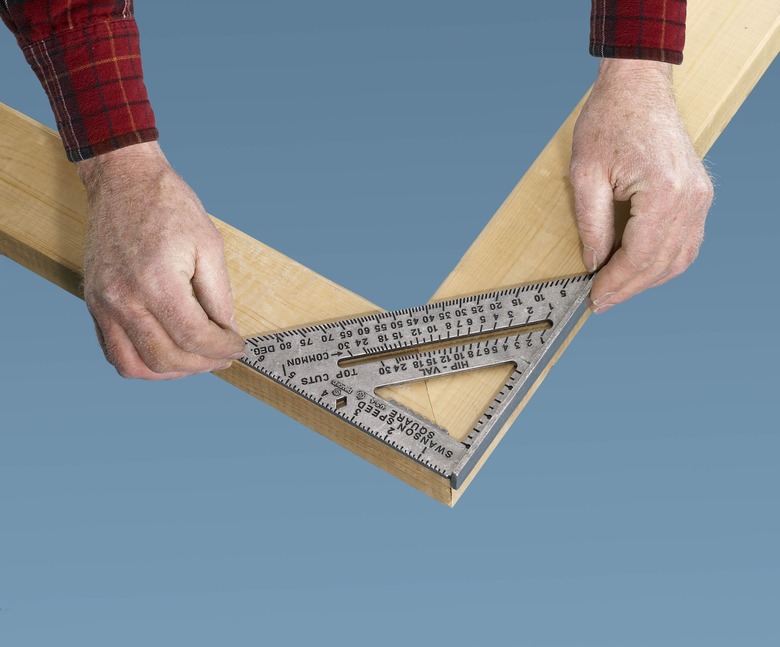
A try square is a traditional woodworker's square for marking right angles and checking corners or assemblies to make sure they are square. To mark a line at a right angle to a board's edge using a speed square, place the square flat on a board and hold the flange up against the board's edge, then mark along the square's edge that is perpendicular to the flange.
To check a corner for squareness, fit the speed square into the corner (for checking the inside of the corner) or against the outside, and look for gaps along the two short edges of the square; if there are no gaps, the corner is square. You can do the same thing to check for squareness at the end of a board to make sure the end was cut squarely.
 Swanson Tool Co.
How to Use a Speed Square as a Miter Square
How to Use a Speed Square as a Miter Square
A traditional miter square is similar to a try square but is fixed at a 45-degree angle rather than 90 degrees. To mark a 45-degree miter (angle cut), hold the square against the edge of the workpiece and trace along the hypotenuse of the square. You can make many more angles with a speed square, but this falls under its use as a protractor, explained below.
How to Use a Speed Square as a Saw Guide
How to Use a Speed Square as a Saw Guide
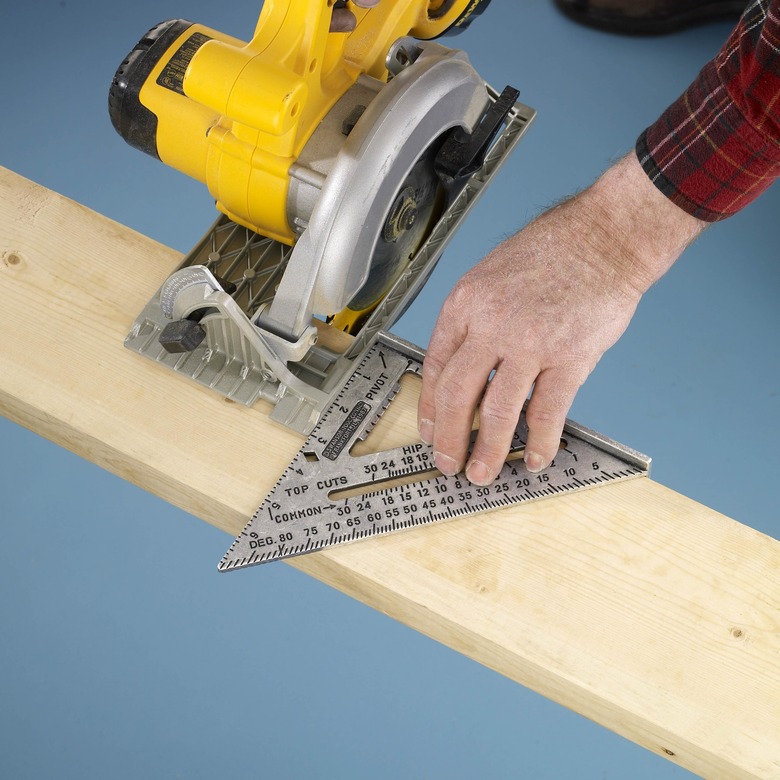
Using a speed square as a power-saw guide helps you make straight cuts on pieces up to about 10 inches wide (using a 7-inch square). This works best with a circular saw or jigsaw and is a slightly advanced technique, but it's indispensably handy once you master it. The idea is to hold the square firmly in place on the workpiece and slide the foot or base of the saw along the straight edge of the square during the cut.
 Swanson Tool Co.
Mark a straight cutting line (using the square as a try square), then position the saw on the workpiece so the blade is aligned with the mark. Place the square onto the workpiece with the flange flush against the front or back edge (whichever feels more comfortable). Slide the square up against the base of the saw. Check the position of the saw blade on the mark, and adjust the saw and square to line up the blade, as needed. Once you're lined up, hold the square firmly in one hand while making the cut with the other hand, keeping the saw foot against the square's edge throughout the cut.
How to Use a Speed Square as Line Scriber
How to Use a Speed Square as Line Scriber
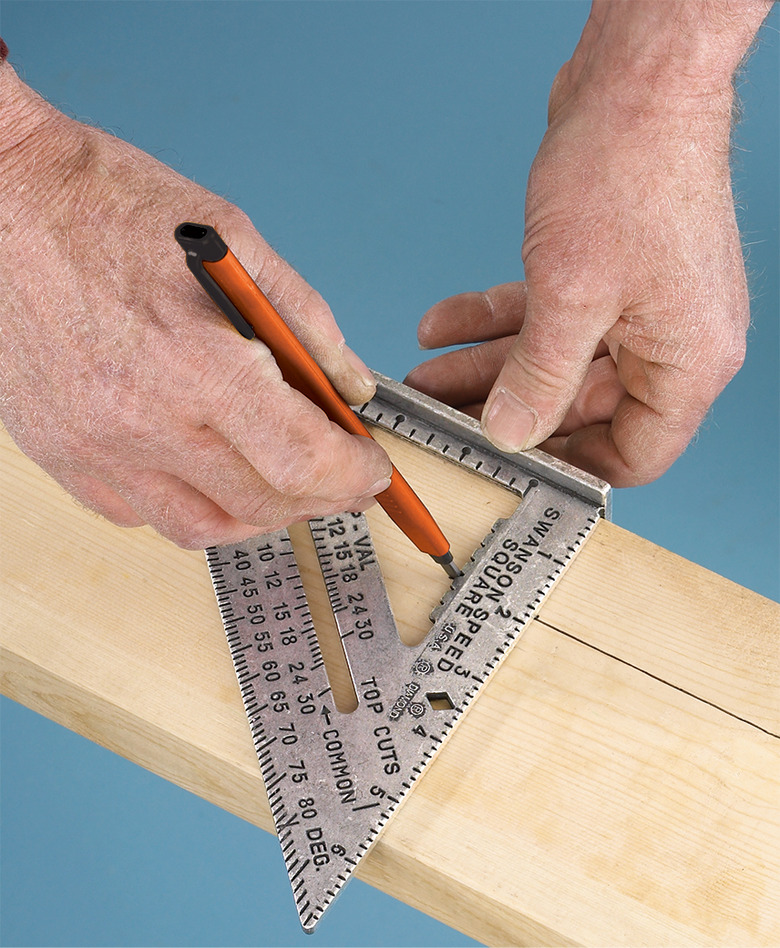
Many speed squares have a triangular opening in the center of the square. On one edge of this triangle is a scale with 1/4-inch gradations. Each gradation has a notch, which is there to hold the tip of a pencil or pen. If you place your pencil in a notch and slide the square along the workpiece—with the flange up against the edge—you'll scribe a straight line that is perfectly parallel to the workpiece edge.
 Swanson Tool Co.
How to Use a Speed Square as a Protractor
A protractor, like the one you used in geometry class, is used for measuring and marking angles. A speed square does the same thing with lumber. In fact, it is this function that gives the rafter square its name: The square is designed to quickly mark the angled cut at the top and bottom ends of roof rafters (as well as the bird's mouth notch where the rafter sits atop the wall frame).
The speed square usually has three scales for marking angles. The "degree" scale runs along the hypotenuse and indicates the standard degree of angle, just like a protractor. You read the degree scale along the hypotenuse edge of the square. Just above the degree scale is the "common" scale, with numbers from 1 to 30 (typically). Each number represents the pitch, or slope, of a roof. Roof pitch is expressed in units of rise (vertical distance) over units of run (horizontal distance). A 3-in-12 pitch rises 3 inches for every 12 inches of horizontal run. A 12-in-12 pitch is a 45-degree angle. You can also have steeper pitches, such as 15-in-12 or 24-in-12. The numbers on the scales indicate the roof pitch. For example, the "3" on the scale is for a 3-in-12 roof.
The third scale, above the common, is the hip-valley, or hip-val, scale. This gives you the roof pitch for hip and valley rafters, which sit at a different angle than the common, or standard, rafters on the same roof. Between the common and hip-val scales is a slot-shaped window; this is where you read the common and hip-val graduations. You don't use the hypotenuse edge, which is for the degree scale only.
 Irwin/Slingshot Tools
To mark a degree angle with a speed square, place the square with the flange flush against a straight side edge of a board. Place a thumb and forefinger at the right-angle corner of the square, where it says PIVOT and has an arrow pointing to the corner. (Note: Your square may say PIVOT on only one side, but the sides are interchangeable; you don't have to have the PIVOT side facing up.) Keeping the pivot point in place with your thumb and forefinger, pivot the flange edge away from the board until that same board edge is aligned with the desired degree marking. Hold the square firmly against the top face of the board (without moving the square), and draw a line along the hypotenuse edge of the square. The resulting line is the degree of angle away from vertical (90 degrees).
Use the same technique to mark a similar line using the common or hip-val roof-pitch scale, but line up the board edge with the appropriate scale marking inside the slot window.
With a little practice, the speed square provides a very easy way to mark angles on framing lumber.