How To Make Coped Joints In Molding
The coped joint is a classic carpenter's technique for joining wood molding at inside corners of walls and ceilings. (When two walls come together to form a "V" shape, the inside corner is when you're looking at the valley of the V; an outside corner is when you're looking at the point of the V.) Coped joints are commonly used when installing baseboard and crown molding, and the technique works just as well for chair rail and picture rail molding. Coping a joint is a two-step process involving a mitered cut with a miter saw followed by a coped cut with a specialty handsaw called a coping saw. The joint takes a little practice, but it's not difficult and can be more foolproof and look better than a standard miter joint.
 Workshop Heaven
How a Coped Joint Works
How a Coped Joint Works
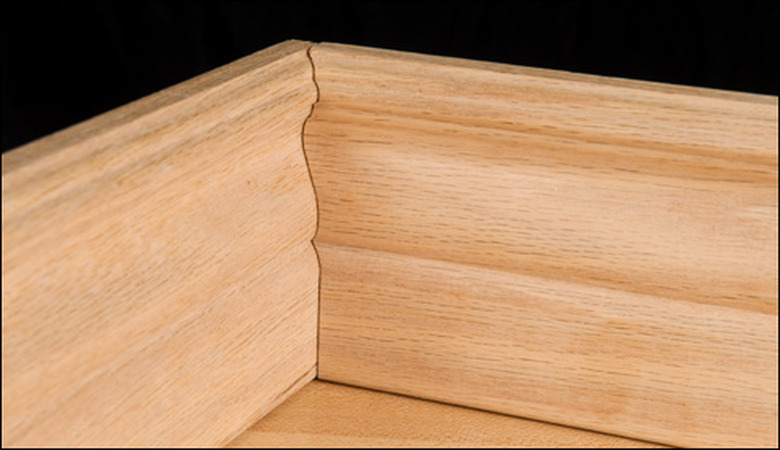
A coped joint is the standard alternative to a basic mitered joint, where the two molding pieces are cut at 45 degrees to fit together at inside corners. Coped joints are used specifically for contoured molding because the cut follows the contours of the molding's face. With a coped joint, the first piece of molding is cut square and runs all the way into the corner. The second piece is coped to fit against the face of the first piece.
 Lee Valley Tools
Advantages of Coped Joints
Advantages of Coped Joints
Coped joints offer several advantages over mitered joints. First, coped joints tend to show gaps less readily if the wood shrinks over time. Coped joints also can be easier to make because only one of the two mating molding pieces needs a special cut; the first piece is just a quick square cut that butts into the adjacent wall. And coping is much more forgiving of walls that don't meet at exactly 90 degrees, which create problems for miters. Finally, coped joints don't spread apart when you nail the molding pieces. By contrast, mitered joints have a tendency to open up during installation because you're forcing the pieces away from each other as you drive each piece up against its own wall.
Things Needed
-
Tape measure
-
Pencil
-
Power miter saw or miter box and backsaw
-
Finish nails
-
Hammer or nail gun
-
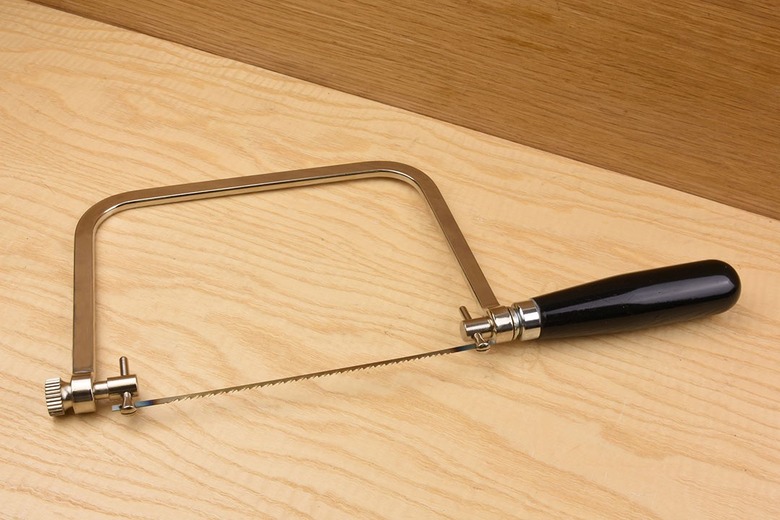
Coping saw
-
File (optional)
-
Nail set (optional)
How to Make a Coped Joint
1. Install the Square-Cut Piece of Molding
Cut the first piece of molding with a square (90-degree) cut so it fits tightly into the corner, butting up against the adjacent wall. Fasten the molding with finish nails and a hammer or a nail gun.
Tip
Plan your molding installation so that each piece has no more than one coped end. (It's possible to cope both ends on a piece of molding, but it's a little trickier than having one square-cut end.) In a square or rectangular room, you can start with two square cuts on the back-wall molding (opposite the room's main door), then use coped joints to work your way around to the door, finishing with square cuts that butt against the vertical door trim.
2. Miter-Cut the Second Piece
Measure for the length of the piece you will cope, measuring all the way to the adjacent wall where the square-cut piece is installed; do not measure to the face of the square-cut piece. Cut the molding to length, making a 45-degree miter cut on the end you will cope, using a miter saw or a miter box and backsaw. The point of the miter cut should be on the backside of the molding, so you can see the cut end grain of the wood when viewing the molding from the front.
Tip
When cutting crown molding, make the miter cut just as you would with a regular miter for an inside corner: If you're using a standard miter saw (not a compound saw) or a miter box, position the molding on the saw so it is upside down and backwards from the way it will be installed. Set the molding at an angle, with its bottom edge against the vertical FENCE of the saw and its top edge against the horizontal TABLE of the saw, then make the cut with the blade rotated to 45 degrees.
 BanksPhotos/iStock/GettyImages
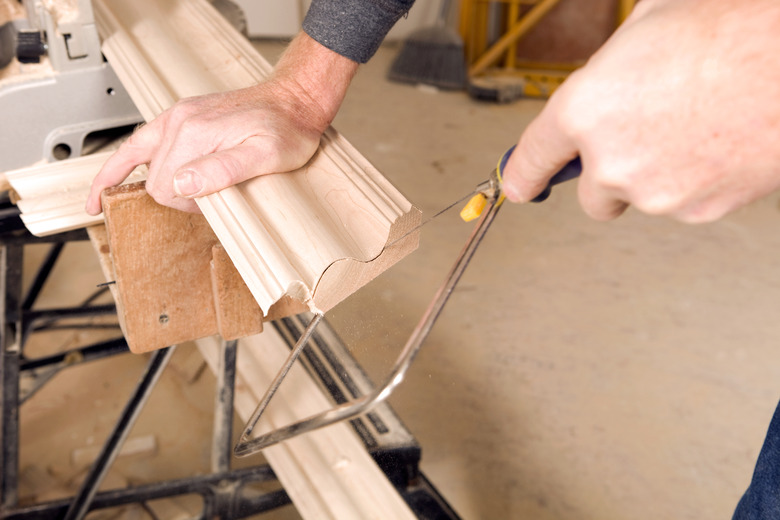
3. Cope the Mitered End
Hold the molding piece face-up on a flat work surface so it overhangs the edge of the surface. Use a coping saw to cut along the edge of the molding, following the line along the ridge of the miter cut—where the end grain meets the face of the molding. Hold the saw at a 30- to 45-degree angle to the molding face so you're back-cutting the end, leaving a crisp edge that follows the molding's contours.
4. Fit and Install the Coped Piece
Position the coped piece of molding against the wall, butting the coped edge against the face of the installed molding. Check the fit of the joint. If there's any gapping, you can fine-tune the coped edge with a file or sandpaper. Stroke with the file from front to back, maintaining the same angle as the coping-saw cut to keep a crisp edge; don't file the coped edge flat. (You can use a round file for tightly rounded contours.) Install the coped piece as with the first.
Tip
For a finished look when attaching moldings with hammered finish nails, "set" the nails by driving them slightly below the wood surface, using a hammer and nail set.