How To Create A Wood Pallet Accent Wall
We may receive a commission on purchases made from links.
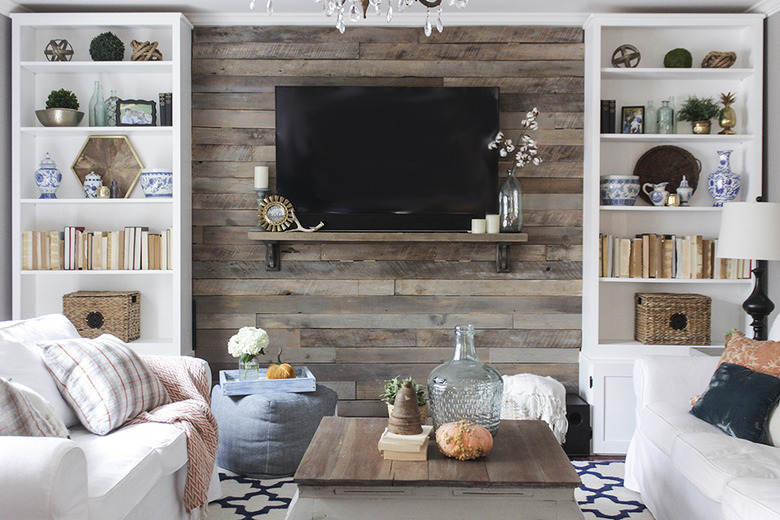
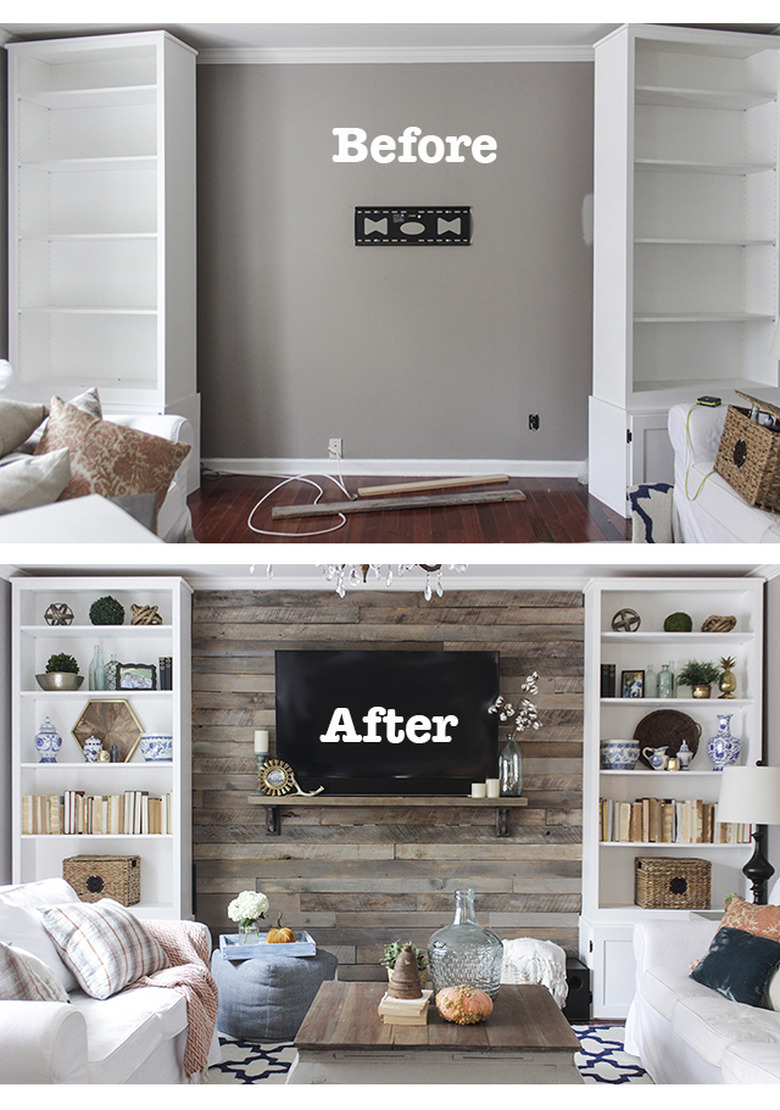
Wood accent walls add an impressive amount of warmth and texture to a room, which is why they're so popular among homeowners. They instantly give any space a cozy, rustic cabin vibe. Because pallets can be found or obtained for little-to-no cost, they're an inexpensive option to completely transform the look and feel of a room. Bonus — a DIY pallet wall will only take an afternoon to complete, even for beginners.
Things Needed
-
Wood shipping pallets, 4 or more, depending on wall size
-
Oil-based stain, light gray (optional)
-
Rubber gloves
-
Scrap piece of cloth or rag
-
Measuring tape
-
Tape (optional for TV mount only)
Tip
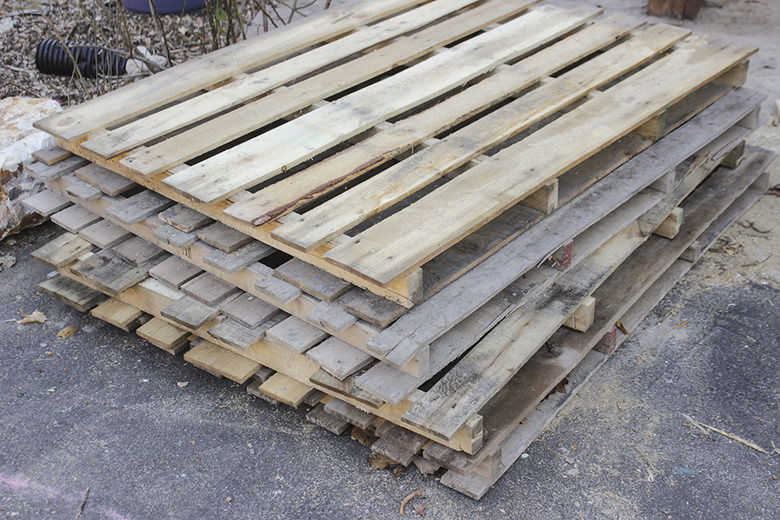
A standard pallet plank is about 50 inches long. There are six to eight usable planks per side on a pallet, so a total of 48 to 64 linear feet of 1-inch-by-4 inch boards (approximately) . Determine how many pallets you need by multiplying the length of the accent wall by the width (to get the total area), and divide that number by the area that one pallet will take up (total linear feet x .3 feet (width of pallet boards).
How to Create a Wood Pallet Accent Wall
How to Create a Wood Pallet Accent Wall
Warning
Pallets that have the "HT" stamp (meaning heat-treated) are safe for indoor use. Pallets with the "MB" stamp on it have been treated with a chemical and are not safe for indoor use. If the pallet has no stamp, verify its origin and make sure it wasn't used to ship chemicals, pesticides or other harmful materials that could harbor bacteria before sanding and using it indoors.
 Shades of Blue Interiors
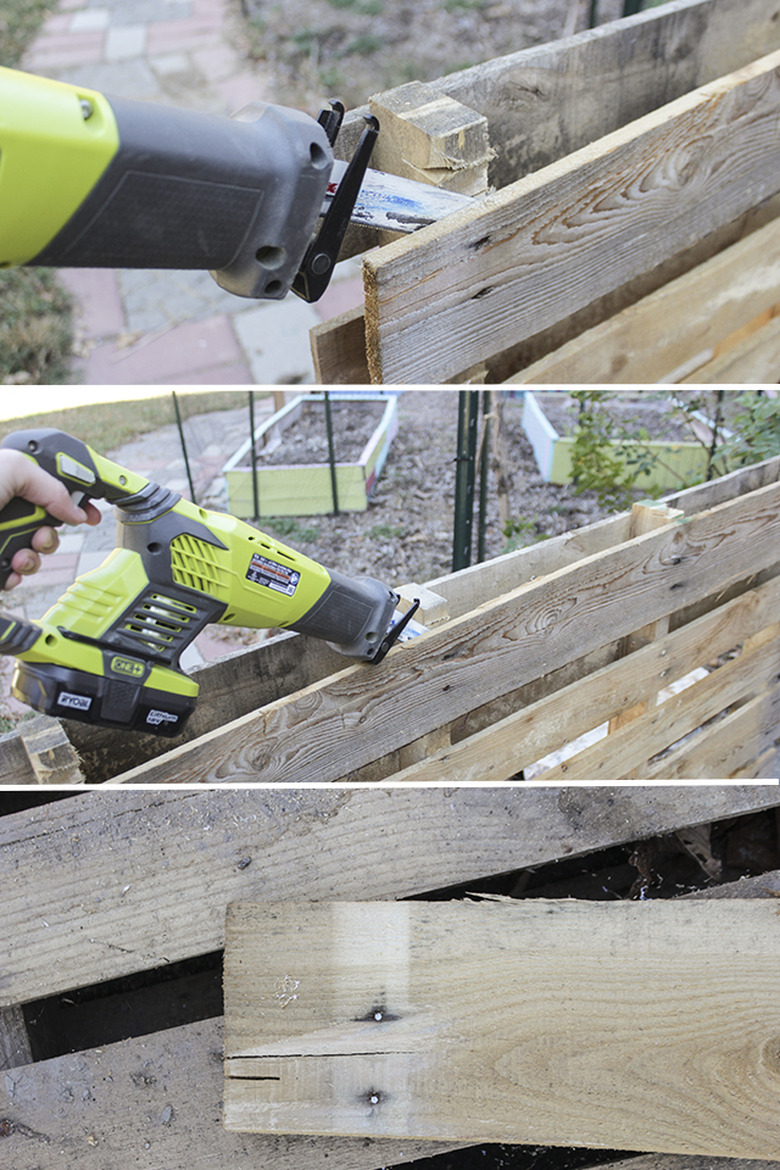
1. Take Apart the Pallets
1. Take Apart the Pallets
Using a reciprocating saw with a metal-cutting saw blade, cut through the nails that hold the pallet in place (four locations along one board). You will need to slide the blade between the pallet frame and the pallet plank where the nails attach, then turn on the saw to cut through. The saw should cut through the nails in about 30 seconds, so if it takes longer, then you are probably cutting at an angle and cutting wood. Readjust and make sure the blade is straight.
 Shades of Blue Interiors
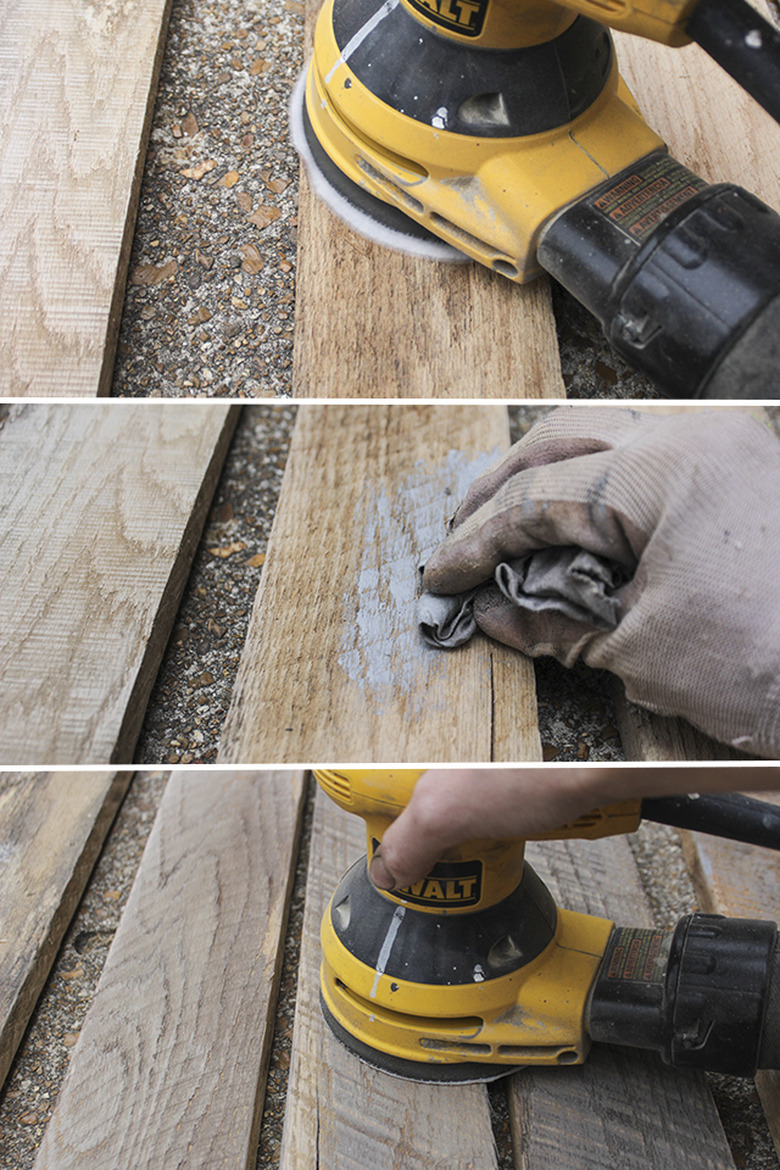
2. Sand and Stain the Pallet Wood
2. Sand and Stain the Pallet Wood
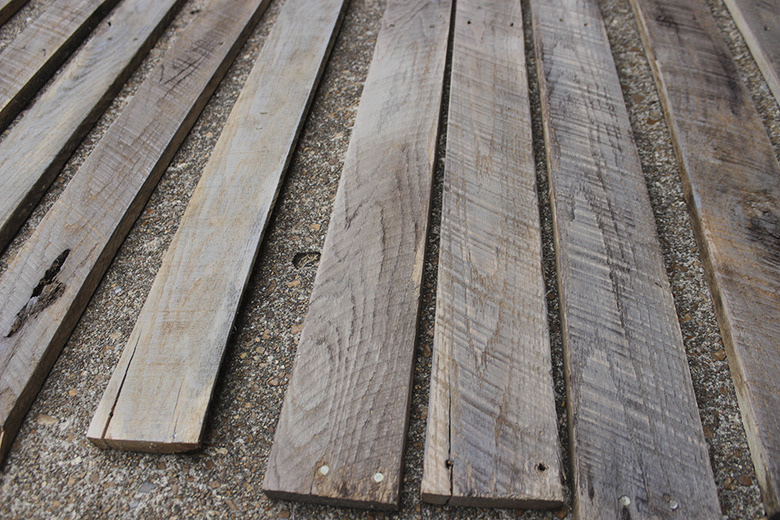
Pallet wood is notoriously rough, so some sanding will likely be needed. Use 150-grit sandpaper with an orbital sander to sand the surface and edges so that splinters are gone and the surface is mostly smooth. Some texture showing grain and saw blades showcase the character of the wood, so lots of sanding isn't needed.
Since sanding the pallet planks can reveal "newer" or light-colored wood, you can lightly apply a weathered gray stain to the boards using a scrap rag and wearing gloves. This gray stain will bring back the appearance of aged wood. Once the stain is dried, lightly and quickly sand the planks again to distress the wood and make it less noticeable where the stain was applied.
 Shades of Blue Interiors
Pallet planks that are ready to attach to the wall should be dry and free of splinters and dust.
 Shades of Blue Interiors
3. Remove Everything from the Wall
3. Remove Everything from the Wall
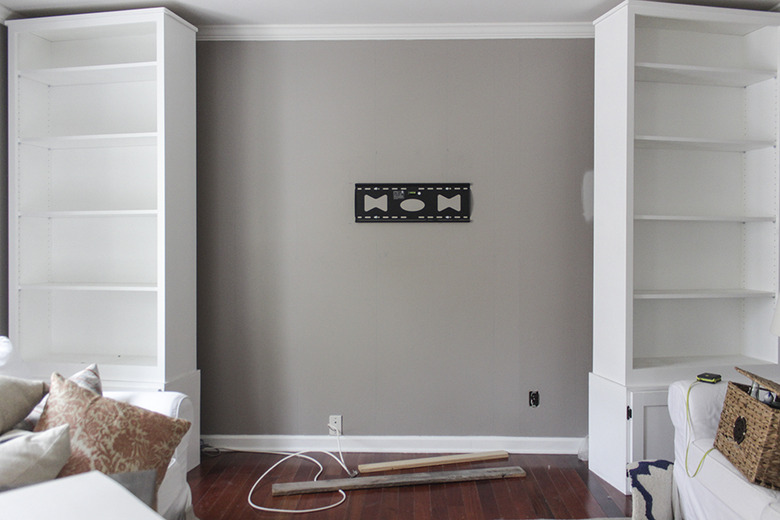
Prep the wall where the pallet planks will be attached by removing everything on it. Pull away any furniture that is against the wall, so there is clearance for attaching the planks. If you plan to mount a TV on the wall, attach the mounting unit to the wall at the desired location.
 Shades of Blue Interiors
4. Find Studs and Attach Boards to the Wall
4. Find Studs and Attach Boards to the Wall
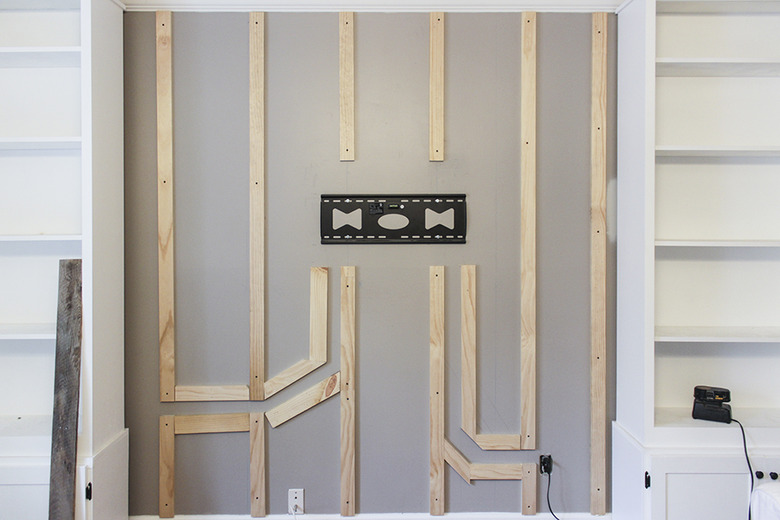
Using a stud finder, mark where the studs are located on the wall. Use a circular saw or miter saw to cut the 1x3 boards to the height of the wall (subtracting the height of the baseboard trim and crown molding). Attach the 1x3 boards, centered over the stud marks, using a cordless drill and 2 1/2-inch interior wood screws. About five screws per board is sufficient.
 Shades of Blue Interiors
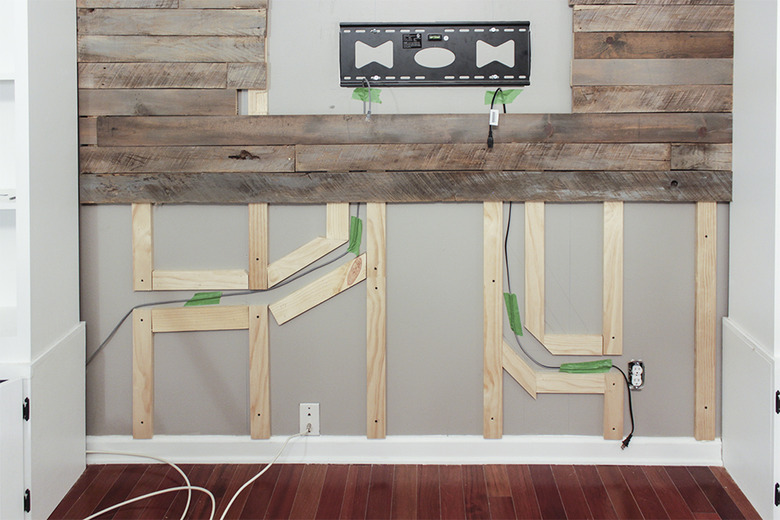
5. Create a Pathway for Wires (Optional for TV mount)
5. Create a Pathway for Wires (Optional for TV mount)
If mounting a TV on the wall, to hide the cords (for internet, power, speakers, etc.), you will need to create a pathway for the wires to follow behind the pallet planks. Cut small angled pieces of 1x3 board to create this pathway, making sure to not create 90-degree angle turns. A 30 to 45-degree angle turn will be easier for wires to follow, without getting caught. Attach these boards with 1 3/4-inch nails and a electric brad nailer into the drywall, nailing at a downward angle.
 Shades of Blue Interiors
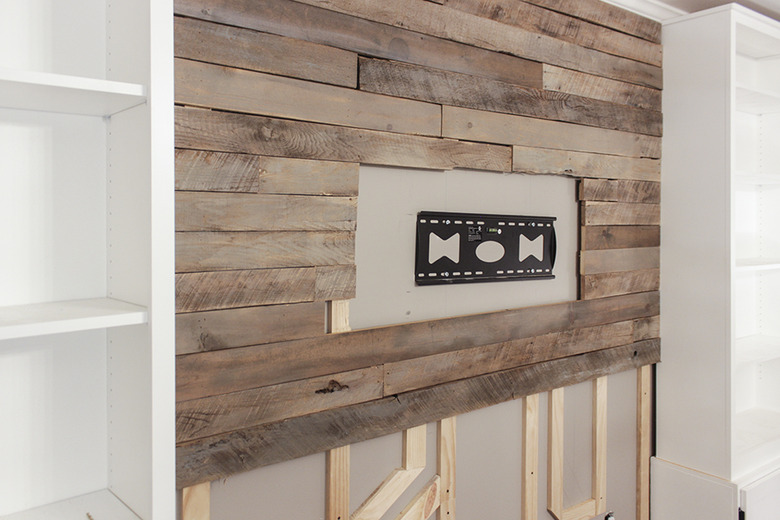
6. Attach the Pallet Boards
6. Attach the Pallet Boards
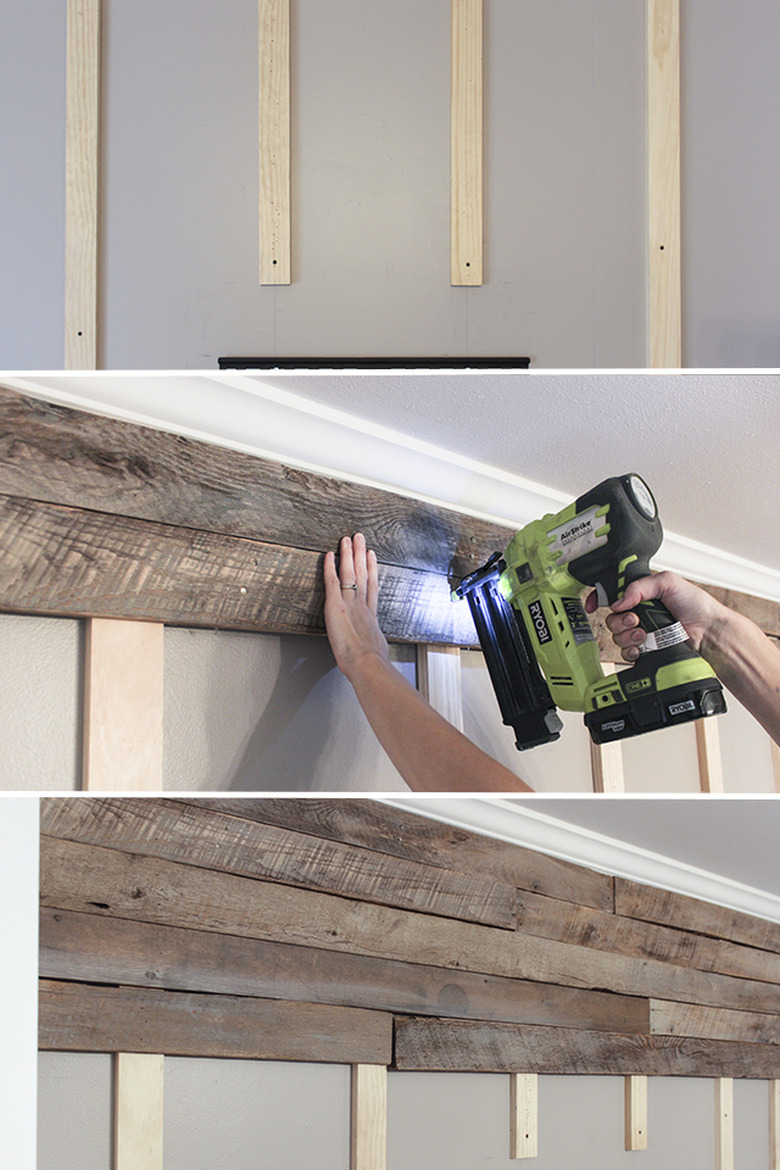
Once all the 1x3s are attached to the studs on the wall, begin to attach the pallet planks to the 1x3 boards by using 1 3/4-inch nails and an electric brad nailer. Make sure to stagger the planks as you attach each row. Try not to have two seams sit directly above each other in adjacent rows.
 Shades of Blue Interiors
If a TV will be mounted on the pallet accent wall, measure around the back of the TV where the mounting hardware sits and mark adequate space on the wall around the mounting unit to ensure the TV has room to be mounted.
Tip
If the TV mount has a tilt option, then you will need to run 1 x 3s behind the mounting unit. So instead of attaching the mounting unit directly to the studs in the drywall, it will attach to the 1 x 3 boards that are attached to the drywall and studs. Doing this increases the space between the TV and pallet planks so the TV can still tilt.
 Shades of Blue Interiors
7. Run Wires Under Planks (Optional for TV mount)
7. Run Wires Under Planks (Optional for TV mount)
If a TV will be mounted on the wall, after the first few pallet planks are attached, run the wires through the pathways you created in step 5. Tape them temporarily in place, removing the tape just before you attach a plank over it.
 Shades of Blue Interiors
Warning
When attaching pallet planks over the wires, be careful to not nail where the wires run. Pay close attention to where the gaps in the 1x3 stud boards are and do not nail in those areas, so as to avoid damaging the wires.
Tip
To ensure that your wiring is up to electrical code, use a power management kit to run your TV cables and cords behind the pallet wall. There are many to choose from online, which are easy to install.
8. Measure and Cut Around the Outlets
8. Measure and Cut Around the Outlets
If a cut-out is needed in a pallet plank to make room for an outlet, measure the distance the outlet starts from the closest wall, the width of the outlet (allowing some clearance), and the height the cut-out needs to be. Be sure to account for the outlet and the coverplate, as the coverplate needs to be mounted flush on the drywall, not on the pallet wood. Mark these measurements on the pallet plank and cut out with a jigsaw before attaching to the wall.
 Shades of Blue Interiors
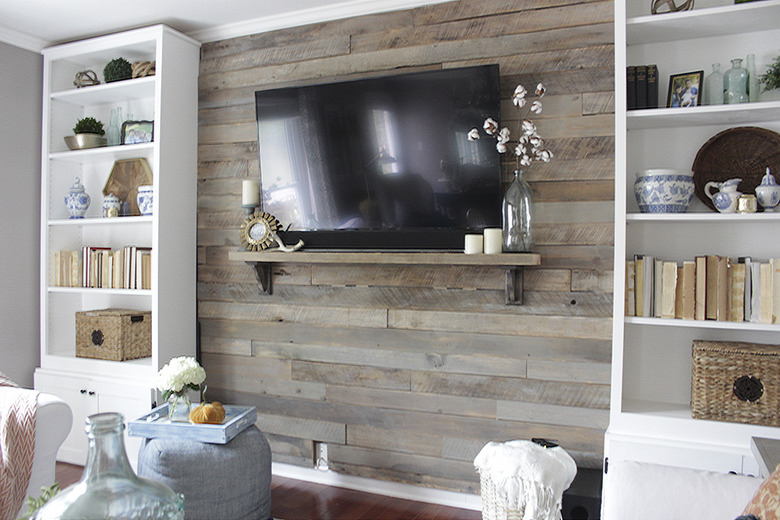
9. Hang TV (Optional)
9. Hang TV (Optional)
If mounting a TV on the wall, connect your wires first, then hang the TV on the mounting unit. A simple shelf can be installed under the TV to hold a speaker and decorative items by screwing wooden brackets into the planks and setting a wooden board on top. Because the wooden planks are attached to studs, the brackets don't need to be attached to the same 1 x 3 studs under the planks.
 Shades of Blue Interiors
Re-hang any artwork, push furniture back into place, and enjoy decorating around your new accent wall.
 Shades of Blue Interiors