How To Use A Jig Saw
The jig saw (or jigsaw) is arguably the most versatile power saw and is undoubtedly the easiest to use. It makes straight, curved and beveled cuts and fits in the hand as comfortably as a hammer handle. A great first power saw for beginners, the jig saw is also the experts' tool of choice for many specialty cuts, especially curved cuts and detailed work that otherwise requires a band saw or even a scroll saw. Making the most of your jig saw starts with a few basic techniques.
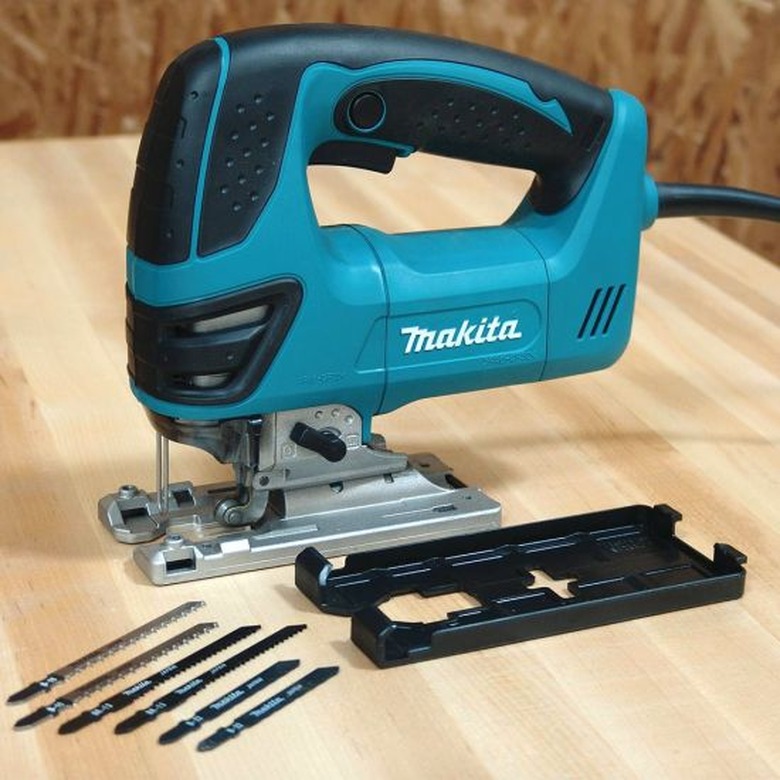 Makita/Rockler
Jig Saw Adjustments
Jig Saw Adjustments
All jig saws offer four basic ways to customize a cut: speed, orbit, bevel and blade type. Get into the habit of checking each of these every time you're setting up for a new cut or material.
- Speed is the rate at which the motor runs and the saw blade moves up and down. Good jig saws usually have a variable-speed trigger so you can adjust the speed during the cut, but the speed setting (typically a dial) establishes the available range of speed for the trigger. In general, you use a higher speed for more aggressive cuts, such as rough cuts in wood. Slower speeds give you more control and are better for finer materials or careful cuts.
- Orbit, or oscillation, is the elliptical travel of the saw blade. It is often adjusted with a lever. Zero orbit means the blade moves straight up and down, like a sewing machine. Maximum orbit means the blade moves in the most circular motion possible, to increase the cutting efficiency of each stroke. Orbit makes the saw cut aggressively and is used mostly for wood. It should be dialed down for cleaner wood cuts and all the way off for metals, plastics and very fine wood cuts.
- Bevel is the angle of the blade in relation to the saw base. Most jig saws can cut straight (no bevel, or 0 degrees) and up to a 45-degree bevel. You set the bevel by adjusting the angle of the saw base.
- Blade type is a critical part of jig saw setup because you must use the right blade for the material and the results you want. There are many types of jig saw blades: coarse and fine wood blades, hacksaw-like metal blades, carbide blades for tile and glass, etc.
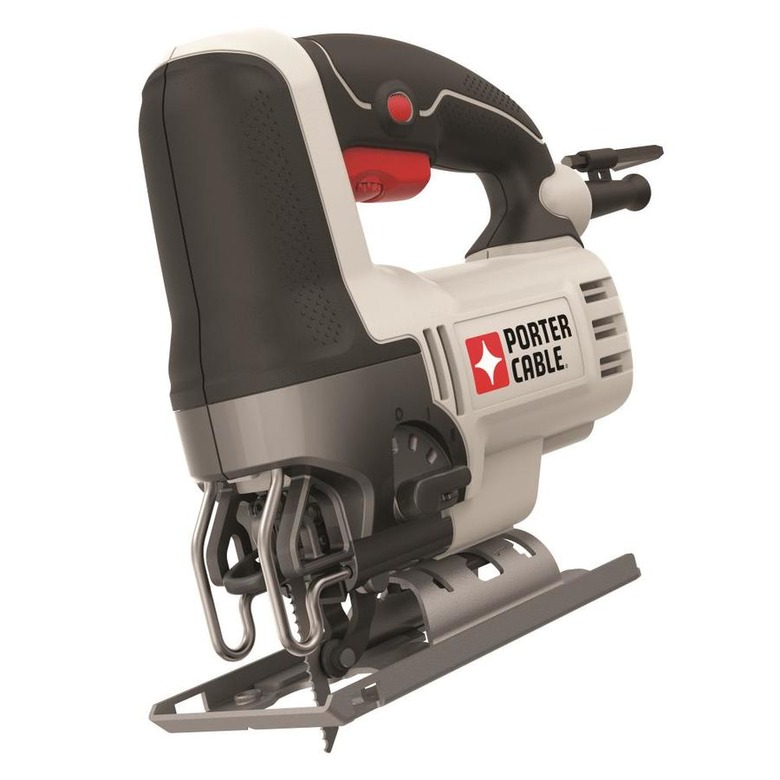 Porter-Cable/Lowe's
The final adjustment you can make is the feed rate, which is simply how quickly you push the saw through the cut. (The term feed rate makes more sense for table saws, where you feed the wood into the saw, but the result is the same.) Pushing the saw faster makes the blade bite more material with each stroke, speeding up the cut but also making it less clean.
Making Straight Cuts With a Jig Saw
Making Straight Cuts With a Jig Saw
There's nothing complicated about making straight cuts with a jig saw; you can simply start the saw and run it along your cut line. But because jig saws are designed for making turns, and they have narrow blades that don't track in the workpiece (like circular saws and table saws do), they can be a little tricky to keep on track. The simple solution is to use a straightedge guide: Clamp a straightedge (such as a level, a straight board, a large square, etc.) over the workpiece, and run the base of the saw along the straightedge to make the cut. As long as you keep the base tight against the straightedge, you can't go wrong.
To set up the straightedge, measure from the edge of the saw base (the one that will ride along the straightedge) to the near side of the saw blade. Position the straightedge that same distance away from your cut line, clamp it down, and make the cut. Alternatively, for a quick straightedge, hold a speed square against the edge of the workpiece, and run the saw base along the leg of the square.
 Capelle.r/Moment/GettyImages
Making Curved Cuts With a Jig Saw
Making Curved Cuts With a Jig Saw
Curved cuts must be freehand—you can't use a straightedge guide—so the best approach is to go slow and steady, and keep a close eye on your cut line. To minimize splintering on the top face of wood workpieces, set the orbit very low (or use no orbit) and keep the feed rate relatively slow. If you still get splintering, slow down the feed rate and/or use a finer-tooth blade.
To cut curves with tight corners, use a narrow blade and move the saw slowly. It's best to make an accurate cut on the first pass (in fresh material), rather than cutting the corner wide then going back and trying to shave it down to the cut line, which usually results in a jagged or chewed-up edge. Some jig saws have a knob that allows you to rotate the blade during the cut. This can make some curved cuts more convenient and can make it easier to cut in tight spaces because you don't have to rotate the saw to turn the blade.
Another trick to cutting tight curves is to make relief cuts. These are straight, parallel cuts made from the outside edge of the piece down to the cut line, spaced about 1/8 to 1/4 inch apart, like fingers on a comb. Make the relief cuts first, then cut the curve. As you shape the curve, the fingers of material made by the relief cuts will fall away, allowing the blade to move freely rather than being trapped in the path of the cut.
Making Interior Cutouts With a Jig Saw
Making Interior Cutouts With a Jig Saw
Interior cutouts are holes cut out of the interior of a workpiece, such as a rectangle made in paneling to accommodate an electrical outlet. The secret to making these is to drill one or more starter holes in the corners of the cutout area. Use a 3/8-inch drill bit (you can use a smaller bit if you have a narrow blade), and drill a hole just inside the cutting line(s). If the cutout is circular, you need only one starter hole. For squared-off corners, it's often best to make a starter hole at each corner. To complete the cutout, insert the jig saw blade into the hole and start cutting.
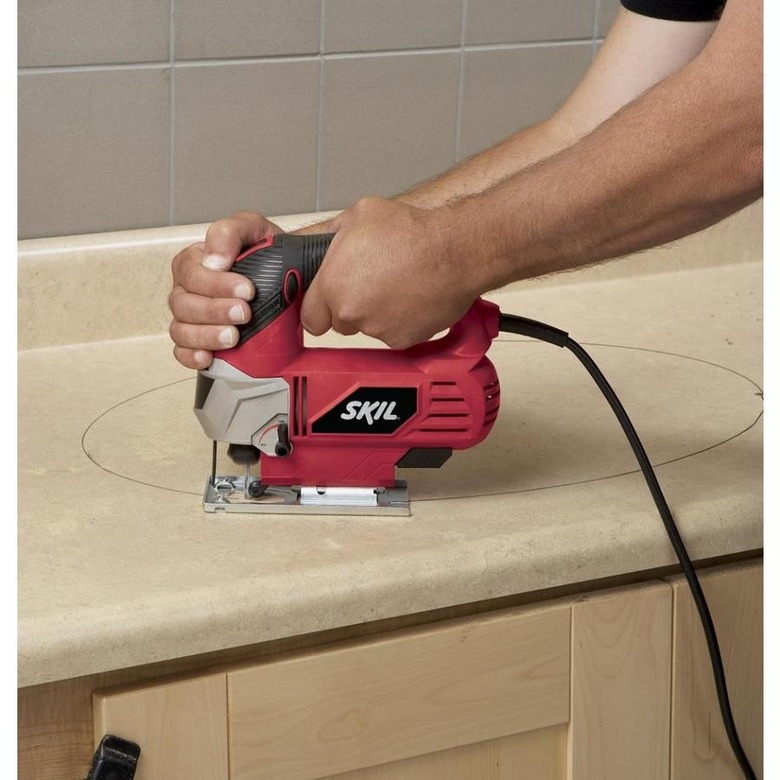 Skil/Lowe's
Jig Saw Tips for Cutting Common Materials
Jig Saw Tips for Cutting Common Materials
A jig saw can cut almost any material you throw at it, but it's important to use the right blade and technique for the job.
- Wood, in general: Cutting wood involves both crosscuts (cutting against the wood grain) and rip cuts (cutting parallel to the grain). Crosscuts are prone to splintering because you're slicing across the wood fibers. As with curved cuts (which almost always involve some crosscutting), reduce splintering by using little or no orbit, slowing down the saw and feed rate and using the finest-tooth blade that is practical.
- Lumber: Make quick, rough cuts in solid lumber with a coarse wood blade, high speed and lots of orbit. For detailed or cleaner cuts, use a slower speed and less orbit.
- Plywood: Plywood has very thin face veneers that splinter easily, especially during crosscuts. Use a fine-tooth blade, minimal or no orbit and a relatively slow speed and feed rate. A narrow blade with 20 teeth per inch (20 TPI) makes very clean cuts in plywood but is pretty slow with thick (3/4-inch) material. All of these tips also apply to MDF and particleboard materials.
- Metal and plastic: Metal blades for jigsaws are like mini hacksaw blades and are made for a variety of metals as well as most plastics. For either material, use zero orbit and low speed to prevent overheating. Excessive heat will ruin the blade (when cutting metal) and will melt plastic.
 Bosch/Home Depot