

Transform An Old Muffin Pan Into Fun Kitchen Decor With This DIY
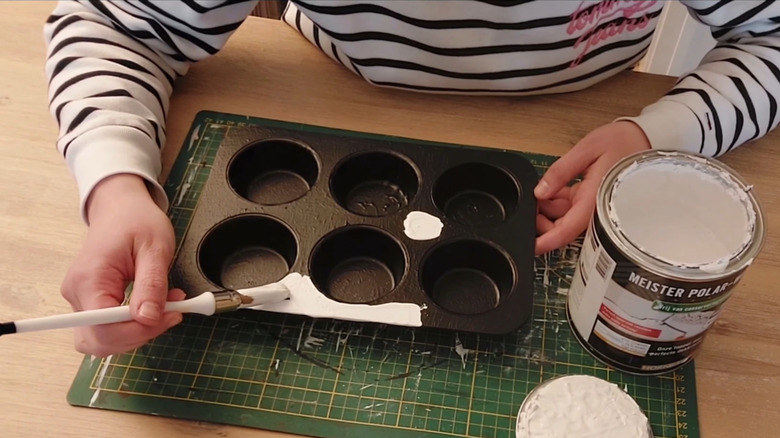
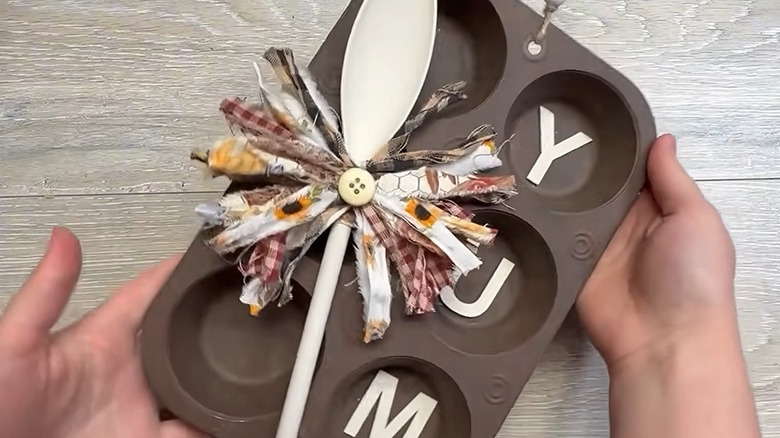
Grab your old muffin pan and preheat your hot glue gun ... not your oven, because we're giving that rusty, crusty baking tin a new purpose. It'll still have a home in the kitchen, but this time, it's purely for decoration. We're finding inspiration in a DIY from Blessings Craft Therapy – the creator paints the tin, spells out "yum" in three cups, and adds a wooden spoon for decoration. It's a fitting kitchen wall decor idea that's bursting with flavor.
Even though muffin pans are made of metal, they're not as easy to recycle as your food cans. You can't usually toss them in your curbside recycling bin, so you'll have to seek out a specialty recycling program. Upcycling one of the old tins is often an easier and more eco-friendly way to deal with it when its baking days are over. Your muffins might keep sticking, but the metal is still strong and durable when used in DIY projects.
Plus, muffin pans make sense as kitchen decor, regardless of your decorating theme. If you don't have a muffin tin to upcycle, check thrift stores — you won't be competing for pans that are still in good baking condition, so you can find some super cheap options. Or, grab a Cooking Concepts Muffin Pan from Dollar Tree for $1.25. Other than that, pick a paint color that fits your color scheme (chalk paint is a good option since it sticks to metal without special primers), little wooden letters, and embellishments like a wooden spoon and ribbon.
Paint and decorate your muffin tin
When you reuse old muffin tins around the house, it's a good idea to scrub them well and scrape off any baked-on food. That way, you get a smooth coat of paint instead of lumps and bumps that show through. Use a scouring pad or baking soda paste to loosen stuck-on gunk. Then, dry the pan completely before you start decorating.
You may need to apply a couple of layers of paint to fully cover the pan. In the inspiration project, the creator uses different shades of brown, adding a rich pop that contrasts with lighter wall colors. However, if you want a neutral background that brightens the design, opt for white or cream. You can also rub darker shades of paint or some Rub 'n Buff along the edges to mimic the look of rust if you prefer a vintage aesthetic.
The original features a six-cup pan with two rows of three cups, so the word "yum" fits perfectly in a row. You can also swap it out for "eat" or another three-letter word. This concept works for larger muffin tins as well, which allows for longer words. Use small wooden letters to spell out the word — paint or stain the letters to contrast with the background color you choose. Then, paint a wooden spoon and add accents like ribbons or faux flowers. Glue the wooden utensil to the front of the pan, making sure not to block the letters. Finally, thread twine through the hole along the pan's edge to serve as a hanger.
Variations for your upcycled muffin tin kitchen decor
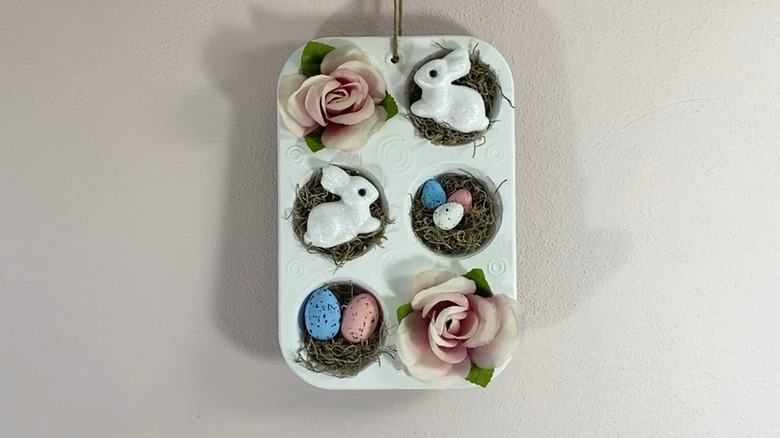
Changing how you decorate the cups on the muffin tin is an easy way to personalize the display. Instead of spelling out a word, fill each cup with little decorations, such as mini dollhouse kitchen accessories or fabric muffins glued in place. Consider your kitchen theme when coming up with ideas. For example, if you're doing a farmhouse kitchen makeover, add rustic touches to the cups.
You might even want to swap out the utensils you use to decorate — try a whisk or a spatula instead of the spoon. Another idea is to make a seasonal muffin pan decoration, like an Easter-themed design with mini decorated eggs or a Christmas display with mini trees and faux snow. You can also do more to decorate the pan itself by gluing a decorative bead border around the edge or framing each cup with twine, lace, or cord to accent the openings.
Changing up the hanger is also an option. Instead of making a small loop at the top, glue twine around the entire edge of the pan and leave slack at the top as a hanger. Alternatively, use wire or a ribbon to create the loop hanger. If you don't want the hanger to show, attach it to the back of the pan to keep it completely hidden. Or, simply lean the pan against the wall on a shelf or countertop for a display option that doesn't require any drilling.