

If You Have Pennies, You Have The Start Of An Easy DIY Wood Stain
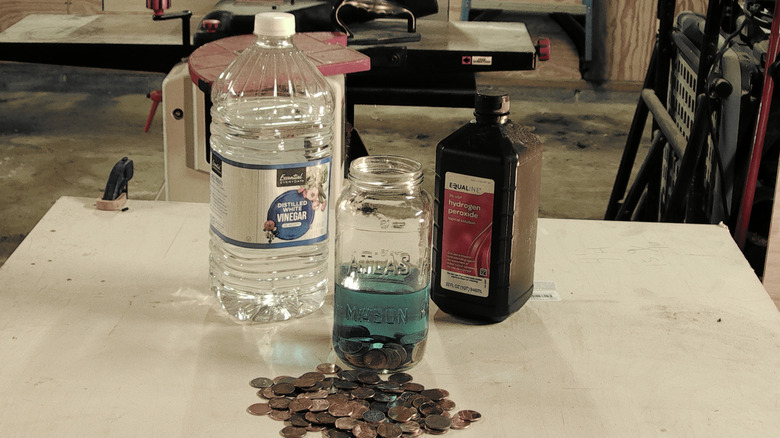
This may come as a surprise to some, but not every tip, trick, or hack that you find on the internet actually works! (I'll give you a moment to get over your shock...) That's why the powers that be here at Hunker have an article format we call We Tried It, where we... try things. When I saw this hack — creating a wood stain with pennies — I jumped on it. As an expert woodworker with over 40 years of experience, the idea really sparked my imagination. But the first question of course was, does it work? Spoiler alert: yes it does!
The formula here is one that I had never heard of: soaking pennies in vinegar, adding some hydrogen peroxide, then giving them some time to react to one another and finally applying it to wood. The practice of soaking nails or steel wool in vinegar to create a mixture to color wood is well known and I've used it countless times. The penny thing was new to me, as was the color of the liquid it produced — a lovely blue color. There is a caveat to this trick: The pennies must be from before 1982 to have sufficient copper content to work properly. Copper piping will allegedly work even better (vinegar on untreated wood will change its color, too).
Do pennies create a true wood stain?
As a professional woodworker, I can get caught up in nomenclature that mere mortals likely don't care about one wit. For example, stain is a term that is used and abused. Some folks call the stuff that colors wood and the finish over the top of it stain (nope, two products there!). The most traditional stain is finely ground pigment suspended in an oil or water-based solution (oil based or waterborne stains). You apply them and let them sit for a while and then wipe off the excess. The stain sits on top of the grain, only penetrating into the wood fibers a very small amount.
That's not what's happening here with the penny, vinegar, and hydrogen peroxide solution. Here the chemicals in the solution are reacting with the tannins in the wood to create the change in color. So, is this a stain? Technically not. But to most people, because it changes the color of the wood, it is a difference without distinction.
How I used this DIY stain
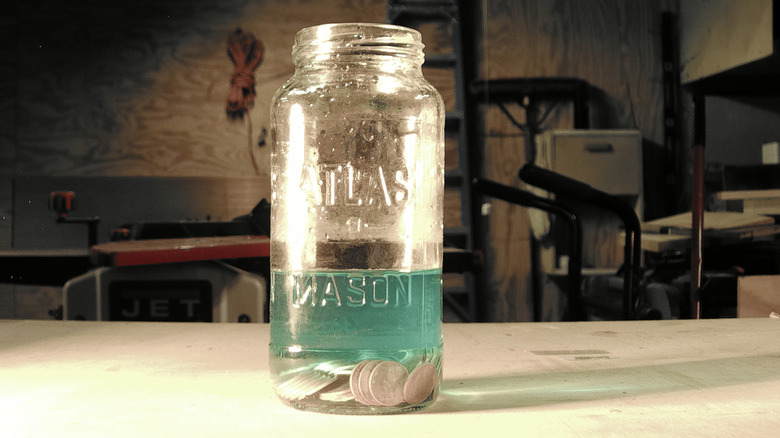
To make the stain, I collected a whole bunch of pre-1982 pennies (a challenge to 70-year-old eyes) and put them in a glass jar. I poured in white vinegar until they were covered with an additional inch of the liquid. It's the acidic content of the vinegar that reacts with the tannins, so white vinegar is the best choice. I soaked them for an hour or so, then added a couple of tablespoons of hydrogen peroxide. This puts oxygen into the solution, oxidizing the copper, and allowing it to combine with the vinegar. I allowed the mixture to sit for three days, to give the chemical reaction time to work fully. Any longer and you'd need to add more hydrogen peroxide, H2O2, as it transitions to H20 (yep, water) when exposed to the air.
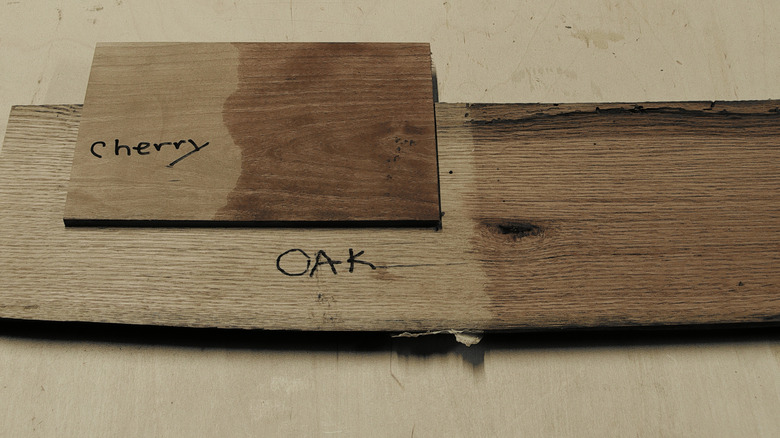
I was now ready to apply the solution. (Proper sanding techniques and surface preparations were done before this step.) I mentioned above that this solution reacts with the tannins in the wood fibers. Commonly used hardwoods that have high amounts of tannin are red and white oak, cherry, and mahogany. This is important because the more tannin in the wood, the stronger the reaction and the more significant the color change. Using one of those species will give you the best result. I tested it on oak, cherry, and maple. Flooding it on, I allowed it to sit for ten minutes or so, and then wiped it off and allowed it to dry. When completely dried, I wiped it down with a water-soaked cloth to remove any vinegar residue that might react with a film finish.
Completing the stain and finishing process
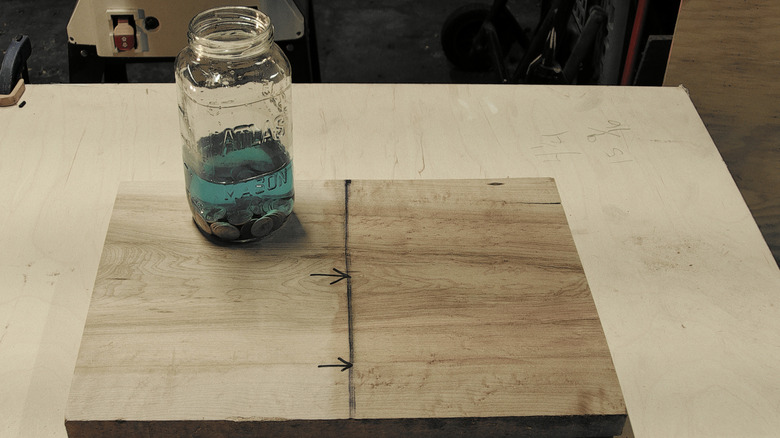
Once the penny, vinegar and hydrogen peroxide solution had dried and been wiped down, I used a fine abrasive synthetic pad to smooth out swollen wood fibers that resulted from the solution and the water. You can apply any topcoat to the wood now, although my preference is to use a sealer coat of shellac right off the bat. Then, any clear film finish you wish will do.
What happens if you have a low tannin lumber like maple? As you can see in the photo above, maple will react to the solution, but much less intensely. If you like the look, it's perfect. (Beauty is subjective.) If not, a more traditional stain may be your best bet. Personally, I love the look this treatment gives both oak and cherry and I will be using it a lot in the future. But the result on maple is not at all pleasing in my opinion. That's why we write these We Tried It articles — to see the results of the tip or trick. For tannin-rich wood, this one was a winner.