

Not Curtains Or Blinds: Use Scrap Fabric To DIY A Cuter Way To Decorate Windows

We may receive a commission on purchases made from links.
When it comes to rooms in the home that might not require total privacy or shade — think kitchens and laundry rooms — decorative window treatments such as café curtains and valances are often a go-to choice since they can preserve views and maximize natural light. What's great about these options is that they're easy to DIY yourself and, because they use much less material than standard curtains or roman shades, they can be budget-friendly as well. Just look at what YouTube creator @taelynkcrosbyart was able to do with scrap fabric. In a video short, she made a cute café awning–style valance that most anyone can replicate because it doesn't involve sewing. (Those who prefer café curtains for a little privacy should check out our DIY café curtain tutorial.)
If you want to give @taelynkcrosbyart's simple no-sew project a shot, you'll need a pair of triangular shelf brackets, a single piece of fabric that's wide enough to both span the window and wrap around the bracket sides, a strong fabric adhesive (such as waterproof and non-yellowing Gorilla Fabric Glue), and fabric trim that's long enough to line the entire awning's bottom edge. If the only brackets you're seeing have a long side and short side, you may want to pick up ones that are reversible (in other words, those with mounting-screw holes on two sides) so that you can wall-mount the side that you feel makes the better awning length and depth for your window.
How to make a cute café awning
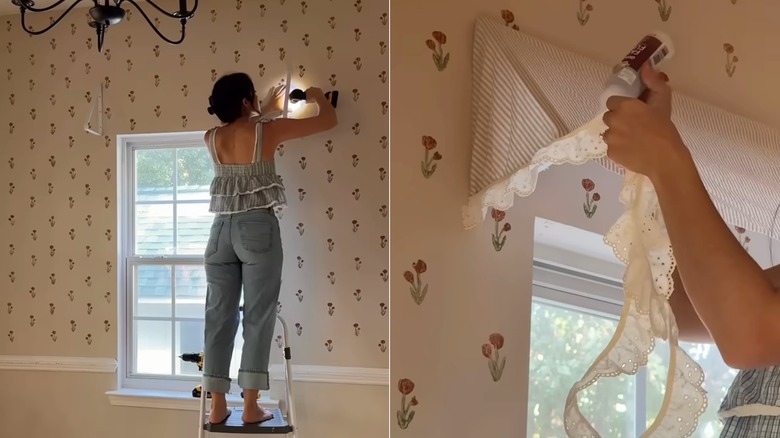
Mount the brackets a few inches to either side of the window. Height-wise, the YouTuber aligned the bottom of the brackets with the top of the window frame. However, a commenter noted that you should lower the brackets so that the finished awning covers the very top of the window, and many design and window-treatment brand blogs seem to be on the same page, with some suggesting covering a few to several inches at the top. So, try installing the brackets at a height you think works and drape the fabric across without gluing it on to see how it looks and feels. If it turns out you don't like the height, simply remove and reposition the brackets. After all, you can easily patch up wall holes if need be.
When you're pleased with bracket placement, pull the fabric taut across the wall and apply beads of glue to the bracket tops to secure the fabric in place. Then, fold the fabric sides over and tuck them in behind the brackets. Next, cut off any excess material with scissors, but leave an inch or so hanging below the bracket bottoms. This is where trim comes in handy: Since a scissor-cut edge can look messy, you'll want to glue the trim just over that bottom edge to cover the cut. Your cute window decoration is now done!
Customizing your awning further
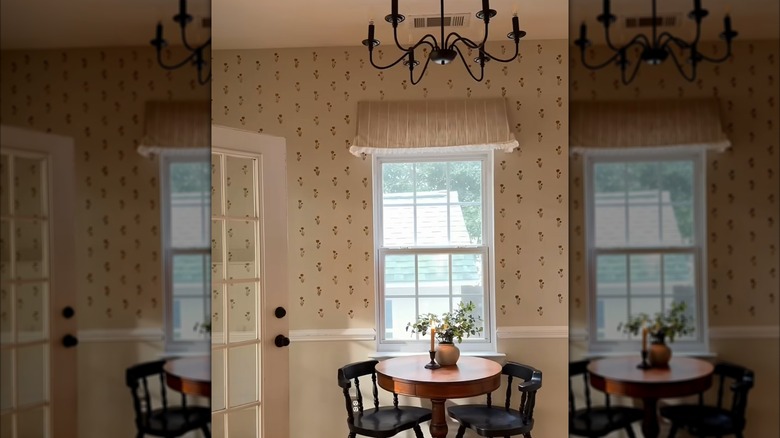
If you're not using materials leftover from another project, consider customizing your awning through new fabric and trim selection. The YouTuber went with a beige vertical stripe and lace trim, for instance, but if your interiors lean more modern or minimalist, you might want to use a solid white, black, or other neutral-color fabric, and a less frilly or completely straight and flat trim on the bottom. A flat trim doesn't have to be boring. It can still have its own embroidered pattern, print, or color striping.
Is your décor style more boho? Try a fabric with a decidedly boho pattern, such as a soft geometric, vintage floral, or intricate ikat, or a textured natural-fiber fabric such as linen. Then, pair it with a jute or pompom-fringe trim. If you're on a tighter budget, perhaps you can reuse home textiles you have on hand, such as a curtain panel, an old bed sheet, or even a rectangular table runner.