

Woman Transforms Old Shower Curtains Into Roman Shades With This Fun DIY
We may receive a commission on purchases made from links.
Choosing a window treatment that meets both your functional and aesthetic needs can be trickier than it sounds. Blinds and shades can provide precise sun and glare control throughout the day, while drapery can offer privacy with a soft decorative touch that can enhance a room's overall design. Roman shades are a classic window treatment that offers the best of both worlds, but they can cost a pretty penny, with some base prices starting at $150 per window, not including installation. But TikToker redeux_style demonstrates that you can easily DIY Roman shades on a budget with basic blinds and a shower curtain.
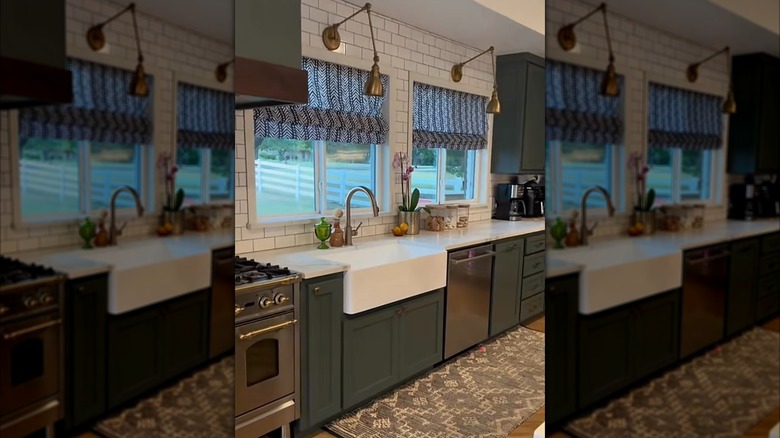
In her video, she wrapped cheap mini blinds in a shower curtain she already had on hand (though she did have to buy a second matching curtain for her second kitchen window). She removed sections of slats and glued the remaining slats to the curtain to form the ribs that, in turn, produce the archetypal pleats or folds of a Roman shade.
To make your own Roman shades, you'll need some blinds. Both corded and cordless varieties can work, and since the curtain will be concealing the blinds completely, it's fine to source budget-friendly ones, such as this unbranded White Cordless Light Filtering Vinyl Mini Blind from Home Depot, available for just under $7. Measure the dimensions of the window to ensure you choose the right size of blinds. You'll also need fabric for the curtain. You can use a shower curtain or another large piece of fabric you have lying around, as long as the fabric measures 2-3 inches longer than your blinds on all sides for seam allowance. While you could sew the edges of the fabric, the creator opted for a no-sew hemming method, so we recommend having hem tape or a strong adhesive on hand.
How to repurpose a shower curtain for roman shades
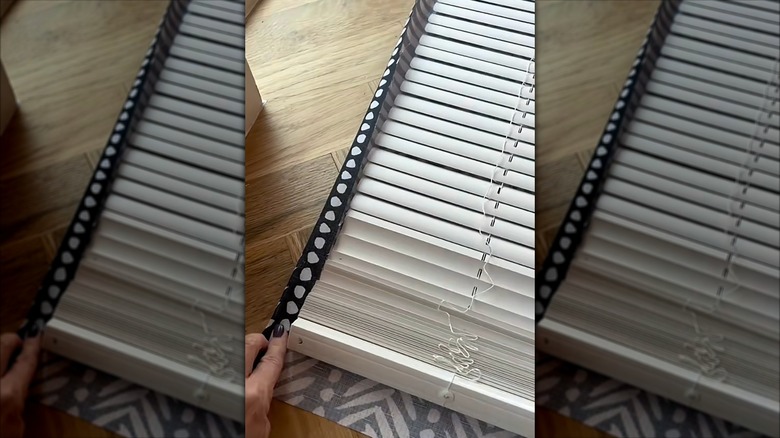
Before you move forward, it's a good idea to install the blind brackets to ensure the blinds are fully functional. Once you're ready to proceed, lay the curtain face-down on a large table or the floor and then lay the blinds on top, also face-down and fully extended. Then cut away excess fabric, still leaving plenty for the seam allowance. Iron the edges to form hems and sew or finish them with fabric glue, hem tape, or strong craft glue. Then, align the head rail with the top of the curtain and glue it down.
@redeux_style Let's Upcycle Shower Curtains into Roman Shades! No Sew! Many requests for Roman zblinds so im resharing this simple Upcycle♻️ #romanblinds #diyblinds #diyromanblinds #miniblinds #upcycle #rework #diy #thriftflip #homedecor #upcycling #upcycle #diy #thriftflip #homedecor #upcycles #rework #upcycling #thriftflip #organize #reuse #recycle #secondhandstyle #transform #oldtonew #upcycleddesign #makers #upcyclersoftiktok #makersoftiktok #upcycling #sustainableliving #sustainsblestyle
Remove 10 to 15 slats in intervals, leaving a single slat between each removed section; be careful not to cut or damage the cords since you'll need them to function. Depending on the material of the blinds, you can break them by hand or cut the slats and slide them out. Once done, pull the curtain taut before gluing the slats you left in, as well as the bottom rail, to the fabric. After everything has dried, hang the headrail on the brackets you already installed.
Shortcuts and customization for your DIY shades
There are a few options that can make this Roman shade DIY even easier. If you're using an old curtain, for instance, you only have to worry about cutting off and creating hems on a couple of the sides instead of all four.
Don't want to go through the trouble of buying blinds only to remove most of the slats? Consider using flat wood dowels, evenly spaced out, to create the fold sections. Attaching magnets to the dowels allows for cord-free lifting and will ensure the pleats hold in place. Just be aware that this method works best on windows that aren't too tall since you'll need to use your arms to adjust the shade rather than rely on a pull cord or tension system.
Another benefit of this DIY is that you don't have to choose from preselected fabrics. While redeux_style chose a black-and-white graphic herringbone-patterned curtain for this project, pick whatever works for your home's aesthetic. For instance, if you like transitional and farmhouse styles, try a vertical pinstripe or trellis-style pattern in earthy colors. If French country or traditional is more your thing, consider a pastoral toile or damask. Art Deco lovers could look for geometric patterns with repeating arches or bold graphic borders. And, of course, there's nothing wrong with a solid color when you're unsure about pattern or want to keep it from looking too busy.