

Turn Pool Noodles Into A Stunning Side Table With This Impressive DIY
We may receive a commission on purchases made from links.
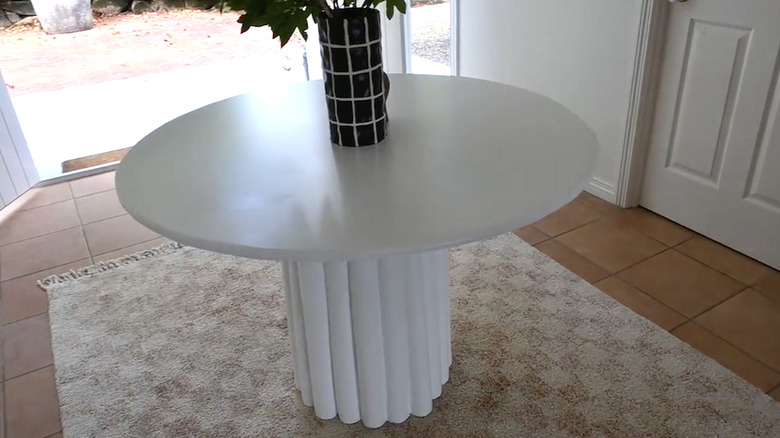
Pool noodles have found their way out of the swimming pool and into all kinds of home projects, from decorative headboards to playful seasonal displays. The secret behind many genius pool noodle hacks that are game changers is their curved shape, which adds a luxurious texture that mimics an expensive piece. This project takes that transformation a little further, turning the floating device into something that looks like it's made out of solid wood.
Buying a side table can feel like a lot of money for a relatively small piece of furniture. If you want to swap traditional side tables for a chic DIY, this project could give you the look for less. Paired with a sturdy cardboard tube and a lightweight top, pool noodles can become a gorgeous fluted side table. The repeating curves give the base that wooden sculptural look and can be painted any color you'd like to fit the vibe of your room. Cream or beige could complement a contemporary space, while a bold shade would be perfect among eclectic furnishings. Just note that this version is best treated as a lightweight decorative accent and should not be doing any heavy lifting.
For this DIY, you'll need a heavy-duty Quik-Tube at least 12" wide, around 15 pool noodles, a hot-glue gun, measuring tape, and a cutting tool. You'll also need spray or acrylic paint, a lightweight wooden round or decorative tray to use as the top, along with an adhesive that can secure it to the base. Plan to keep the finished piece indoors, away from moisture.
How to build and customize your pool-noodle side table
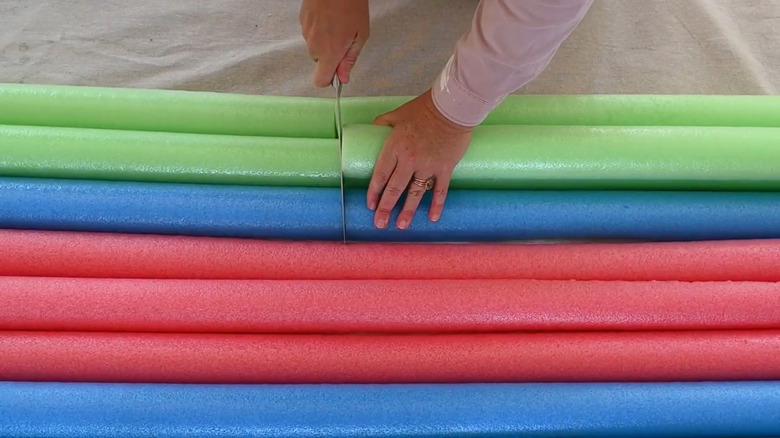
The best space-saving side tables fit the spot without crowding it, so measure beside your sofa or chair before choosing your tube and tabletop. Shorten the cardboard tube as needed and make sure both ends are even so the table isn't wobbly. Cut the noodles into matching lengths to cover the tube. For a shallower, fluted effect, split them lengthwise and place the flat sides against the cardboard (this also gets you two strips from each noodle, saving you even more cash). First things first, map out the pieces around the tube before gluing so you can adjust the spacing and avoid an awkward gap at the end.
Working one strip at a time, apply glue with a low-temperature glue gun and press each piece vertically against the tube. Once everything is attached, test your paint on a scrap piece before coating the whole base. Spray paint works well for an even finish, but if you want to play with adding a woodgrain effect, you can also hand-paint with acrylic paint. Once painted, seal it with a clear coat so the paint doesn't chip.
Now you can have fun choosing a tabletop for the piece. A lightweight wooden circle gives it a simple finish, but you could also splurge for a round decorative tray with a raised edge from somewhere like Marshalls or HomeGoods. Whatever top you choose, center it and secure it directly to the cardboard tube's supporting rim with a compatible adhesive like E6000 or liquid cement, allowing the full curing time before use. Lastly, keep the tabletop's overhang modest, check for any wobbles, and your creation is ready for lightweight use indoors.