

She Turns 4 Dollar Tree Items Into Stunning Bedroom Lights

We may receive a commission on purchases made from links.
Skip the high-end lighting store, and head to Dollar Tree instead. There, you'll find four simple items that combine to create a surprisingly stunning light that's perfect for illuminating your bedroom. It's the brainchild of The Whites Creations TikTok page, and the creator grabs everything from Dollar Tree. She uses a wood plank as the base, an LED puck light as the illumination source, and curved napkin holders with a flexible chopping mat to form a shade for the sconce-style light.
The price point is the real benefit of this light idea — each light costs around $10 to make. Hiring a professional to install a traditional wall sconce costs $250 per light on average, and sometimes much more. For this project, you'll need two Cooking Concepts Wire Napkin Holders for each light and a pack of Cooking Concepts Chopping Mats. While the original creator purchased a Crafter's Square Wood Plank, you can also use scrap wood cut to size for the project. E-Circuit Wireless LED Lights work well for this DIY because they come with a remote — a two-pack costs $5.
Still skeptical? These supplies might not seem like they could produce a chic light, but they do. The shape of the napkin holders creates a curved sconce, and the wires hold the very flexible and semi-opaque chopping mats into the curved shape. The mats come in a two-pack, so you can make two lights, or save one of the mats for another project, like transforming Dollar Tree kitchen finds into cute decor. And since the LED lights have a remote, you can turn them off and on without leaving your bed.
Assemble a simple wall sconce with Dollar Tree items
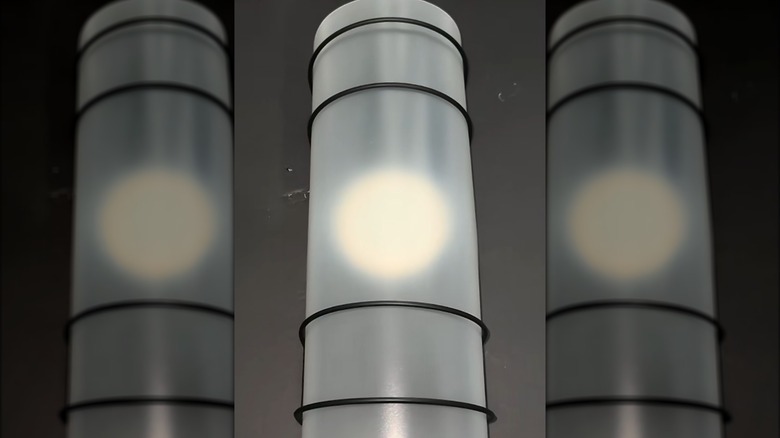
The chopping mats from Dollar Tree are 14 inches long, so you'll want the board to be slightly shorter so it doesn't show — 12 inches should work well. The original creator cuts off a small strip from the side of the mat, so it fits snugly under the curve of the napkin holders — check for the fit and cut a small amount off until it fits properly. Next, decide what color you want the napkin holder supports to be. The original creator chooses black, which gives it a simple, elegant look. If you want the holders to be less noticeable, go with a light neutral color. She paints the wooden support piece the same color to help it all blend together.
@thewhitescreations Dollar Tree 🌳 DIY " Bedroom lights " #dollartree #diy #fyp #homedecor #paratii
You can use double-sided tape to hold the light, or attach a hanger to the top of the board before you assemble the piece. Then, flip it over and stick the puck light to the center of the board; it's self-adhesive, but you can use hot glue, too, for extra hold. Slide the flat part of the napkin holders under the board, and hot glue them, one near each end of the board.
Then, curve the chopping mat gently and slide the end through the first napkin holder. Continue pushing it through until it's securely tucked under both curved wire supports. It should expand outward and stay secure against the wires, but you can use a few drops of hot glue for extra security. Hang the sconce on the wall in your bedroom for a warm glow at night. And since there are several reasons you might need wall sconces for the living room and other spaces, you can make more for other rooms.
Change up the design of the Dollar Tree DIY light
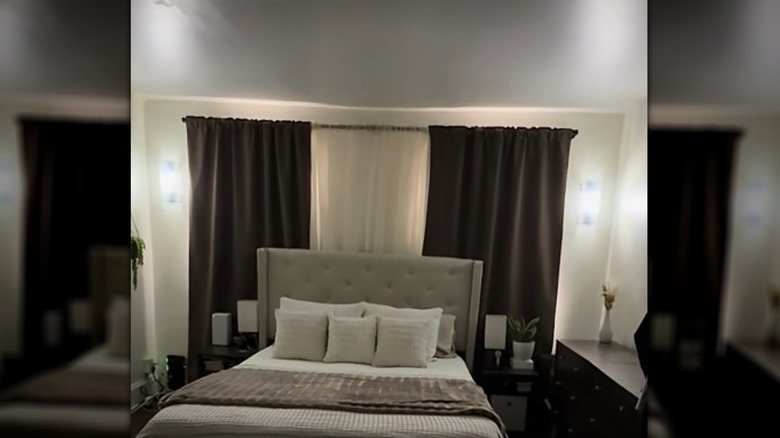
When you want bedroom lighting ideas that won't disappoint, you also need to think about how functional the fixture is. The puck light in the original design creates a focused, round light source in the center. If you prefer more diffused light, choose a fixture like this Gritin Under-Cabinet Lighting. It's a long bar-style light, so you'll illuminate the curved cover evenly from top to bottom. You could also glue strands of remote-controlled fairy lights underneath the shade — keep in mind that fairy lights aren't usually super bright, though.
With the original design, you get a sleek, modern-style fixture. However, you can adjust the style with different embellishments. To add a rustic touch, wrap the curved bars of the napkin holders with twine, and glue twine or rope around the edges of the chopping mat. For a glam effect, spray paint the napkin holders a metallic shade. Attach gemstones or adhesive rhinestone ribbon around the edges of the chopping mat shades. You can also create designs on the inside of the mat using hot glue or white string — when the light shines through the cover, those designs will appear.
You can also adapt the look by using a longer board that shows above and below the shade. Paint or stain the board to coordinate with other finishes in the room. Leaving the board visible creates a contrast in color and textures that makes the light visually interesting. You can also use a board that's longer and wider with the shade being surrounded on all sides with the wood.